background image

14” COLOUR TELEVISION WITH DVD PLAYER 

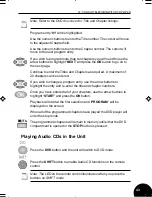
Fast Search Forward/Backward 

To fast search the contents of a disc, press either the 

SEARCH 

FORWARD

 button to search forwards through the disc or press the 

SEARCH BACKWARD

 button, to search backwards through the disc. 

Repeatedly pressing the search buttons will toggle through the six 
search speeds available.  The available speeds are: 

X2, X4, X8, X16. Either the 

symbol or the 

symbol will be 

displayed in the top right hand corner of the screen before the speed, to 
show in  which direction the disc is being searched. 

Skipping to the Next/Previous Chapter/Track 

To skip to the next chapter or track, press the 

SKIP FORWARD

 button. 

To skip to the previous chapter or track, press the 

SKIP BACKWARD 

button. 

Display 

Press the 

DISPLAY

 button repeatedly to show single elapsed, single 

remain, total elapsed and total remain. 

Repeat Function 

The repeat function for audio discs operates similarly to DVD discs (see 
page 37) except that it either repeats the track or the whole disc. 

Programme Function 

The programme function for audio discs operates similarly to DVD discs 
(see page 40) except that the track numbers are entered. 

45 

Summary of Contents for gtv14t4dvd

Page 1: ......

Page 2: ...d the Safety Instructions on page 4 before you operate this product Keep this information in a safe place for future reference CAUTION THIS PRODUCT UTILISES A CLASS 1 LASER USE OF CONTROLS ADJUSTMENTS OR PROCEDURES NOT LISTED IN THIS USER GUIDE MAY RESULT IN HAZARDOUS RADIATION EXPOSURE This product incorporates copyright protection technology that is protected by method claims of certain U S pate...

Page 3: ...patible Discs 14 Connecting External Equipment 15 Using the Unit in TV Mode 21 TV Setup 26 Teletext 33 Game 35 Using the Unit in DVD Mode 36 Inserting a Disc 36 DVD Special Functions 39 Playing Audio CDs in the Unit 43 Playing Kodak Picture CDs and JPEG picture CDs 46 DVD Setup 48 AnalogAudio Setup 52 Dolby Digital Setup 53 Video Setup 54 Preference Page 57 Help andAdvice 62 Care and Maintenance 6...

Page 4: ...s are not placed on top of the unit Cleaning Ensure that the mains plug is disconnected from the mains supply before the appliance is cleaned Do not use any liquids or aerosol cleaners as this may damage the unit The unit should be cleaned with a soft damp cloth Ventilation Do not cover the ventilation slots on the rear of the unit as this may cause the unit to overheat Never allow children to ins...

Page 5: ...anged because it is not suitable for your socket or it becomes damaged it should be removed and an appropriate plug fitted following the wiring instructions below The waste plug must be disposed of safely as insertion into a mains socket is likely to cause an electrical hazard CAUTION IF A 13 AMP BS1363 PLUG IS USED A 3 AMP FUSE BS1362 MUST BE FITTED BLUE BROWN As the colours of the wires in the m...

Page 6: ...o the remote control Aerial Connection To connect the aerial plug the aerial lead into the aerial socket on the rear of the unit see page 8 You can use an outdoor aerial However if you use an indoor aerial the quality of the reception may be reduced and adjustment of the aerial may be required when changing programmes The Remote Control Installing the Batteries Remove the battery compartment cover...

Page 7: ...up to 30 degrees Do not block the path of the beam from the remote control to the unit Note Sunlight or very bright light will reduce the remote control sensitivity Switching On Mains Power Connect the 3 pin plug into the mains socket and switch on Note When not in use disconnect the 3 pin plug from the mains power supply Press the POWER switch on the front panel The unit will go to standby mode i...

Page 8: ...Screen Saver When in DVD mode this unit is equipped with a screen saver to protect the screen if left in standby mode The DVD logo will be displayed and move randomly on the screen while the screen saver is active If the unit is in DVD mode and switched on see page 34 the screen saver will activate if no buttons are pressed for 5 minutes while in the stop mode When a button is pressed the unit wil...

Page 9: ... Control Sensor Power Button Disc Tray Menu Button DVD Mode Button 9 Quick View Volume Control Button Channel Control Button TV AV Mode Button Play Pause Button Disc Tray Open Close Button Video In RCA Audio In RCA Left Channel Audio In RCA Right Channel ...

Page 10: ...k View cont Audio In Right Channel Audio In Left Channel Video In Aerial Socket Audio Out Right Channel Audio Out Left Channel Video Out SCART Socket 2 DVD Out SCART Socket 1 TV In Out Coaxial Output Optical Output 10 ...

Page 11: ...gram Down p23 Shift LED p34 Shift Button p34 Standby Button p6 Setup Menu Button p30 Multi Digit Button p23 Menu Button p19 Game Button p33 AV mode p13 Picture Patterns p26 Mute Button P23 Return Button p23 Display Button 23 Sound Setup Menu p27 Picture Setup Menu p26 Sound Effects p23 Tune Setup Menu p24 Time Setup Menu p27 Lock Button p24 11 ...

Page 12: ... Shift LED p34 Shift Button p34 Standby Button p6 Hold Button p31 Sub Page Button p32 Reveal Button p32 Cancel Button p31 Double Height Text Button p33 Text on Picture Button p31 Text On Off Button p31 Eastern Western European display Language Button p33 12 ...

Page 13: ...rrow Buttons p35 Open Close Button p35 Skip Backwards Button p36 Play Pause Button P35 Skip Forwards Button p36 Search Backwards Button p36 Search Forward Button P36 Stop Button p35 Picture Patterns p26 Mute Button p23 Go To Button p39 Display Button p34 Subtitle Button p39 Angle Button p38 Sound Effects Button p23 Zoom Button p38 Title Button p37 Clear Button p34 Program Button p40 Repeat Button ...

Page 14: ...with the following logos 12cm Compact Disc Recordable Discs 12cm Compact Disc Re Writeable Discs 8cm 12cm Compact Disc Audio Discs 12cm Photo Compact Discs Regional management information this equipment will only play discs bearing area code 2 12cm JPEG Compact Discs 14 ...

Page 15: ...elect AV1 when using the RCA In on the side of your TV Press the AV button twice to select AV2 when using the RCA in at the back of your TV or SCART socket 1 Press the AV button three times to select RGB when using SCART socket 1 Note SCART socket 1 is RGB capable That is they can accept Red Blue and Green signals as opposed to the composite signal which gives a much higher quality picture To make...

Page 16: ...r Unit to an Audio System Note The following information is a guide only White audio left red audio right RCA output connections on back of the TV to white audio left and red audio right RCA input connectors on audio system 16 ...

Page 17: ...ION WITH DVD PLAYER Connecting your Unit to a Digital Set Top Box Note The following information is a guide only 21 pin SCART connector from Socket 1 TV In Out to 21 pin SCART connector output on Digital set top box 17 ...

Page 18: ...21 pin SCART connector from Socket 1 TV In Out to white audio left red audio right yellow video RCA connectors on video White audio left red audio right yellow video input RCA connectors on your unit to white audio left red 1 2 3 1 2 3 audio right yellow video output RCA connectors on video 18 Note If you want to use the DVD mode and AV input mode of the TV set at the same time please input the au...

Page 19: ...14 COLOURTELEVISION WITH DVD PLAYER Connecting your Unit to another Television Note The following information is a guide only 21 pin SCART connector to 21 pin SCART connector input on Television 19 ...

Page 20: ...ly 20 1 2 3 3 2 1 21 pin SCART connector output to 21 pin SCART connector input on Dolby Digital AC 3 processing amplifier Coaxial digital cable to coaxial digital input connector on Dolby Digital AC 3 processing amplifier Optical digital cable to optical digital audio input connector on Dolby Digital AC 3 processing amplifier Remove the plastic plug from the socket before connecting optical digit...

Page 21: ...ng pages only stay on screen for 5 seconds if no response is received Auto Search Note If the remote control does not respond press the SHIFT button to exit shift mode Press the MENU button five times until the Tune Menu is displayed or press the TUNE button UHF Press the PROGRAM DOWN or PROGRAM UP button to select AUTO SEARCH and press the VOLUME UP button To exit press the MENU button As AUTO SE...

Page 22: ...ct the program 2 Press the VOLUME UP or VOLUME DOWN button to select the second channel to be exchanged Press the PROGRAM DOWN button to select Exchange and VOLUME UP to confirm Continue this procedure until all the channels are in the correct order Manual Tuning Press the MENU button five times until the Tune Menu is displayed or press the TUNE button UHF Press the PROGRAM DOWN or PROGRAM UP butt...

Page 23: ...Press the PROGRAM DOWN button to select STORE press the VOLUME UP button to store the channel Continue the tuning procedure until you have tuned in all the channels required To exit press the MENU button Fine Tuning Although the SEARCH and AUTO SEARCH will automatically try and tune to the best reception in areas of poor reception some fine tuning may be required Press the MENU button five times u...

Page 24: ...on to select the channel to be skipped and press the MENU button until the Tune Menu is displayed or press the TUNE button UHF Press the PROGRAM DOWN button to select SKIP and press the VOLUME UP button to select ON Press the PROGRAM UP button to select STORE and press the VOLUME UP or VOLUME DOWN button to store the selection To exit press the MENU button To restore a channel repeat the above pro...

Page 25: ...ress the VOLUME UP or VOLUME DOWN button A sound level bar will appear on the screen Mute To mute the sound press the MUTE button on the remote control Note MUTE will be displayed in the top left of the screen Press the MUTE button again to restore the sound Display Press the DISPLAY button and the program number and program name will be displayed for a few seconds Note Pressing the DISPLAY button...

Page 26: ...etup Colour Systems Note Once the setup has been stored this is the setup the unit will default to Press the PROGRAM DOWN or PROGRAM UP button to select the channel and press the MENU button five times until the Tune Menu is displayed or press the TUNE button 26 UHF I Press the PROGRAM UP button to select COLOUR and press the VOLUME UP button to toggle through the colour systems Set to AUTO or PAL...

Page 27: ...button to select SOUND and press the VOLUME UP button to select the required sound system Note For UK set the Sound option to I Press the PROGRAM UP button to select STORE and press the VOLUME UP or VOLUME DOWN button to store the selection To exit press the MENU button Band Press the PROGRAM DOWN or PROGRAM UP button to select the channel and press the MENU button five times until the Tune Menu i...

Page 28: ...u a choice of the following picture types USER MILD STANDARD or DYNAMIC For USER settings see next section Picture Menu Press the PP button repeatedly to select the type of picture you require Note As you select each one the picture will change to that type Picture Menu Press the MENU button once until the Picture Menu is displayed or press the PIC button 28 Press the PROGRAM DOWN or PROGRAM UP bu...

Page 29: ...n to make the adjustment Note The surround option provides a pseudo stereo effect through the TV speakers This is not true stereo Time Menu Clock Press the MENU button three times until the Time Menu is displayed or press the TIME button Press the PROGRAM UP button to select the hours Press the VOLUME UP or VOLUME DOWN button to set the hours Press the PROGRAM DOWN button to select the minutes Pre...

Page 30: ...et the minutes On Prog Press the PROGRAM UP or PROGRAM DOWN button to select ON PROG Press the VOLUME UP or VOLUME DOWN button to select the required channel Off Time Press the PROGRAM UP or PROGRAM DOWN button to select the hours Press the VOLUME UP or VOLUME DOWN button to set the hours Press the PROGRAM UP or PROGRAM DOWN button to select the minutes Press the VOLUME UP or VOLUME DOWN buttons t...

Page 31: ...t the unit to automatically change channel at a specified time Remind Time Press the PROGRAM UP or PROGRAM DOWN button to select REMIND TIME Press the VOLUME UP or VOLUME DOWN button to set the hours Press the PROGRAM UP or PROGRAM DOWN button to select the REMIND TIME minutes Press the VOLUME UP or VOLUME DOWN button to set the minutes Remind Prog Press the PROGRAM UP or PROGRAM DOWN button to se...

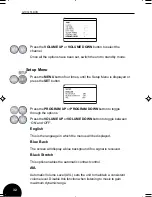
Page 32: ... DOWN button to toggle through the options Press the VOLUME UP or VOLUME DOWN button to toggle between ON and OFF English This is the language in which the menus will be displayed Blue Back The screen will display a blue background if no signal is received Black Stretch This option enables the automatic contract control AVL Automatic Volume Level AVL sets the unit to maintain a consistent volume l...

Page 33: ...umber of the page you wish to view in the index and enter it using the numeric buttons Teletext page numbers comprise three digits and all three must be entered As you enter the number it will appear in the top left corner of the screen The system searches for the page During this process the page number counter at the top of the screen can be seen increasing Television Text Mode To watch the tele...

Page 34: ...eveal Information Some text pages contain concealed information such as the answers to quiz questions To view the concealed information press the REVE button To conceal the information press the REVE button again Fast Text At the bottom of the teletext screen is a row of subject headings coloured red green yellow and blue The remote control has coloured buttons corresponding to the coloured subjec...

Page 35: ...s the SIZE button again to return to the full page E W Press the E W button to switch between the Eastern and Western European display languages Game To play the built in game press the GAME button To exit the game mode press the GAME button again Note The Game function operates in either TV or DVD mode In DVD mode the movie will continue to play while playing the game Press the PROGRAM UP button ...

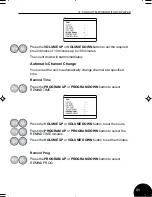
Page 36: ... DVD button and the unit will switch to DVD mode Press the OPEN CLOSE button to open the disc compartment drawer Note OPEN will be displayed in the top left hand corner of the screen Select the desired disc and place it over the disc holder in the centre of the disc compartment ensuring that the label is facing upwards Press the OPEN CLOSE button to close the disc compartment drawer Note LOADING w...

Page 37: ...t available Fast Search Forward Backward To fast search the contents of a disc press either the SEARCH FORWARD button to search forwards through the disc or press the SEARCH BACKWARD button to search backwards through the disc Repeatedly pressing the search buttons will toggle through the six search speeds available The available speeds are X2 X4 X8 X16 Either the symbol or the symbol will be disp...

Page 38: ...which direction the disc is being searched Press the DISPLAY button to show title elapsed title remain chapter elapsed and chapter remain Press the DISPLAY button once to show TITLE ELAPSED Press the DISPLAY button twice to show TITLE REMAIN Press the DISPLAY button three times to show CHAPTER ELAPSED Press the DISPLAY button four times to show CHAPTER REMAIN Press the DISPLAY button five times to...

Page 39: ...The current chapter will be repeated when the end of the chapter is reached To select the next repeat function press the REPEAT button again TITLE is displayed in the top left hand corner of the screen Note The movie will be repeated from the beginning when the end of the movie is reached when TITLE is selected To select the next repeat function press the REPEAT button again ALL is displayed in th...

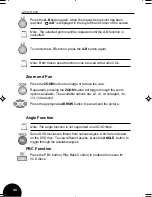
Page 40: ... to enlarge or reduce the view Repeatedly pressing the ZOOM button will toggle through the zoom options available The available options are x2 x3 x4 enlarged 1 2 1 3 1 4 reduced Press the appropriate ARROW button to pan around the picture Angle Function Note The angle function is not supported on all DVD discs Some DVD movies are filmed from various angles which are included on the DVD disc To vie...

Page 41: ...rent audio press the AUDIO button and toggle through the available languages until the desired audio is found Note See the DVD disc cover for supported languages GOTO Function NOTE Some DVD discs do not support the GOTO function The GOTO button is used to search for a specific point on the disc It is possible to go to a point in the disc by selecting the Title number and Chapter number Press the G...

Page 42: ...tons on the remote control The DVD will skip to the beginning of the title selected Press the down arrow button to highlight Chapter Press the OK button to highlight the chapter number Enter the desired chapter number using the numeric buttons on the remote control Press the GOTO button to exit the menu and return to the normal view Note You can also select the Audio and Subtitle options described...

Page 43: ...ed If you wish to change a program entry use the arrow buttons to highlight the entry and re enter the title and chapter numbers Once you have entered all of your chapters use the arrow buttons to highlight START and press the OK button Playback will start at the first selection and PROGRAM will be displayed on the screen When all of the programmed chapters have played the DVD player will enter th...

Page 44: ...1 20 03 46 You can select a track by pressing the appropriate NUMERIC button on the remote control Audio You can listen to a CD in either Stereo Mono left audio channel or Mono right audio channel Press the AUDIO button MONO LEFT will be displayed in the top left hand corner of the screen to listen to the CD in Mono left audio channel Press the AUDIO button again MONO RIGHT will be displayed in th...

Page 45: ...een before the speed to show in which direction the disc is being searched Skipping to the Next Previous Chapter Track To skip to the next chapter or track press the SKIP FORWARD button To skip to the previous chapter or track press the SKIP BACKWARD button Display Press the DISPLAY button repeatedly to show single elapsed single remain total elapsed and total remain Repeat Function The repeat fun...

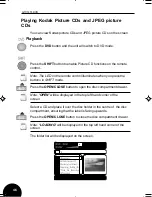
Page 46: ... illuminates when you press the buttons in SHIFT mode Press the OPEN CLOSE button to open the disc compartment drawer Note OPEN will be displayed in the top left hand corner of the screen Select a CD and place it over the disc holder in the centre of the disc compartment ensuring that the label is facing upwards Press the OPEN CLOSE button to close the disc compartment drawer Note LOADING will be ...

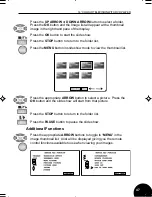
Page 47: ...t Press the MENU button in slideshow mode to view the thumbnail list Press the appropriate ARROW button to select a picture Press the OK button and the slide show will start from that picture Press the STOP button to return to the folder list Press the PAUSE button to pause the slide show Additional Functions 47 Press the appropriate ARROW buttons to toggle to MENU in the image thumbnail list cont...

Page 48: ... displayed on the screen LB TV Display Angle Mark OSD Lang ENG On SPDIF Output Screen Saver RAW General Setup Page Go To General Setup Page Scroll through the pages by pressing the appropriate ARROW buttons Once the desired menu is highlighted press the OK button to confirm the selection To return to the main menu press the LEFT ARROW button To return to the standard display press the SETUP button...

Page 49: ...ions column and the UP ARROW or DOWN ARROW button to toggle between Normal PS Normal LB and Wide Select Normal PS when the DVD player is connected to a normal TV Widescreen images are shown on the screen with the ends of the picture cut automatically Select Normal LB when the DVD player is connected to a normal TV Widescreen images are shown on the screen with a black bar on the top and bottom of ...

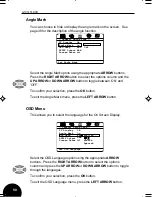
Page 50: ...en ON and OFF To confirm your selection press the OK button To exit the Angle Mark menu press the LEFT ARROW button OSD Menu This allows you to select the language for the On Screen Display LB TV Display Angle Mark OSD Lang ENG On SPDIF Output Screen Saver RAW General Setup Page Set OSD Language English French Spanish 50 Select the OSD Language option using the appropriate ARROW buttons Press the ...

Page 51: ...T ARROW button to select the options column and press the UP ARROW or DOWN ARROW button to toggle through the options To confirm your selection press the OK button To exit the Digital Output menu press the LEFT ARROW button Screen Saver See page 6 for the description of the Screen Saver LB TV Display Angle Mark OSD Lang ENG On On SPDIF Output Screen Saver RAW General Setup Page Screen Saver On Off...

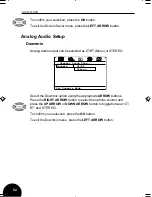
Page 52: ...s LT RT Mono or STEREO Speaker Setup Page Downmix LT RT Stereo Set Downmix Mode Select the Downmix option using the appropriate ARROW buttons Press the RIGHT ARROW button to select the options column and press the UP ARROW or DOWN ARROW button to toggle between LT RT and STEREO To confirm your selection press the OK button To exit the Downmix menu press the LEFT ARROW button 52 ...

Page 53: ...o option using the appropriate ARROW buttons Press the RIGHT ARROW button to select the options column and press the UP ARROW or DOWN ARROW button to toggle between the options To confirm your selection press the OK button To exit the Dual Mono menu press the LEFT ARROW button Dynamic The dynamic range of the sound is reduced so that quiet passages can be heard and loud passages are not too loud 5...

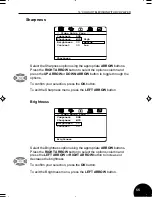
Page 54: ...he Dynamic menu press the LEFT ARROW button Video Setup Component Video Setup Page Component Sharpness Brightness Contrast Off RGB RGB MID 00 00 Components Select the Component option using the appropriate ARROW buttons Press the RIGHT ARROW button to select the options column and press the UP ARROW or DOWN ARROW button to toggle between OFF and RGB To confirm your selection press the OK button To...

Page 55: ...ough the options To confirm your selection press the OK button To exit the Sharpness menu press the LEFT ARROW button Brightness Video Setup Page Component Sharpness Brightness Contrast RGB MID 00 00 Brightness Select the Brightness option using the appropriate ARROW buttons Press the RIGHT ARROW button to select the options column and press the LEFT ARROW or RIGHT ARROW button to increase or decr...

Page 56: ...ect the Contrast option using the appropriate ARROW buttons Press the RIGHT ARROW button to select the options column and press the LEFT ARROW or RIGHT ARROW button to increase or decrease the contrast To confirm your selection press the OK button To exit the Contrast menu press the LEFT ARROW button 56 ...

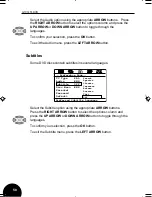
Page 57: ...ARROW button to toggle between PAL MULTI and NTSC To confirm your selection press the OK button To exit the menu press the LEFT ARROW button Note PAL format is used for televisions in the U K Check your television user guide for supported formats If you are unsure of the format select MULTI Audio Some DVD discs contain the soundtrack in several languages 57 TV Type Audio Subtitle Disc Menu Parenta...

Page 58: ...D discs contain subtitles in several languages French Spanish Chinese Japanese Korean Russian Thai Off TV Type Audio Subtitle Disc Menu Parental Password Default Preferred Subtitle Language Preference Page PAL ENG Off ENG Select the Subtitle option using the appropriate ARROW buttons Press the RIGHT ARROW button to select the options column and press the UP ARROW or DOWN ARROW button to toggle thr...

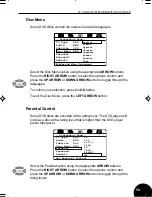
Page 59: ...hrough the languages To confirm your selection press the OK button To exit the Disc Menu press the LEFT ARROW button Parental Control Some DVD discs are encoded with a rating level The DVD player will not play a disc with a rating level that is higher than the DVD player preset rating level TV Type Audio Subtitle Disc Menu Parental Password Default Set Parental Control Preference Page PAL ENG Off ...

Page 60: ...and press OK default password is 3308 To confirm your selection press the OK button Enter your password and press the UP ARROW to select OK and press the OK button to confirm To exit the Parental menu press the LEFT ARROW button 60 ...

Page 61: ...ERIC buttons and then enter the new password by pressing the appropriate NUMERIC buttons Confirm the password by pressing the appropriate NUMERIC buttons Press the OK button to OK your selection To exit the Password menu press the LEFT ARROW button Default This menu resets the functions of the DVD player to the initial factory settings CAUTION DO NOT FORGET YOUR NEW PASSWORD RESETTING THE DVD PLAY...

Page 62: ...s between the aerial and other attached equipment are secure 2 Have you pressed the correct buttons on the remote control Try once more 3 Try a different DVD disc that you are sure works ok No sound 1 Check the volume is set to an audible level Make sure you have not switched the sound off accidentally Press the Mute button on the remote control Disc does not play 1 Check that the disc has been co...

Page 63: ... most particles Wipe in a straight line from the inside to the outside of the disc Small dust particles and light stains should have no effect on reproduction quality Never use chemicals such as record sprays antistatic sprays benzine or thinners to clean the discs These chemicals can irreparably damage the disc s surface Discs should be returned to their cases after use This avoids serious scratc...

Page 64: ...ing provisions The guarantee is only valid within the boundaries of the country of purchase The product must be correctly assembled and operated in accordance with the instructions contained in this booklet The guarantee does not cover accidental damage misuse or consumable items The guarantee will be rendered invalid if the product is resold or has been damaged by inexpert repair The manufacturer...

Page 65: ...u O o i d u A o e r e t S l e n n a h C 2 y l n o D V D l a t i g i D y b l o D s l a n i m r e T t u p t u O A C R t u p t u O o e d i V t f e L t u p t u O e u g o l a n A o e r e t s x i m n w o D A C R t h g i R d n a t u p t u O l a i x a o C o i d u A l a t i g i D y b l o D y l n o D V D d e s o l c s n o i s n e m i D mm 5 8 3 D X m m 432 H X m m 5 9 3 W HZ_V1_GTV14T4DVD PDF SEPTEMBER23 65...

Page 66: ......

Reviews: