background image


 34

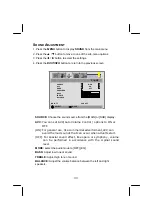
EQUALIZER: 


1. Press the 

S

 / 

T

 button to enter the EQUALIZER menu. 


2. Press the 

X


button to select the EQUALIZER options. 


3.  There are 6 Equalizer modes available: [MANUAL] , [VOICE] , [POP], 

[ROCK] , [JAZZ] , [CLASSIC]. 

 
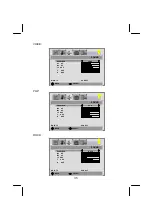
4.  Settings for VOICE , POP, ROCK , JAZZ and CLASSICAL are 

pre-configured. You cannot change these settings. The frequency 
responses are as below:   


MOVE                                  SELECT                  


SOURCE                                MAIN
AVC                                                                            ON 
MODE                                                                        EQ 
EQUALIZER                                                       
BASS                                             
TREBLE 
BALANCE 

SOUND

MAIN:TV                                       

                  SUB:OFF


MOVE                                  SELECT                   


EQUALIZER                                   

                MANUAL

120    HZ                                                                     
500    HZ                                                                 
1.5    KHZ                                                       
5        KHZ                                             
10      KHZ                                                   

SOUND

MAIN:TV                                       

                  SUB:OFF

Summary of Contents for GTVL37W9HD

Page 1: ...Model GTVL37W9HD HD READY...

Page 2: ......

Page 3: ...ved the following items with your TV Power Cord Remote Control Batteries AAA X2 User s Manual USER S MANUAL LCD TV Note All Connection cables shown throughout this manual are not supplied These may be...

Page 4: ...cost of unnecessary service or call out charge Table of contents Important Safeguards Controls and location Remote Control Summary Of Remote Control Buttons General Controls Adjustment Connecting Ext...

Page 5: ...following the wiring instructions below The plug must then be disposed of safely as insertion into a 13Asocket is likely to cause an electrical hazard IMPORTANT The wires in the mains plug should be c...

Page 6: ...ety reasons do not remove any covers or attempt to gain access to the inside of the product Refer any servicing to qualified personal Do not attempt to remove any screws or open the casing of the unit...

Page 7: ...CHANNEL down up change channels VOLUME turn up or turn down the volume WIDE EXIT select the aspect ratio of display TV Video source Panorama Normal Full Zoom1 Zoom2 Auto PC DVI source Full Normal or...

Page 8: ...5 R RE EM MO OT TE E C CO ON NT TR RO OL L...

Page 9: ...Middle Large Audio Video button Toggle audio video source between the primary display and the PIP window POSITION button Move the PIP window position Other Function INFO button Display current channe...

Page 10: ...e sound volume Using Mute At any time users can temporarily turn off the sound by pressing the MUTE button 1 Press the MUTE button and the sound cuts off 2 Press the MUTE again or VOL VOL button to tu...

Page 11: ...LUXEMBURG FRANCE CZECH POLAND HUNGARY AUSTRIA GERMANY SWITZERLAND BELGIUM NETHERLANDS A P S 1 Press the S T button to select A P S option and then press the X button to enter A P S Automatic Programmi...

Page 12: ...m that the user wants the tuned channels to store 2 Press S T button to select the items and then press W X button to select the setting CHANNEL choose channels by pressing W X COLOUR SYSTEM choose AU...

Page 13: ...te or insert programs 1 Select channel by pressing the S T or W X buttons Selecting the program list will display the stored program on the screen 2 A highlighted grey bar appears on the chosen progra...

Page 14: ...t cover ON Function key is locked OFF Function key is active 00 _ _ _ _ _ 01 _ _ _ _ _ 02 _ _ _ _ _ 03 _ _ _ _ _ 04 _ _ _ _ _ 05 _ _ _ _ _ 06 _ _ _ _ _ 07 _ _ _ _ _ 08 _ _ _ _ _ 09 _ _ _ _ _ PROGRAM 1...

Page 15: ...nguage ENGLISH DEUTSCH NEDERLANDS ITALIANO CASTELLANO FRANCAIS DANSK NORSK SVENSKA SUOMI SCART 2 OUTPUT choose the output SCART 1 or TV RECALL reset to factory settings MOVE SELECT MULTI MODE OFF PIP...

Page 16: ...the volume control on your display This connector should be used with an external audio amplifier that can be used to control the volume DVI HDMI D SUB AUDIO IN Interface I AC POWER SOCKET SCART IN VI...

Page 17: ...nterface I HDMI D SUB AUDIO IN VIDEO L R HDMI HDMI to HDMI Cable PC Y Pb Pr L R DVI Connect a VCR Set Top box or DVD player recorder using a standard Scart to Scart connection cable not supplied to SC...

Page 18: ...I connect a Video device via HDMI HDMI This can be applied only if there is the HDMI Output connector on the external device Note No sound connector is needed for a HDMI to HDMI connection VIDEO L R...

Page 19: ...nector on the external device 1 Connect a DVI cable between the DVI connector on the TV and the DVI connector on the DVD player Set top box 2 Connect an audio cable between the PC AUDIO IN jack on the...

Page 20: ...I DVI 1 Connect a DVI cable between the DVI connector on the TV and the DVI connector on PC 2 Connect an audio cable between the PC AUDIO IN jack on the TV and AUDIO OUT jack on PC TV Set HDMI D SUB D...

Page 21: ...A D SUB 1 Connect a VGA cable between the D SUB connector on the TV and the D SUB connector on PC 2 Connect an audio cable between the PC AUDIO IN jack on the TV and AUDIO OUT jack on PC TV Set HDMI D...

Page 22: ...L2 R2 SV AV Y Pb Pr AV L R S P DIF TV AERIAL This TV will accept different Video Inputs if video This TV accept different Video Input if video device has a connector with better quality please connec...

Page 23: ...an input source as described below TV button PC HD button VIDEO button SCART button This are the source buttons switch to TV mode switch to PC HDMI and DVI mode Analog or Digital switch to AV SV YPbP...

Page 24: ...ker and brighter picture brightness BACKLIGHT Adjust the back light level of screen H POSITION Adjust picture horizontal position Note Not available in HDMI DVI source V POSITION Adjust picture vertic...

Page 25: ...ARM COOL MANUAL 3 Press S T buttons to move USER R G B and then press the X button to enter the desired setting USER R adjust colour of red rate USER G adjust colour of green rate USER B adjust colour...

Page 26: ...cture position automatically Screen will disappear until it has completed adjustment MOVE SELECT COLOUR TEMP MANUAL USER R USER G USER B PC MAIN PC SUB OFF MOVE SELECT CONTRAST BRIGHTNESS BACKLIGHT H...

Page 27: ...erent systems broadcast function will show differently sends the primary broadcast language to the loudspeakers sends the secondary broadcast language to the loudspeakers sends mono sound sends stereo...

Page 28: ...s screen MULTI MODE 1 Press the T button to select MULTI MODE option 2 Press the W X button to select the OFF PIP POP mode SELECT MOVE MULTI MODE OFF PIP FUNCTION LANGUAGE ENGLISH SCART2 OUTPUT TV REC...

Page 29: ...26 OFF Only show the primary source No PIP POP PIP Show PIP in a window POP Show PIP side by side with the main source 3 Press the EXIT INFO button to return to the previous screen...

Page 30: ...ub menu 3 Press the S T button to move to one of the sub menu items 4 Press the W X button to select the settings MOVE SELECT MULTI MODE PIP PIP FUNCTION LANGUAGE ENGLISH SCART2 OUTPUT TV RECALL FUNCT...

Page 31: ...indow move from corner to corner on the TV screen SWAP To exchange the display of main source and sub source Sub Main PC HDMI DVI CV SV AV TV SCART 1 SCART 2 SCART 2S PC X X X X O O O O O O HDMI X X X...

Page 32: ...e of the menu options and then press the S T button to access the sub menu 3 Press the W X button to make adjustments 4 Press EXIT INFO button to exit from the menu Note The menu varies according to w...

Page 33: ...on to select the desired item 3 Press the W X button to adjust ranges from minimum to maximum 4 Press the EXIT INFO button to return to the previous screen PICTURE MODES MANUAL select this mode if you...

Page 34: ...and sharper image COLOUR MODE 1 Press the S T buttons to select COLOUR MODE option and then press the X button to enter the COLOUR TEMP sub menu 2 Press the X button to choose the colour of picture m...

Page 35: ...G B and then press the X button to enter the desired setting USER R adjust colour of red rate USER G adjust colour of green rate USER B adjust colour of blue rate RECALL User can reset the picture set...

Page 36: ...to Volume Control options to ON or OFF ON For general use like commercial advertisment AVC can avoid the loud sounds that can occur when adverts start OFF For special sound effect like opera or sympho...

Page 37: ...ble MANUAL VOICE POP ROCK JAZZ CLASSIC 4 Settings for VOICE POP ROCK JAZZ and CLASSICAL are pre configured You cannot change these settings The frequency responses are as below MOVE SELECT SOURCE MAIN...

Page 38: ...IZER VOICE 120 HZ 500 HZ 1 5 KHZ 5 KHZ 10 KHZ SOUND MAIN TV SUB OFF MOVE SELECT EQUALIZER POP 120 HZ 500 HZ 1 5 KHZ 5 KHZ 10 KHZ SOUND MAIN TV SUB OFF MOVE SELECT EQUALIZER ROCK 120 HZ 500 HZ 1 5 KHZ...

Page 39: ...36 JAZZ CLASSICAL MOVE SELECT EQUALIZER JAZZ 120 HZ 500 HZ 1 5 KHZ 5 KHZ 10 KHZ SOUND MAIN TV SUB OFF MOVE SELECT EQUALIZER CLASSIC 120 HZ 500 HZ 1 5 KHZ 5 KHZ 10 KHZ SOUND MAIN TV SUB OFF...

Page 40: ...frequency settings MANUAL Note When using the PIP feature in PC mode you are able to listen to the sound of the SUB screen instead of the MAIN screen by selecting the AUDIO SWAP button MOVE SELECT EQU...

Page 41: ...on the screen headline The first page number indicates your selection while the second shows the current page being displayed Press the TELETEXT button again to switch off Teletext The previous progr...

Page 42: ...Press UPDATE button to switch to TV mode while waiting for the text page A small blue box in which shows appears in the upper left corner When the required text page is found the required page number...

Page 43: ...M 1 Some DVD movies may not fill the top and bottom of the screen The 14 9 zoom function extends the height to fill the screen ZOOM 2 Same as 16 9 ZOOM but the button edge of the screen pulls up a lit...

Page 44: ...ure z Make sure the Contrast Brightness is properly adjusted z Make sure all external devices are connected properly There is no sound z Make sure the volume is not set to minimum z Make sure the soun...

Page 45: ...or triple image z Make sure the aerial is facing the right direction z There may be reflected signals from mountains or buildings The picture is spotty z There may be interference from automobiles tr...

Page 46: ...25 175 2 VGA 640 480 37 500 75 000 31 500 3 US TEXT 720 400 31 472 70 100 28 325 4 STB 768 576 31 250 50 000 29 750 5 SVGA 800 600 37 879 60 300 40 000 6 SVGA 800 600 46 875 75 000 49 500 7 XGA 1024...

Page 47: ...adcasting System PAL SECAM Receiving Channel B G D K I and L L Multi Europe Sound System NICAM A2 IGR Teletext 255 pages FLOF TOP TV Function Data Broadcasting Auto Program Searching APS Video Colour...

Page 48: ...n Finnish Swedish Dutch Danish Norwegian Function Keys Power Source Menu Up Down Channel Volume WIDE EXIT Video Performance 3D Comb filter 3D De interlace Canal Plus Teletext Aspect Ratio Control WIDE...

Reviews: