background image

28

08

Configuration Settings

The following settings can all be accessed form 
the configuration menu. Use the 

SCROLL

 control 

to navigate through the menu system, and 
change settings. Press the 

SELECT

 button to 

confirm.

Network Config

This menu enables you to setup and view your 
network configuration settings. These settings 
are used when setting up your network and are 
explained in “Switching on” on page 6

Version

This menu shows you the version numbers of 
the built-in firmware in your internet radio. These 
version numbers are helpful when calling the 
customer helpline.

Upgrade firmware

This menu enables you to upgrade the firmware 
in your internet radio. When you press the 

SELECT

 button your internet radio will search for 

available upgrades.

Language

This menu enables you to change the menu 
language used in your internet radio.

Factory Reset

This menu enables you to reset your internet 
radio. When your internet radio is reset you will 
lose your stored radio stations, clock settings and 
network settings.

Refer to “Switching on” on page 6 for help with 
re-setting up your internet radio.

Register

The 7 digit key is device specific and is required 
when you subscribe to premium content services 
and when setting up your ‘My Stuff’ account on 
the Reciva website.

Clock

See “Setting the clock” on page 26. 

Sleep Timer

See “Setting the sleep timer” on page 27.

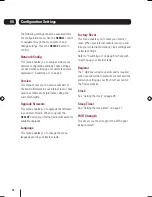
WiFi Strength

This shows you the strength of the WiFi signal 
being received.

goodmans_GWF101IP.indd   28

goodmans_GWF101IP.indd   28

19/02/2008   13:13:44

19/02/2008   13:13:44

Summary of Contents for GWF101IP

Page 1: ...IMPORTANT Please read all instructions carefully before use and keep for future reference GWF101IP Internet Radio with iPod Dock Instruction Manual...

Page 2: ...2...

Page 3: ...codes Before continuing make sure that your wired wireless access point or router is powered on and connected to your broadband internet connection Consult the manufacturer s guide supplied with your...

Page 4: ...23 My Stuff 24 25 Clock Functions 26 27 Configuration Settings 28 Help and Advice 29 30 Error Messages 31 Windows 2000 Users 32 34 Specifications 35 Guarantee 36 Contents What s in the box Your new in...

Page 5: ...5 STOP button Radio P1 button Radio P4 MODE button Radio P2 button Radio P3 button Top view Rear view BACK button SKIP button REPLY button PLAY PAUSE button BROWSE button SKIP button NETWORK port LINE...

Page 6: ...plete the name of a wireless network will be shown If your wireless network is not found check that your wireless access point or router is switched on and connected to your broadband internet connect...

Page 7: ...network when your router does not broadcast the SSID network name complete the following procedure Press the POWER button and wait until the following is displayed Turn the SCROLL control until the fo...

Page 8: ...the WEP WPA key has been entered turn the SCROLL control so that END is selected Press the SELECT button to confirm The internet radio will now connect to your wireless network The following screens w...

Page 9: ...the network port on the rear of the internet radio and a wired router Power On the internet radio The connection between the internet radio and the router will be setup automatically The following sc...

Page 10: ...10 Getting Started 02 The menu structure Navigate through the options using the SCROLL control confirming each step using the SELECT button...

Page 11: ...ss the SELECT button to confirm When you connect to an internet radio station the blue menu control indicator will flash and a connecting screen will display Before the station begins to play the wire...

Page 12: ...ol to select a new station Connecting to an on demand radio station Some radio stations offer on demand services which can feature highlights previous shows or special events When you connect to a sta...

Page 13: ...press the SELECT button to listen from that point On demand features When listening to an on demand service you can use the following features Button Function P5 Press this button to stop playback PL...

Page 14: ...imum of 5 stations To store a station follow the procedure below To store presets 1 5 listen to the station that you wish to store then press and hold the relevant preset number button to store the st...

Page 15: ...c from your iPod Ensure your iPod is set firmly in the iPod adaptor The iPod will only fit in the adaptor one way Do not force it Turn the SCROLL control until iPod is displayed Press the SELECT butto...

Page 16: ...0 Win XP and Windows Vista The following file formats are supported MP3 WMA RM OGG AAC M3U DRM encrypted files can not be played back using the built in media player If you try to play an encrypted fi...

Page 17: ...e the folder in which they are stored To setup your shared folders complete the following procedure on your computer Open My Computer from the Start menu Browse to the folder where your audio files ar...

Page 18: ...music files The name of the PC will be shown in the display If there is more than one PC found use the SCROLL control to select the required PC Press the SELECT button to confirm Your internet radio...

Page 19: ...or UPnP client software if you are not sure how to enable these features Make sure that the PC where the media files are stored is switched on and the above requirements have been installed and enabl...

Page 20: ...gory or by using a predefined playlist The categories are as follows Windows Media Windows Media Player Playlist My Shared Folders Use the SCROLL control to select the required option Press the SELECT...

Page 21: ...ess the SELECT button to confirm Choose the relevant sub category using the SCROLL control then press the SELECT button to confirm Your selection will now be added to the queue and the first track wil...

Page 22: ...urn the SCROLL control until the following screen is displayed Press the SELECT button to confirm Select the option for Playback Mode using the SCROLL control Press the SELECT button to confirm Turn t...

Page 23: ...L control Press the SELECT button to confirm Turn the SCROLL control until Repeat is displayed Press the SELECT button to confirm Turn the SCROLL control so that YES is highlighted then press the SELE...

Page 24: ...va website Go to the Reciva website at www reciva com Click on Register in the top right hand corner Follow the on screen instructions to complete registration Register your Goodmans internet radio to...

Page 25: ...hrough the options using the SCROLL control confirming each stage using the SELECT button Turn the SCROLL control until the following screen is displayed Select My Stuff Select My Stations Select the...

Page 26: ...control to set the minutes Press SELECT to confirm The set time will be displayed Setting the alarm Before setting the alarm make sure that the clock is correct To set the alarm proceed as follows Se...

Page 27: ...eep timer is used to turn off the internet radio after a specified amount of time To set the sleep timer proceed as follows Select Configure from the main menu and press SELECT to confirm Turn the SCR...

Page 28: ...pgrade the firmware in your internet radio When you press the SELECT button your internet radio will search for available upgrades Language This menu enables you to change the menu language used in yo...

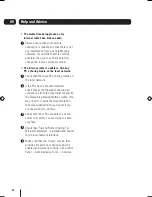
Page 29: ...t DHCP server is enabled on your internet radio Goto Configure Network Config View Config The following should be displayed Check that your firewall is not blocking the following UDP and TCP ports 80...

Page 30: ...etwork If the PCs have a firewall installed check that a the firewall is allowing all connections from the local network and b the firewall is allowing Netbios traffic You may need to consult the docu...

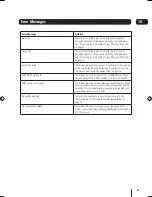
Page 31: ...Connecting the internet radio to your PCs shared folder on page 18 DHCP DNS Data Invalid The internet radio can not connect to a valid DNS server Check that the internet radio is DHCP enabled See item...

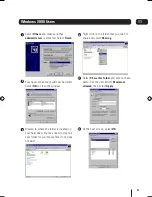
Page 32: ...his user can then be saved and accessed by all users and the internet radio Logon to Windows 2000 as the administrator Open the control panel When the control panel has opened double click the users a...

Page 33: ...e window Browse to where the folder is located on your hard drive You may need to create a new folder for your media files if one does not exist Right click on the folder that you wish to share and se...

Page 34: ...t the folder is shared You will now need to copy your media files into your shared folder so that they can be accessed by other users on the PC and the internet radio For further information on settin...

Page 35: ...Power Consumption 8 0 W Wireless Network Protocol 802 11b g Compatible Media Formats mp3 wma rm ogg aac Preset Stations 5 Specifications IMPORTANT Due to continual revision and improvements to our pro...

Page 36: ...to this guarantee It is valid only in the country you bought the product in The product must be correctly installed and used in line with the instructions in this user guide The product must be used o...

Page 37: ...be of the same rating and ASTA approved to BS1362 If the plug is changed a fuse of the appropriate rating must be fitted in the plug adapter or at the distribution board If the fuse in a moulded plug...

Page 38: ...appliance is labelled in accordance with European Directive 2002 96 EG concerning used electrical and electronic appliances waste electrical and electronic equipment WEEE The guideline determines the...

Page 39: ...39...

Page 40: ...www goodmans co uk 0844 477 6404...

Reviews: