HELPLINE PHONE NUMBER 0870 873 0080
HELPLINE PHONE NUMBER 0870 873 0080
9
10
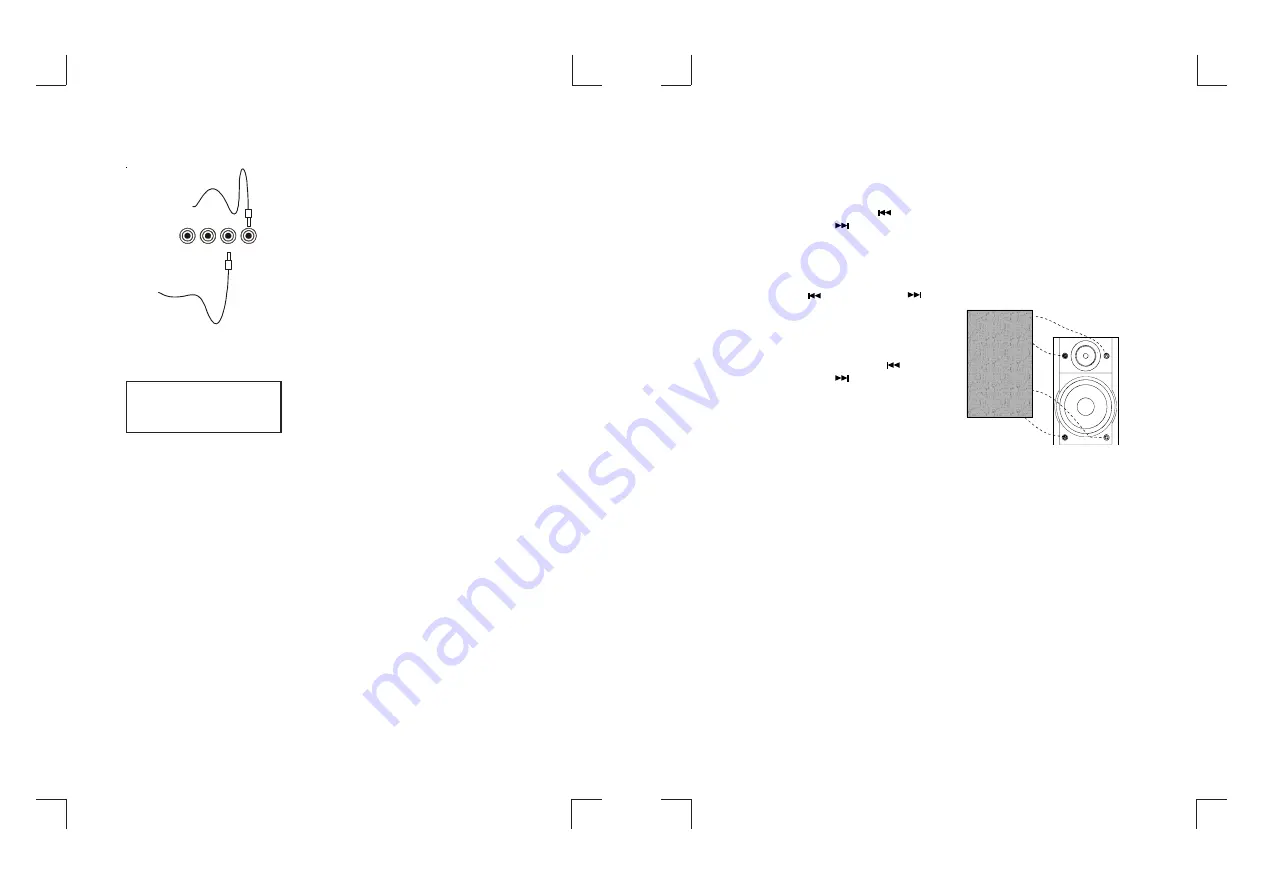
SPEAKER CORD
CONNECTION
Connect the cable from the speaker on the
left to the (L) terminal and the cable from
the speaker on the right to the (R) termi-
nal.
NOTE:
The speakers are not magnetically
shielded. If placed next to or on top of your
TV. The picture colour will be distorted.
Install the speaker at least 5 inches away
from your TV.
AC POWER CONNECTION
Connect the ac power lead after all other
connections have been made.
NOTE:
When there is a long power failure, or the
mains lead is disconnected for more than
3 hours, the clock and tuner preset sta-
tions may be erased from the memory.
Reset the clock and presets when power
is restored.
SWITCHING THE UNIT ON
AND OFF
Press the power button to turn the unit on.
POWER STANDBY
Power standby mode allows you to turn
the unit on and off (to standby mode)with
the power button on the remote control or
on the unit itself. If you want to turn off the
unit completely, remove the AC plug from
the household supply.
VOLUME CONTROL
To adjust the volume, press the VOLUME
and VOLUME button of front panel or press
the VOLUME DOWN/UP button of remote
control to the desired level.
STEREO HEADPHONE
Stereo headphone socket is provided on the
front panel of the main unit (headphones
not supplied). Connect a low impedance (4-
32ohm) stereo headphone to the headphone
socket for private listening. Inserting the
3.5mm headphone jack plug automatically
disconnects the loudspeakers.
SETTING THE CLOCK
1. Press
DISPLAY
to change to
Clock display.
2. Press and hold
MEMORY/CLK
ADJ
, the first second digit of
"24H"
will flash, press
SEARCH/CLK
to set the
correct hour mode.
3. Press
MEMORY/CLK ADJ
to
select the hour setting, the first
second digit of
"00"
will flash,
press the
SEARCH/CLK
to set the correct hours.
4. Press
MEMORY/CLK ADJ
again to select the minutes
setting, the third fourth digit of
"00" will flash, press the
SEARCH/CLK
to set the
correct minutes.
5. Press
MEMORY/CLK ADJ
again
to store in the memory.
TO REMOVE THE
SPEAKER GRILLES
1. Insert your fingers at the top
and bottom of the grille and pull
towards you.
Attaching the speaker grille.
speaker
speaker grille.
Match the fittings when attaching the grille.
DO NOT CONNECT
THE SPEAKERS TO
THE AUX SOCKETS
R
SPEAKER
L
TO RIGHT SPEAKER
TO LEFT SPEAKER


