background image

DAB &


FM


Clock


Radio

INFO/MENU button

4.10 Station information.

1. The radio station usually broadcasts certain 

information that can be seen on the radio. These 
information will appear on the two text lines under 
the Clock. When listening to a station you can 
change the information that will appear under the 
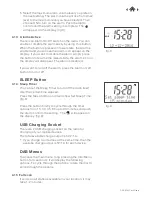
clock on the second line of the display. (fig.6)

2. To get these information, press the INFO/MENU 

button to cycle through the display options. There 
are several different types of information that are 
sent by the broadcaster.

4.11 System information

Long press the INFO/MENU button, there are more 
setting available as below:
1. Time

You can set the Time/Date manually or select to auto 
update the time from the DAB or FM radio. 

2. EQ Set

You can choose your desired equalizer to adjust the 
sound: Jazz/Rock/Classic/Pops

3. Factory Reset

This menu can reset your radio and restore all the 
settings to the original factory settings.

4. SW version

Choose this menu to see the Software version of the 
radio for future maintenance purpose.

ALARM and ALARM ON/OFF button

4.12 Set Alarms

There are 2 alarms available. Follow the steps below to 
set the alarm:
1. Short press the “Alarm” button briefly to open the 

Alarm wizard to set Alarm 1. 
If you want to set the Alarm 2, simply turn the dial to 
show Alarm 2, then press the dial to confirm. (fig.7) 

2. Rotate dial and press to select Alarm ½ Active. Then 

rotate the dial choose the desired hour and push the 
dial to confirm. Then do the same for the minutes 
setting. 

3. The next setting is Duration, it means how long you 

want to keep the alarm sounds over the time period. 
You can choose from 15, 30, 45. 60 and up to 90 
minutes. 

4. Then it comes to choose the “Sound source”, you 

can choose the alarm to activate from Buzzer, or 
Radio in DAB or FM. 

fig.7

DAB

1

DAB

fig.6

Summary of Contents for NOD

Page 1: ...MODEL NOD DAB FM Clock Radio DAB FM Clock Radio ...

Page 2: ...LARM ON OFF Button 4 1 Select and Confirm 4 12 Set Alarms 4 2 Full Scan DAB 4 13 Alarms activity 4 3 Manual Tune SLEEP Button SNOOZE BACKLIGHT settings 4 14 Sleep Timer 4 4 Snooze USB Charging Socket 4 5 Backlight DAB menus POWER MODE button 4 15 Full scan 4 6 Switch to DAB mode 4 16 Manual Tune 4 7 Switch to FM mode 4 17 Prune FAV Button 4 18 System 4 8 Storing DAB FM Presets FM Menus 4 9 Recall ...

Page 3: ... is not subject to vibrations Avoid the following locations Where it is exposed to direct sunlight Where it is close to heat radiating sources Where the humidity is high and ventilation is poor Where it is dusty Using the Adaptor Connect the power adaptor supplied in the package to the DC IN socket on the radio and plug in the other end to the wall socket Adjusting the Aerial Fully extend the aeri...

Page 4: ...rt press 1 sec to power on Standby Long press 3 sec switch to DAB or FM mode FAV Long press 3sec to preset radio station Short press 1 sec to recall the list of preset stations Info Menu Short press 1 sec to cycle through station broadcast information Long press 3 sec to access main menu Alarm Short press 1 sec to open alarm setup wizard Sleep Short press 1 sec to cycle through the sleep options A...

Page 5: ...start scanning the DAB radio stations automatically fig 2 6 Once the scan is finished it will display the number of radio stations received 3 2 Changing Mode DAB FM AUX IN DAB FM mode 1 Long pressing the Power Mode button to switch between DAB FM mode 2 The radio will tune to the first DAB station To explore the stations that have been found push the Dial briefly the station list will appear Rotat...

Page 6: ... to date station listing stored with the memory of your radio 3 4 Adjusting the Volume Adjust the Dial control to increase or decrease the volume 3 5 Power Off Press the Power Mode button briefly to turn off the radio 4 Features DIAL Button 4 1 Select and Confirm In DAB mode scroll the dial and rotate to the station you want to listen to and then press the dial to select 4 2 Full Scan DAB 1 DAB fu...

Page 7: ... 10 you want to preset then push the Dial to select The display will show Preset X Saved where X is the number of the preset 1 10 fig 4 Your radio can store up to 10 DAB stations and 10 FM station in its preset memories for instant access to your favorite stations Note If there is already an existing station stored under a preset it will be overwritten when you store a new station When you store D...

Page 8: ...d Jazz Rock Classic Pops 3 Factory Reset This menu can reset your radio and restore all the settings to the original factory settings 4 SW version Choose this menu to see the Software version of the radio for future maintenance purpose ALARM and ALARM ON OFF button 4 12 Set Alarms There are 2 alarms available Follow the steps below to set the alarm 1 Short press the Alarm button briefly to open th...

Page 9: ...the Alarm on off button to turn it off SLEEP Button 4 14 Sleep Timer You can set the Sleep Timer to turn off the radio itself after the certain time elapsed Press the Sleep button and it will show Set Sleep Time fig 9 Press the button briefly to cycle through the timer options from 15 30 45 60 up to 90 minutes and push the dial to confirm the setting The will appear on the display fig 9 USB Chargi...

Page 10: ...t will exit the menu 4 17 Prune Some DAB services may stop broadcasting or you may not be able to receive a station Prune stations will delete the DAB stations from your station list that will no longer be received 1 Press and hold info menu button to access the menu 2 Rotate the dial to scroll to Prune option and push the dial to select 3 The display will show as below Choose Yes to confirm it wi...

Page 11: ...areas of weak signal that may cause poor reception Follow the instructions for Manual Tuning on 4 16 and adjust the aerial while monitoring the signal strength until the optimum signal is obtained If reception is still poor try re locating the radio to another part of the room Some of the buttons on the DAB Digital Radio are not working This may be caused by electrostatic discharge Turn the DAB Di...

Reviews: