


TAIYO ELECTRIC IND.CO.,LTD.
12
TAIYO ELECTRIC IND.CO.,LTD.
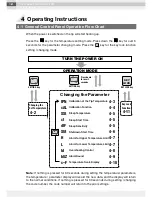
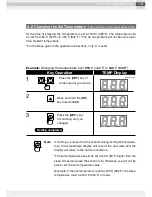
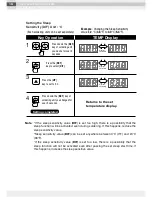
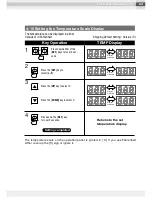
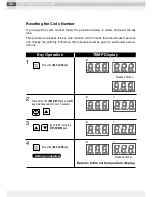
Note: If nothing is pressed for 30 seconds during setting the temperature/ parameters,
the temperature / parameter display will record the new data, and the display will return
to the normal conditions. If nothing is pressed for 30 seconds during setting / changing
the code number, the code number will return to the prior settings.
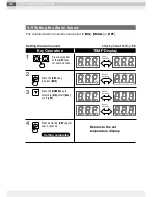
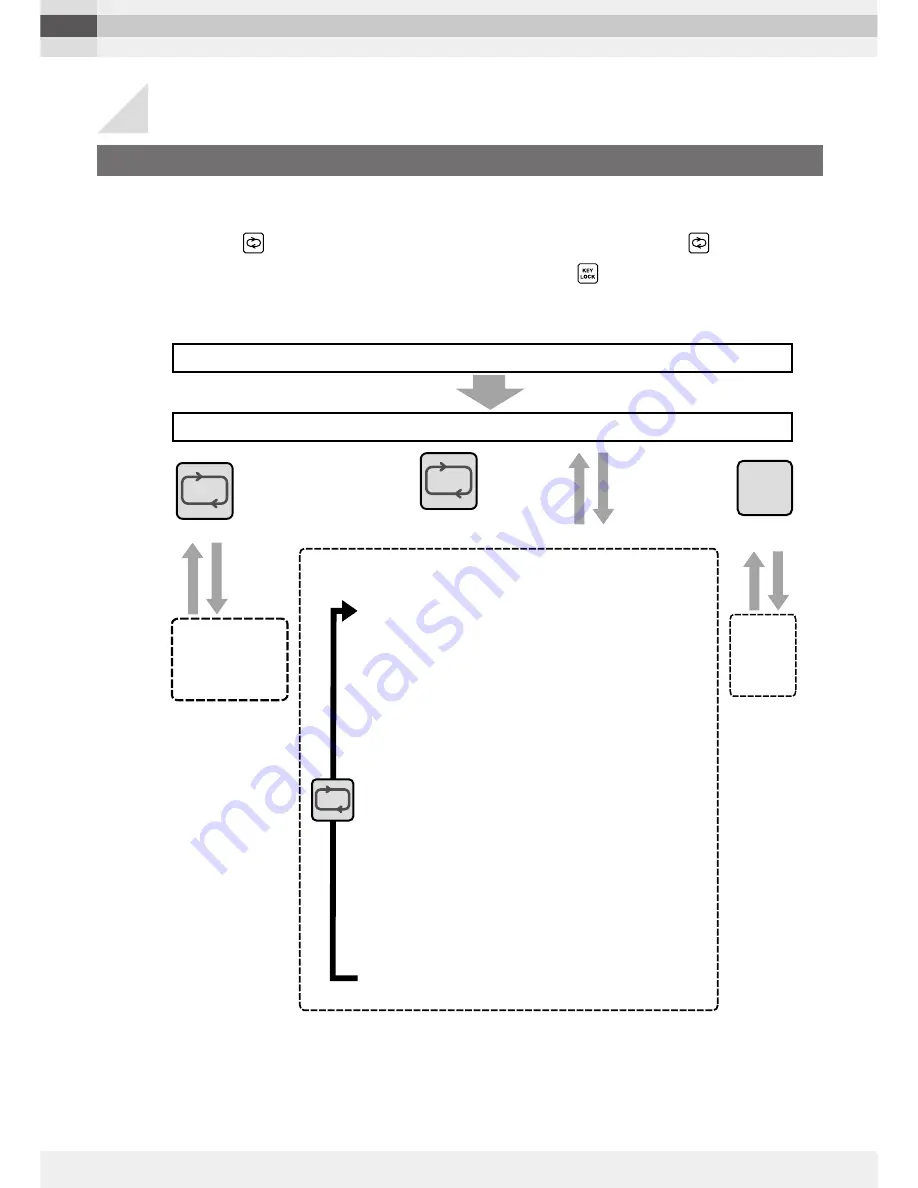
TURN THE POWER ON
OPERATION MODE
Changing the
Set Temperature
4-2
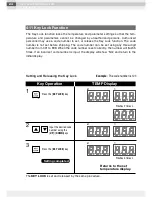
Key Lock
Function
4-11
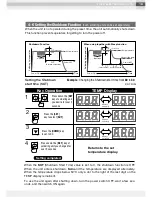
Changing the Parameter
SETTING key
SETTING key
KEY LOCK key
KEY
LOCK
tPN
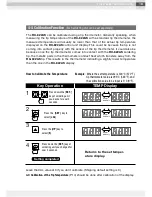
Calibration of the Tip Temperature
4-3
cAL
Calibration Function
4-4
SSt
Sleep Temperature
4-5
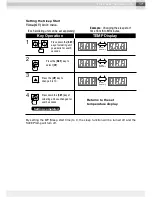
ct
Sleep Start Time
4-5
dIF
Sleep Sensitivity
4-5
SUt
Shutdown Start Time
4-6
H
Alarm for Upper Temperature Limit
4-7
L
Alarm for Lower Temperature Limit
4-7
td
Overshooting Control
4-8
bUZ
Alarm Sound
4-9
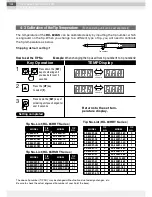
c–F
Temperature Scale Display
4-10
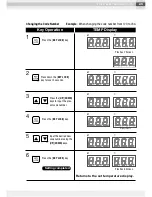
Press down
for over 3
seconds
4
Operating Instructions
4-1 General Control Panel Operation Flow Chart
When the power is switched on the tip will start heating up.
Press the
key for the temperature setting mode. Press down the
key for over 3
seconds for the parameter changing mode. Press the
key for the key lock function
setting / changing mode.