background image

INSTALLATION

STEP 1 - PRE-ASSEMBLY

1.1

  Check packing list to make sure correct quantity of parts is included.

1.2

  Tools and materials (by others) typically needed to assemble crane are as follows:


• Ladders/man lifts   


• Tape measure, combination wrenches, socket sets


• Large square 


• Lifting sling (rated for 4000 lbs. capacity minimum)


• Mallet 


• Leveling tools (transit, laser level, water level, etc.)


• Shop brush  


• Lifting device to lift heavy Gantry Crane components


• Torque wrench (200 ft.-lbs. 

• Safety equipment (hard hats, barricades, etc.)


   capable)

WARNING

Equipment described herein is not designed for, and should not be used for, lifting, supporting or 

transporting humans.  Failure to comply with any one of the limitations noted herein can result in 

serious bodily injury and/or property damage.  Check State and Local regulations for any

additional requirements.

WARNING

Crane cannot be utilized as a ground:  A separate ground wire is required.  For example,

systems with 3-phase power require three conductors plus one ground wire.

WARNING

Reference the American Institute of Steel Construction (AISC) Manual of Steel Construction 

(9th edition), Part 5, Specification for Structural Joints using ASTM A325 or A490 Bolts (section 

8.d.2) for the proper procedures to follow when using any torque tightening method.

 TIP: 

Packing list can be found in plastic pocket inside hardware box:  General


Arrangement Drawing can be found inserted in this installation manual.

2

9/19

WARNING

Gantry Crane should not be moved when loaded.

WARNING

Gantry Crane should not be moved by pushing or pulling on load.

WARNING

Gantry Crane should be used on a level, flat, smooth surface which is free of defects and 

obstructions.

Summary of Contents for Adjustable Gantry Crane

Page 1: ...IMPORTANT DO NOT DESTROY Installation Operation Maintenance Manual Month Year Gorbel Dealer Date Adjustable Height Steel Gantry Cranes Gorbel Customer Order No Serial No Issued 05 2013 Revised 09 2019...

Page 2: ...This page intentionally left blank...

Page 3: ...o Base Channel Connections 4 Step 4 Optional Endstop Tagline Installation 5 Step 5 Final Steps 5 General Layout Drawings 6 Crane Operator Instructions 7 General Safety Suggestions 7 Limited Warranty 8...

Page 4: ...ts are tight and have lockwashers Making sure that festooning cannot be snagged or pinched whether it is electric or pneumatic Checking for any other unsafe conditions For additional safety precaution...

Page 5: ...odily injury and or property damage Check State and Local regulations for any additional requirements WARNING Crane cannot be utilized as a ground A separate ground wire is required For example system...

Page 6: ...d support assembly 2 3 While resting on the floor tilt the I beam by means of rigging straps slings are preferred to reduce paint damage that is sized and oriented correctly for raising the load and o...

Page 7: ...Gantry Crane onto its casters by means of an overhead lifting device or lift truck Use Gorbel Blue touch up paint provided to cover any scratches and abrasions as needed 3 5 If your Gantry Crane is eq...

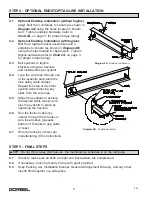
Page 8: ...s and clamp the loop using cable clamps Repeat this step at the other eyebolt while removing any slack from the wire rope 4 5 Adjust the eyebolts to achieve the desired cable tension and lock the eyeb...

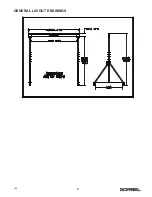
Page 9: ...6 9 19 GENERAL LAYOUT DRAWINGS...

Page 10: ...oothness of the crane operation The good crane operator should know and follow these proven suggestions for safe efficient crane handling 1 The crane should be moved smoothly and gradually to avoid ab...

Page 11: ...TOR NOT AN AGENT Gorbel and Purchaser agree that Purchaser has been put on notice that dealer or distributor is not Gorbel s agent in any respect for any reason Gorbel and Purchaser also agree that Pu...

Page 12: ...torque specifications Chart 2A page 3 Every 1 000 hours or 6 months 3 Endstop Tagline Bracket Hardware Check for full compression of lockwasher Bolts should be tightened to torque specifications Chart...

Reviews: