STEP 6 - HOIST TROLLEY INSTALLATION
6.1
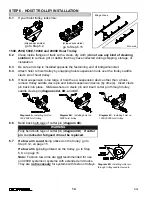
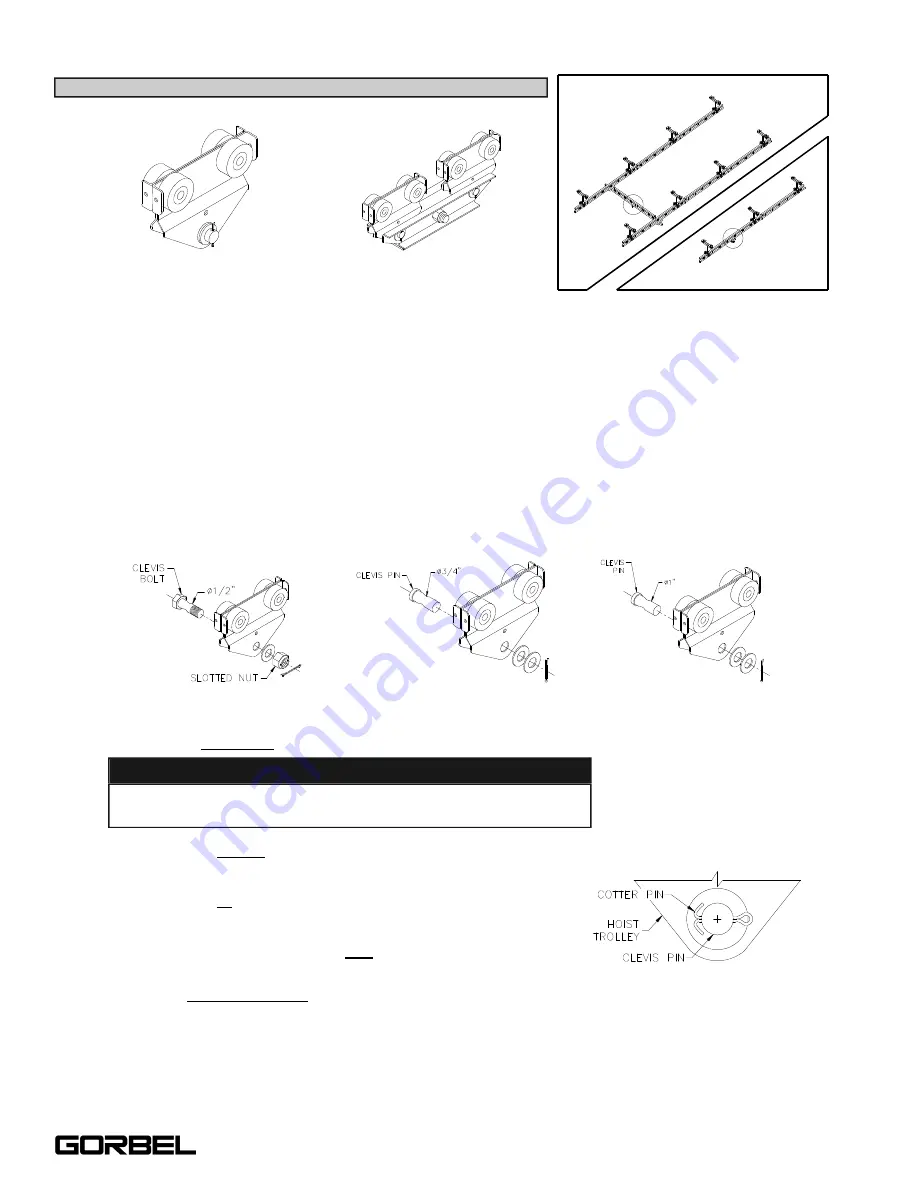
If your hoist trolley looks like:
150#, 250#, 500#, 1000# and 2000# Hoist Trolley
6.2
Clean inside flanges of track with a clean, dry cloth (
do not use any kind of cleaning
solution
) to remove grit or debris that may have collected during shipping, storage, or
installation.
6.3
Be sure end stop is installed opposite the festooning end of bridge/monorail.
6.4
Attach hoist to hoist trolley by snapping hoist suspension hook over the trolley saddle
clevis pin of hoist trolley.
6.5
If hoist suspension is too large or hoist has a suspension device other than a hook,
remove trolley saddle clevis pin and install suspension device (by others). Insert clevis
pin back into place. Slide washers on clevis pin and insert cotter pin through trolley
saddle clevis pin (
diagrams 6A, 6B,
and
6C
).
6.6
Bend back both legs of cotter pin (
diagram 6D
).
6.7
If a tow arm is not
being utilized on the trolley, go to
Step 6.12, on page 15.
If a tow arm is
being utilized on the trolley, go to Step
6.8, on page 15.
Note:
Festoon tow arms are
not
recommended for use
on 4000# systems or systems with extended end trucks.
They are
not necessary
for systems with festoon trolleys.
(shipped assembled)
go to Step 6.2
(shipped assembled)
go to Step 6.15
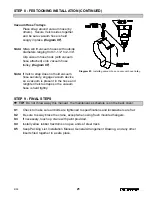
Diagram 6A.
Installing hoist on
150-250# hoist trolley.
Diagram 6B.
Installing hoist on
500# hoist trolley.
Diagram 6C.
Installing hoist on
1000-2000# hoist trolley.
WARNING
Fully bend both legs of cotter pin (
diagram 6D
).
If cotter
pin is cracked or fatigued it must be replaced.
Diagram 6D.
Installing cotter pin
through trolley saddle clevis pin.
14
9/05
Bridge Crane
Monorail
Summary of Contents for AL 1000
Page 1: ......


