STEP 2 - PIVOT PRO® (WALL/COLUMN MOUNTED) BOOM INSTALLATION
2.1
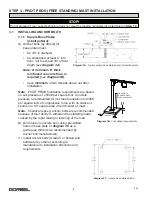
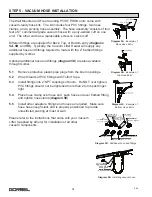
Determine position of upper pivot mounting assembly
on support structure, and drill bolt holes.
Temporarily
bolt upper pivot mounting assembly to support structure
(do not use lock washers).
2.2
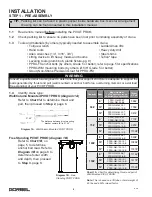
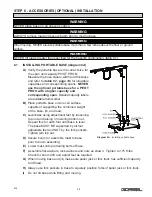
Determine position of
lower
pivot mounting assembly
by dropping plumb bob (by others) through pivot holes
(
diagram 2B
).
2.3
Drill bolt holes and bolt
lower
pivot mounting assembly to
support structure.
Do not
torque bolts until boom
weldment is installed.
2.4
Remove upper pivot mounting assembly from support
structure.
2.5
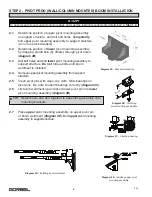
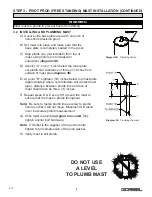
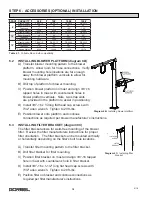
Clean pivot pins with clean, dry cloth. Slide bearings on
pivot pins. Be sure to orient bearings correctly (
diagram 2C
).
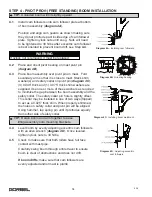
2.6
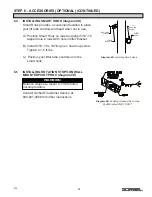
Lift boom weldment up and insert lower pivot pin into
lower
pivot mounting assembly (
diagram 2D
).
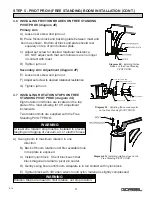
2.7
Place
upper
pivot mounting assembly on upper pivot pin
of boom weldment (
diagram 2E
). Bolt
upper
pivot mounting
assembly to support structure.
STOP!
Do not proceed if your support structure does not meet the loading requirements determined in
Step 1.4
.
Diagram 2B.
Plumbing
pivot mounting assemblies
.
Diagram 2C.
Orienting bearing.
Diagram 2D.
Installing boom weldment.
Diagram 2E.
Installing upper pivot
mounting assembly.
6
9/18
TIP:
Retain boom and arm together to ease lifting assembly onto
mounting brackets.
27.45”
Diagram 2A.
Bracket dimensions

