background image

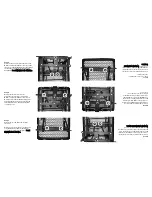
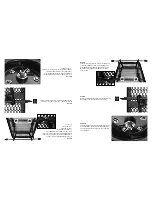
Using the Dumping Feature

To operate the dumping feature, pull the

dumping release handle upward to release

the bed from the locking mechanism. Lift up

the release handle to rotate cart upward into

the dumping position.

Returning the Bed to the 
Lowered Position

Rotate the bed back down to the lowered

position. Make sure the dumping release

handle is locked into place when the cart is

in the lowered position.

UNLOCKED

LOCKED

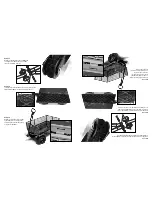
Using the swivel handle

1.  Remove clips and cotter pins.

2.  Rotate the handle and insert cotter pin.

Secure by attaching the clip.

3. The second cotter pin is used to attach the

handle to the trailer hitch, as shown.

Usar el mango gir

ator

io

1.Quitar las presillas y los pasadores 

de chaveta.

2.Girar el mango e insertar el pasador

mencionado.  Asegurar con la presilla.

3.El segundo pasador de chaveta se usa para

fijar el mango en el enganche de remolque

tal como se muestra.

Usar la Función de 

V olt

eo

Para usar el volteo, hala hacia afuera el

mango de liberación del volteo para liberar la

cama de del mecanismo de cierre.  Alza el

mango de liberación para rotar hacia arriba

el carrito y ponerlo en la posición de volteo. 

Bajar la Cama a la Posición

Horiz

ontal

Rota y baja la cama a la posición horizontal.

Comprueba que el mango de liberación del

volteo esté bloqueado en su lugar cuando el

carrito está en posición horizontal. 

BLOQUEADO

DESBLOQUEADO

Summary of Contents for GORMP-12

Page 1: ...ructions Assembly Instructions Parts and Hardware Identification CAUTION Read understand and follow ALL instructions before using this product Questions problems missing parts Before returning to your retailer visit us online at www tricam com and complete the replacement parts submission form or call our customer service department at 1 800 867 6763 9 a m 4 p m CST Monday Friday For product inqui...

Page 2: ......

Page 3: ...E C G D H F I J K L Diagrama de Despiece para el Ensamblaje A Armazón de la Cama 1 B Bloqueo del Volteo 1 C Ensamblado del Eje Delantero 1 D Amortiguadores Delanteros 2 E Ensamblado del Eje Trasero 1 F Amortiguadores Traseros 2 G Ruedas 4 H Mango 1 I Funda de la Cama 1 J Paneles Laterales 2 K Paneles Delanteros Traseros 2 L Conectores del Mango 2 Lista de Piezas A Pernos de Carro M6x15 2 B Arandel...

Page 4: ...ucciones de Ensamblaje Paso 1 Voltear bocabajo el armazón de la cama del carrito Usar la caja de cartón para evitar rayar o dañar el acabado Paso 2 Fijar el bloqueo del volteo al armazón de la cama con 2 pernos de carro M6x15 2 arandelas M6 y 2 contratuercas M6 Apretar firmemente 1 READ ALL INSTRUCTIONS CAREFULLY BEFORE USE If you do not understand these instructions need clarification or further ...

Page 5: ... the wheels left and right Paso 3 Desbloquear el armazón delantero mediante el cerrojo de volcar y colocar el ensamblado del eje trasero bajo el armazón para alzarlo y facilitar el acceso Fijar el ensamblado del eje delantero al armazón de la cama con 4 pernos de carro M8x20 4 arandelas M8 y 4 contratuercas M8 Los pernos primero deben pasar por el armazón y luego por el eje delantero Apretar con l...

Page 6: ...r los amortiguadores Apretar con las manos N N o o a a p p r r e e t t a a r r c c o o m m p p l l e e t t a a m m e e n n t t e e l l o o s s p p e e r r n n o o s s Step 7 Remove the rear axle from underneath the front frame Attach the rear axle assembly to the bed frame using M8x20 carriage bolts 2 M8 washers 2 and M8 lock nuts 2 Hand tighten D Do o n no ot t f fu ul ll ly y t ti ig gh ht te en...

Page 7: ...on wheel spacers 4 onto the front and rear axles Paso 10 Colocar las ruedas en cada eje los vástagos de las válvulas hacia afuera con las 4 arandelas para ruedas M12 y las contratuercas M12 Apretar firmemente todas las tuercas Voltear el carrito sobre sus cuatro ruedas Paso 8 Deslizar los amortiguadores traseros sobre el ensamblado del eje trasero y fijar la pieza en ángulo del amortiguador al arm...

Page 8: ...he bed frame Please reference the stamp THIS SIDE UP to ensure proper placement Step 13 Attach the mesh panels to all sides of the bed frame Latch the front and back panels to the side panels using the lock handles Paso 13 Unir todos los paneles de malla a todos los lados del armazón de la cama Unir los paneles frontales y traseros a los paneles laterales mediante las manijas con cerrojos Paso 11 ...

Page 9: ...ed to attach the handle to the trailer hitch as shown Usar el mango giratorio 1 Quitar las presillas y los pasadores de chaveta 2 Girar el mango e insertar el pasador mencionado Asegurar con la presilla 3 El segundo pasador de chaveta se usa para fijar el mango en el enganche de remolque tal como se muestra Usar la Función de Volteo Para usar el volteo hala hacia afuera el mango de liberación del ...

Page 10: ...piezas de repuesto o llamar a nuestro departamento de servicio al cliente al 1 1 8 8 0 0 0 0 8 8 6 6 7 7 6 6 7 7 6 6 3 3 de 9 a m a 4 p m Hora Estándar del Centro de Lunes a Viernes DO NOT EXCEED MAXIMUM OVERALL LOAD CAPACITY 1 200 LBS 544 KG OR THE MAXIMUM DUMPING LOAD CAPACITY OF 500 LBS 226 KG WEIGHT RATING IS BASED ON AN EVENLY DISTRIBUTED LOAD CAUTION B Dump Lock 1 C Front Axle Assembly 1 D F...

Reviews: