background image

10

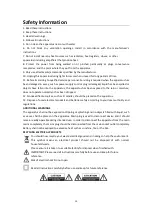
Safety Information

1. Read these instructions.
2. Keep these instructions.
3. Heed all warnings
4. Follow all instructions
5. Do no clean the apparatus near or with water
6. Do not block any ventilation openings. Install in accordance with the manufacturer's
instructions
7. Do not install near any heat sources such as radiators, heat registers, stoves, or other
apparatus (including amplifiers) that produce heat.
8. Protect the power from being walked on or pinched particularly at plugs, convenience
receptacles, and the point where they exit from the apparatus.
9. Only use attachments/accessories specified by the manufacturer.
10. Unplug this apparatus during light storms or when unused for long periods of time.
11. Refer all servicing to qualified service personnel. Servicing is required when the apparatus has
been damaged in a way, such as power-supply cord or plug is damaged, liquid has been spilled or
objects have fallen into the apparatus, the apparatus has been exposed to the rain or moisture,
does not operate normally or has been dropped.
12. No naked flame sources, such as lit candles, should be placed on the apparatus.
13. Dispose of used electrical products and batteries safely according to your local authority and
regulations.

ADDITIONAL WARNINGS

The apparatus shall not be exposed to dripping or splashing and no objects filled with liquid, such
as vases, shall be places on the apparatus. Main plug is used to disconnect device and it should
remain readily operable during intended use. In order to disconnect the apparatus from the main
mains completely, the mains plug should be disconnected from the main socket outlet completely.
Battery shall not be exposed to excessive heat such as sunshine, fire or the like.

RECYCLING ELECTRICAL PRODUCTS

You should now recycle your waste electrical goods and in doing so help the environment.
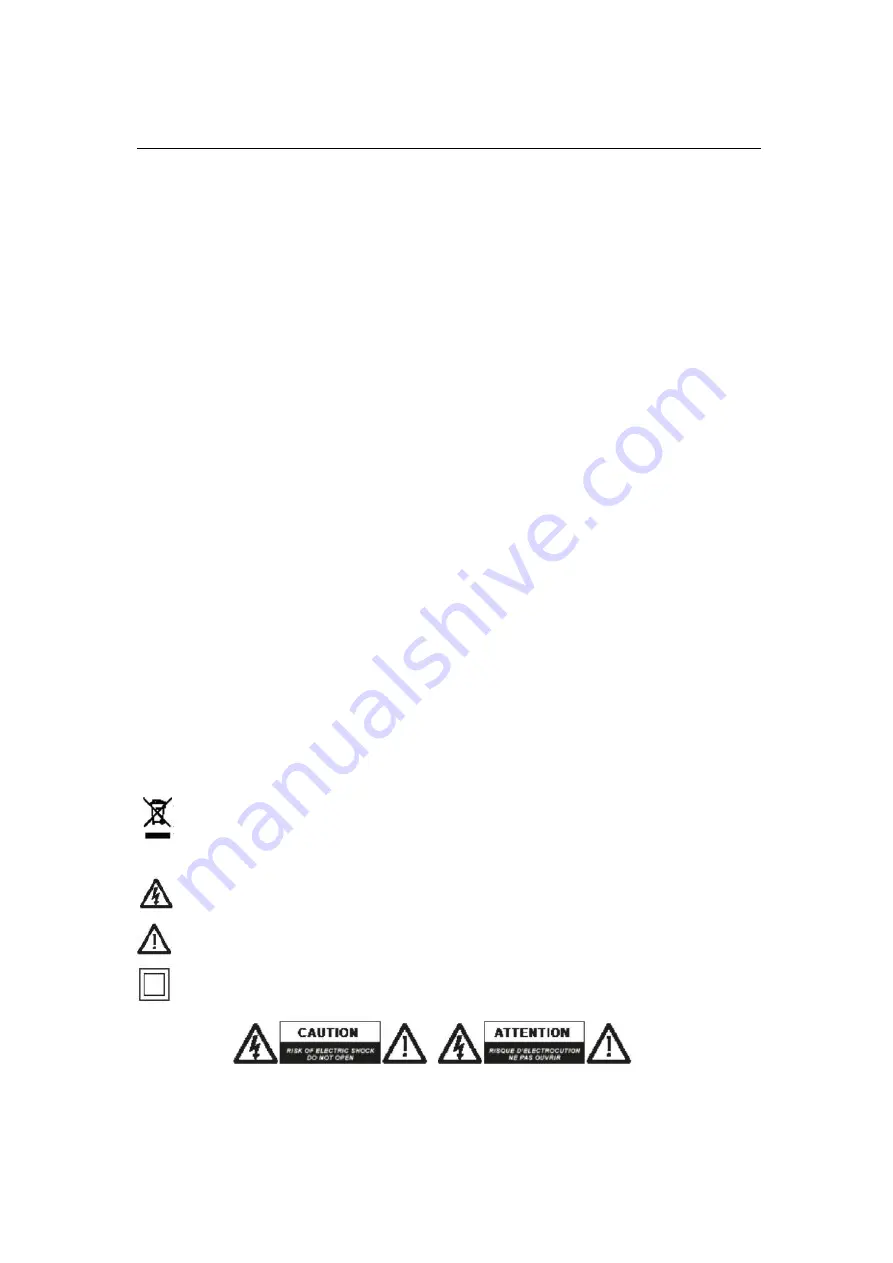
This symbol means an electrical product should not be disposed of with normal
household waste.
Please ensure it is taken to a suitable facility for disposal when finished with.
IMPORTANT: Please read all instructions carefully before use and keep for future
reference.
Risk of electric shock.Do not open

Read all instructions carefully before use and keep for future reference.

Summary of Contents for GS-SB60S

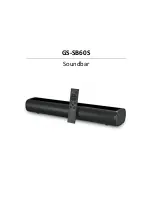
Page 1: ...GS SB60S Soundbar INSTRUCTION MANUAL ...

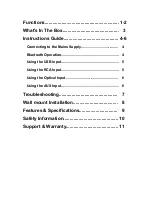
Page 2: ...Connecting to the Mains Supply 4 Bluetooth Operation 4 Using the USB Input 5 Using the RCA Input 5 Using the Optical Input 6 Using the AUX Input 6 Troubleshooting 7 Wall mount Installation 8 Features Specifications 9 Safety Information 10 Support Warranty 11 ...

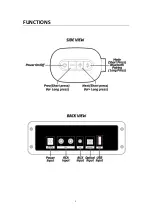
Page 3: ...1 FUNCTIONS ...

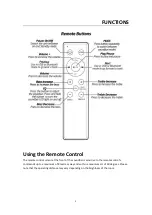
Page 4: ...control sensor at the front of the soundbar is sensitive to the remote control s commands up to a maximum of 8 metres away and within a maximum arc of 30 degrees Please note that the operating distance may vary depending on the brightness of the room ...

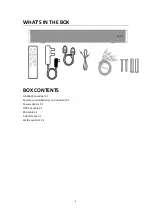
Page 5: ...3 WHAT S IN THE BOX BOX CONTENTS GS SB60S Soundbar X 1 Remote control batteries not included X 1 Power adaptor X 1 OPTICAL cable X 1 RCA cable X 1 AUX IN cable X 1 Wall mount kits X 1 ...

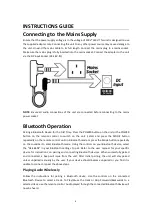
Page 6: ...ect and press the MODE button repeatedly on the remote control until in Bluetooth mode or press the Mode button repeatedly on the soundbar to enter Bluetooth mode Using the controls on your Bluetooth device select the GS SB60S in your Bluetooth settings to pair Refer to the user manual for your specific device for instructions on pairing and connecting Bluetooth devices When successfully paired an...

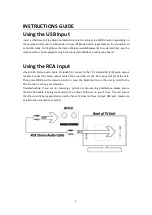
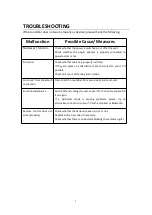
Page 7: ...e an RCA Stereo Audio Cable included to connect to the TV s stereo RCA L R audio output sockets Connect the audio output cable of the soundbar via the RCA input sockets of the unit Then press MODE on the remote control or press the Mode button on the unit to scroll to the RCA function Turn on your television Troubleshooting If you are not receiving a picture or encountering interference please ens...

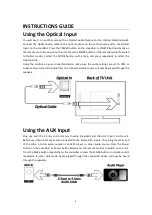
Page 8: ...nected device make sure the audio settings are set to PCM or Audio and are turned On Audio from the connected audio source will now be played through the speakers Using the AUX Input Plug one end of a 3 5mm to 3 5mm Aux In cable included into the AUX In port on the unit Before use disconnect any cables connected to the Stereo RCA Inputs Then plug the other end of the cable into the audio output or...

Page 9: ... cable to connect to your TV if possible Check unit is out of standby and in mode No sound from Bluetooth connection Disconnect the soundbar from your device and reconnect Function disturbance Switch off and unplug the unit Leave it for 2 minutes and switch it on again If a particular mode is causing problems please try an alternative connection to your TV such as Optical or Bluetooth Remote contr...

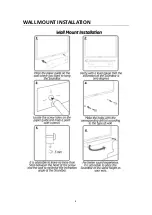
Page 10: ...8 WALL MOUNT INSTALLATION ...

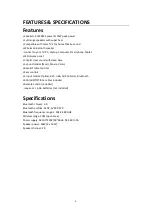
Page 11: ...lear sound with deep base 3 sound modes Music Movie Voice Base Treble controls Easy controls 5 Input modes Optical RCA USB AUX 3 5mm Bluetooth RCA AUX OPTICAL cables included Remote control included requires 2 AAA batteries not included Specifications Bluetooth chipset 5 0 Bluetooth profiles A2DP AVRCP SPP Bluetooth frequency range 2 402 2 480 GHZ Wireless range 10M open area Power supply AC100 24...

Page 12: ...erate normally or has been dropped 12 No naked flame sources such as lit candles should be placed on the apparatus 13 Dispose of used electrical products and batteries safely according to your local authority and regulations ADDITIONAL WARNINGS The apparatus shall not be exposed to dripping or splashing and no objects filled with liquid such as vases shall be places on the apparatus Main plug is u...

Page 13: ...nt to Part 15 of the FCC Rules These limits are designed to provide reasonable protection against harmful interference in a residential installation This equipment generates uses and can radiate radio frequency energy and if not installed and used in accordance with the instructions may cause harmful interference to radio communications However there is no guarantee that interference will not occu...

Reviews: