background image

EN


22

Tips

•  Cooking times are dependent on the size and quantity of the food and on the cooking 

temperature. However, in general the cooking times are shorter than in a conventional 
oven or pot. Start with shorter cooking times and then adapt the cooking times to your 
personal taste. 

•  When  preparing  mass-produced  frozen  products,  you  should  follow  the  times  and 

temperatures  specifi ed  by  the  manufacturer.  Before  the  specifi ed  cooking  time 
elapses,  check  whether  the  food  is  already  cooked  through  because  the  cooking 
time can be slightly shorter than in a conventional oven.

Cleaning

PLEASE NOTE!


Do not clean the device and the cover with sealing ring in the dishwasher! 


Do not use any caustic or abrasive cleaning agents or scouring sponges for cleaning. 
These may damage the surface.

Clean the device and the used accessories immediately after each use to prevent germ 
formation. Do not allow any food residues to dry on.
1.  Do not immerse the device in water or other liquids! If necessary, clean the housing 

with a damp cloth and a little detergent. 

2.  Pull out and empty the drip tray (

19

).

3.  If the cover with sealing ring (

15

) should be dirty, rinse it with detergent and warm 

water.

4.  Clean the inner pot (

1

), measuring cup (

2

), steaming insert (

3

), rice spoon (

4

) and 

ladle (

5

) with detergent and warm water or in the dishwasher.

5.  Allow all parts to dry completely or dry them with a tea towel.

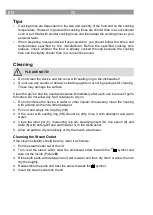
Cleaning the Steam Outlet

If the steam outlet (

8

) should be dirty, clean it as follows: 

1.  Pull the steam outlet out of the lid.
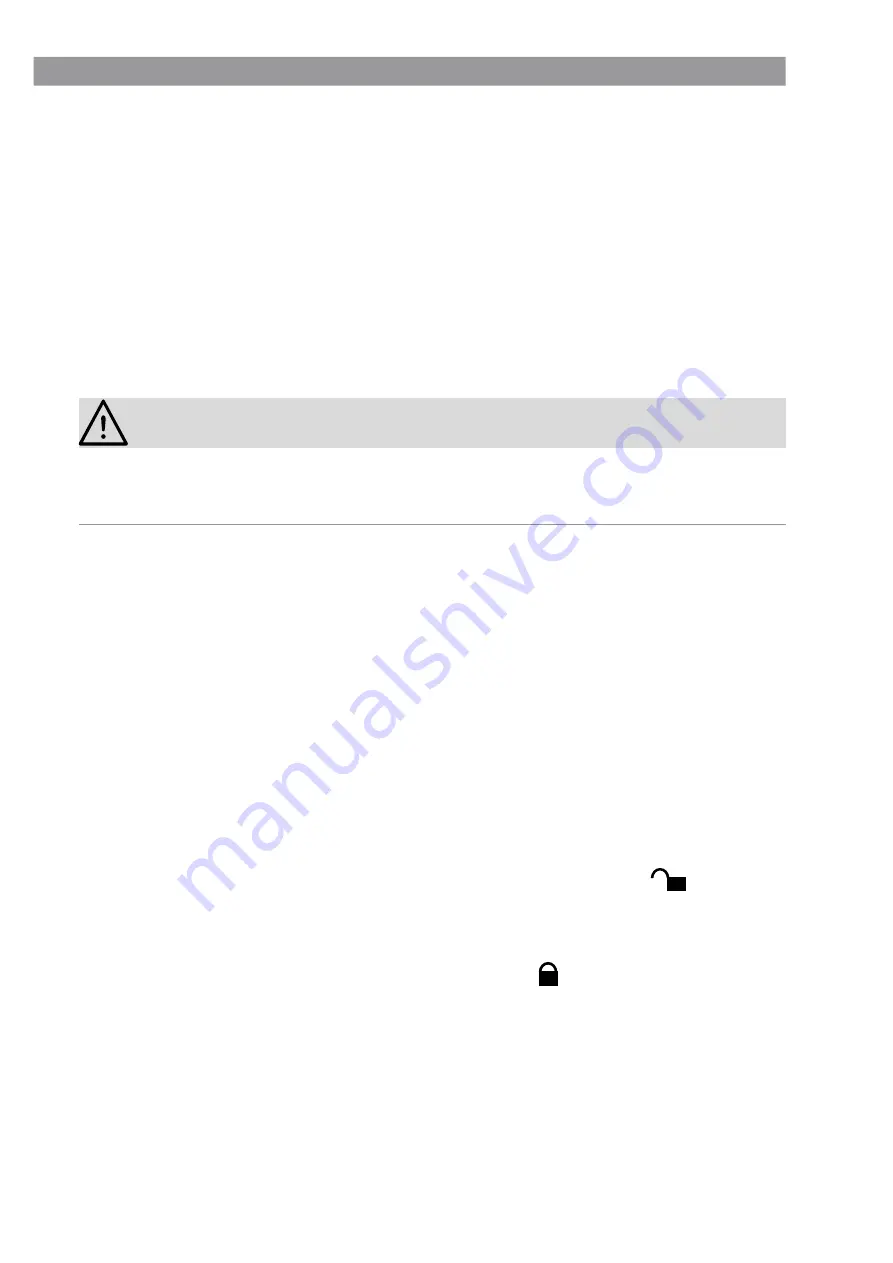
2.  Turn over the steam outlet, twist the embossed arrow towards the 

 symbol and 

take out the inside (Picture 

B

). 

3.  Rinse both parts with detergent and warm water and then dry them or allow them to 

dry thoroughly.

4.  Reassemble the parts and twist the arrow towards the   symbol. 
5.  Insert the steam outlet into the lid.

Summary of Contents for KF-T50

Page 1: ..._________________________ 10 Technische Daten __________________________________________________ 11 Fehlerbehebung ___________________________________________________ 11 Entsorgung _______________________________________________________ 12 Erklärung der Symbole Gefahrenzeichen Diese Symbole zeigen Verletzungsgefahren z B durch Strom oder Feuer an Die dazugehörenden Sicherheits hinweise aufmerksam ...

Page 2: ...6 Heizplatte auf dem Boden des Gar raums 17 Garraum 18 Lüftungsöffnungen auf der Unterseite 19 Auffangschale für Kondenswasser 20 Deckel Bedienfeld Bild E 21 START Taste einschalten 22 Leuchten Anzeige des aktiven Programms 23 MENU Taste Programmauswahl 24 STARTVORWAHL Taste Timer aufrufen 25 MINUTEN Taste bei der Programmauswahl zurück springen Temperatur verrin gern Minuten erhöhen 26 STUNDEN Tast...

Page 3: ...verursachen Dieses Gerät darf nicht von Kindern im Alter zwischen 0 und 8 Jahren benutzt werden Dieses Gerät kann von Kindern ab 8 Jahren und darüber benutzt werden wenn sie ständig beauf sichtigt werden Dieses Gerät kann von Personen mit reduzierten physischen sensorischen oder mentalen Fähigkeiten oder Mangel an Erfah rung und oder Wissen benutzt werden wenn sie beaufsichtigt oder bezüglich des ...

Page 4: ...Handgriffen sofern vorhanden aufgestellt werden um das Verschütten der heißen Flüssigkeit zu vermeiden Das Gerät und die Anschlussleitung niemals in Wasser oder andere Flüssigkeiten eintauchen und sicherstellen dass diese nicht ins Wasser fallen oder nass werden können Keine Flüssig keiten direkt in den Garraum gießen Es besteht Stromschlagge fahr durch Wasser Das Gerät ist bei nicht vorhandener Au...

Page 5: ...n dass diese nicht verstopft sind Darauf achten dass öl und fettreiche Speisen nicht überhitzt werden Das Gerät während des Betriebes nicht abdecken um einen Gerätebrand zu vermeiden Im Brandfall Nicht mit Wasser löschen Flammen mit einer Löschdecke oder einem geeigneten Feuerlöscher ersticken WARNUNG Verletzungsgefahr Kinder und Tiere von Kunststoffbeuteln und folien fernhalten Es besteht Ersti ck...

Page 6: ...eißen Flächen z B des Gerätes in Berührung kommt Niemals Gegenstände auf das Gerät oder die Anschlussleitung stellen Nur Original Zubehörteile des Herstellers verwenden um die Funktionsweise des Gerätes nicht zu beeinträchtigen und eventuelle Schäden zu verhindern Vor dem ersten Gebrauch 1 Eventuelle Folien Aufkleber oder Transportschutz vom Gerät abnehmen Niemals das Typenschild und eventuelle Wa...

Page 7: ...er den Reislöffel noch andere Küchenhelfer im eingeschal teten Gerät liegen lassen Das Gerät insbesondere den Innentopf und die Heizplatte sauber halten Die Ver unreinigungen könnten anbrennen und ggf zu Störungen führen Vorbereitungen 1 Das Gerät auf die Küchenzeile oder eine andere trockene saubere ebene und hitze beständige Arbeitsfläche stellen Für ausreichend Freiraum zu allen Seiten sorgen 2 D...

Page 8: ...opfsymbol blinkt Programm wählen 1 Das Bedienfeld durch Drücken einer beliebigen Taste aktivieren 2 Die MENÜ Taste 23 so oft drücken bis das Feld des gewüschten Programms mar kiert ist Alternativ kann man nach dem Betätigen der MENÜ Taste mit den Tasten STUNDEN und MINUTEN zwischen den Programmen wechseln Programm Temperatur ca Garzeit Reis 115 130 C ca 1 h Braten 153 158 C ca 1 h Suppe 93 96 C ma...

Page 9: ...ste drü cken um sie zu beenden 2 Den Deckel öffnen 3 Den Innentopf an seinen Griffen greifen und aus dem Garraum herausnehmen auf einer hitzebeständigen Unterlage abstellen oder die Speise direkt servieren 4 Nach dem Gebrauch den Netzstecker aus der Steckdose ziehen 5 Das Gerät sowie Zubehör abkühlen lassen und danach reinigen siehe Kapitel Rei nigung Warmhaltefunktion Soll die Speise nicht gleich s...

Page 10: ...der Scheuer schwämme verwenden Diese können die Oberfläche beschädigen Das Gerät und das verwendete Zubehör sofort nach jedem Gebrauch reinigen um Keimbildung vorzubeugen Keine Lebensmittelreste antrocknen lassen 1 Das Gerät nicht in Wasser oder andere Flüssigkeiten eintauchen Das Gehäuse bei Bedarf mit einem feuchten Tuch und etwas Spülmittel reinigen 2 Die Auffangschale 19 herausziehen und leeren ...

Page 11: ...uchen ein elektrisches Gerät eigenständig zu reparieren Problem Mögliche Ursache Behebung Das Gerät funktioniert nicht Das Display 9 geht nicht an Der Netzstecker steckt nicht richtig in der Steckdose Den Sitz korrigieren Die Steckdose ist defekt Eine andere Steckdose aus probieren Es ist keine Netzspannung vorhanden Die Sicherung des elektrischen Verteilers Sicherungskasten überprüfen Der Überhit...

Page 12: ...en keine Werte ange zeigt Das Gerät wurde gerade benutzt und die Temperatur im Innentopf ist zu hoch Den Deckel öffnen und das Geräteinnere etwas abkühlen lassen Dann erneut versu chen Es kommt Qualm aus dem Gerät oder es lässt sich ein unan genehmer Geruch feststellen Das Gerät ist verschmutzt Die Anweisungen des Kapitels Reinigung befolgen Das Gerät wird zum ersten Mal verwendet Eine Geruchsentwi...

Page 13: ..._________________________________________ 22 Technical Data ____________________________________________________ 23 Troubleshooting____________________________________________________ 23 Disposal__________________________________________________________ 24 Explanation of the Symbols Danger symbols These symbols indicate risks of injury e g from electricity or fire Read the asso ciated safety notice...

Page 14: ... of the cooking chamber 17 Cooking chamber 18 Ventilation openings on the bottom 19 Drip tray for collecting condensation 20 Lid Control Panel Picture E 21 START button Switch on 22 Lights Display of the active programme 23 MENU button Programme selection 24 STARTVORWAHL start preselection button Call up timer 25 MINUTEN minutes button Skip back when selecting programme reduce temperature increase...

Page 15: ...d 8 and above if they are constantly supervised This device may be used by people with reduced physical sensory or mental abilities or a lack of experience and or knowledge if they are supervised or have received instruction on how to use the device safely and have understood the dangers resulting from failure to comply with the relevant safety precautions The device and the connecting cable are t...

Page 16: ...quids directly into the cooking chamber There is a danger of electric shock from water The device must always be disconnected from the mains power when it is not being supervised and before assembly disassembly or cleaning Do not make any modifications to the device Also do not replace the connecting cable yourself If the device the connecting cable or the accessories of the device are damaged they...

Page 17: ...le does not represent a tripping hazard It should not hang down from the surface on which the device is placed in order to prevent the device from being pulled down Hot steam can escape from the device during operation and when opening the lid You should therefore keep your head and hands out of the danger zone There is a danger of scalding from heat hot steam or condensation NOTICE Risk of Damage...

Page 18: ...ood in it see the Use chapter 3 Thoroughly rinse all accessories Follow the instructions in the Cleaning chapter to do this Safety Features Button Lock If no button is pressed for 20 seconds a button lock is activated and the display be comes darker To unlock the buttons move a finger over the bottom row of buttons Overheating Protection The device has overheating protection If the internal tempera...

Page 19: ...inner pot must be positioned in the recesses at the side of the device 4 Fully unwind the connecting cable 6 and connect it to the mains connecting socket 10 5 Plug the mains plug into an easily accessible plug socket The control panel 12 switches on 6 Place the food that is to be prepared in the inner pot For steaming pour water or broth into the inner pot and insert the steaming insert 3 7 Close...

Page 20: ...ake sure prior to serving that meat and poultry in particular is fully cooked through It may be necessary to adjust the temperature and cooking time depending on the size and weight of the food 3 To change the cooking temperature press the MANUELL TEMPERATUR manual temperature button 28 and use the STUNDEN hours button 26 and MINUTEN minutes button 25 to set the temperature you want 4 To change th...

Page 21: ...is kept warm at a temperature of 68 C for no more than 24 hours To switch off the keep warm function press the WARMHALTEN ABBRECHEN keep warm cancel button again Timer Function The device has a timer which is used to start the cooking process after a specified time after no more than 24 hours The timer is activated as follows 1 Connect up the device as described in the Use chapter fill it with food a...

Page 22: ...he used accessories immediately after each use to prevent germ formation Do not allow any food residues to dry on 1 Do not immerse the device in water or other liquids If necessary clean the housing with a damp cloth and a little detergent 2 Pull out and empty the drip tray 19 3 If the cover with sealing ring 15 should be dirty rinse it with detergent and warm water 4 Clean the inner pot 1 measuri...

Page 23: ...artment Do not attempt to repair an electrical device yourself Problem Possible cause Fix The device does not work The display 9 does not go on The mains plug is not inserted correctly in the plug socket Correct the fit The plug socket is defective Try another plug socket There is no mains voltage Check the fuse of the electrical distributor fuse box The overheating protection has been triggered Pu...

Page 24: ...e device has just been used and the temperature in the inner pot is too high Open the lid and allow the in side of the device to cool down a little Then try again Smoke emerges from the device or an unpleasant smell can be detected The device is dirty Follow the instructions in the Cleaning chapter The device is being used for the first time A smell often develops when new devices are first used The...

Page 25: ...stiques techniques __________________________________________ 35 Dépannage _______________________________________________________ 36 Mise au rebut______________________________________________________ 37 Explication des symboles Symboles de danger ces sym boles signalent des risques de blessure par ex par l électricité ou par le feu Lisez et observez attentivement les consignes de sécurité corres...

Page 26: ...uisson 18 Orifices de ventilation en face infé rieure 19 Récipient de récupération de l eau de condensation 20 Couvercle Panneau de commande Illustration E 21 Touche START démarrage mise en marche 22 Témoins affichage du programme actif 23 Touche MENU menu sélection du programme 24 Touche STARTVORWAHL présélection du démarrage sélection de la minuterie 25 Touche MINUTEN minutes retour en arrière dans...

Page 27: ...doit pas être utilisé par des enfants de moins de 8 ans Cet appareil peut être utilisé par des enfants à partir de 8 ans et plus s ils sont sous surveillance permanente Cet appareil peut être utilisé par les personnes dont les capacités physiques sensorielles ou mentales sont réduites ou manquant d expérience et ou de connaissances lorsqu elles sont sous surveillance ou qu elles ont été instruites...

Page 28: ...e de ses poignées si existantes de sorte à éviter que le liquide chaud qu il contient ne se renverse Ne plongez jamais l appareil et le cordon de raccordement dans l eau ou tout autre liquide et assurez vous que ceux ci ne risquent pas de tomber dans l eau ou d être mouillés Ne versez aucun liquide directement dans l espace de cuisson Risque d électrocution au contact de l eau L appareil doit touj...

Page 29: ...sez aucun objet dans les orifices d aération de l appareil ni dans la soupape d évacuation de la vapeur et assurez vous que ces derniers ne sont pas obstrués Veillez à ce que les aliments riches en huile et en graisse ne soient pas surchauffés Afin d éviter tout risque d incendie de l appareil ne le couvrez pas lorsqu il est en cours de fonctionnement En cas d incendie n éteignez pas avec de l eau Ét...

Page 30: ...ieur exclusivement au sein de l appareil Ne le chauffez jamais sur une plaque de cuisson dans un four etc N exposez pas l appareil à des températures extrêmes à une humidité prolongée ou au rayonnement direct du soleil et veillez à ce qu il ne soit pas soumis à des chocs Conservez l appareil dans un endroit sec sur une plage de température allant de 0 à 40 C Veillez à ce que le cordon de raccordeme...

Page 31: ...ce après vente Veillez en présence de liquides à ne pas dépasser le repère supérieur au sein du bac intérieur afin que rien ne déborde Le bac intérieur au sein de l appareil devient brûlant Saisissez le uniquement par les poignées et posez le sur un support résistant à la chaleur Ne mettez pas dans l appareil d aliments sous film ou enveloppés dans des poches en plastique Ne laissez pas dans l appar...

Page 32: ...nutes 25 réglez la température de votre choix 4 Appuyez sur la touche KOCHZEIT temps de cuisson 27 pour passer au réglage de l heure 5 À l aide des touches STUNDEN heures et MINUTEN minutes réglez le temps de cuisson de votre choix 6 Lancez la cuisson en appuyant sur la touche START démarrage 21 Le temps de cuisson restant s affiche à l écran 9 et le symbole du bac clignote Sélection du programme 1 ...

Page 33: ... sur la touche KOCHZEIT temps de cuisson 27 réglez le temps de cuisson de votre choix à l aide des touches STUNDEN heures ou MINUTEN minutes 5 Une fois la température et le temps de cuisson programmés appuyez sur la touche START démarrage 21 pour lancer la cuisson Le symbole du bac clignote À l écran s affiche pour les programmes REIS riz BRATEN rôti SUPPE soupe et KUCHEN gâteau le temps de cuisson ...

Page 34: ...cher dans 30 minutes 3 À l aide des touches STUNDEN heures et MINUTEN minutes ajustez l heure de démarrage 4 La minuterie s active à l aide de la touche START démarrage À l écran le symbole STARTVORWAHL présélection du démarrage s allume et le symbole du bac clignote À l heure programmée l appareil s enclenche automatiquement et STARTVORWAHL présélection du démarrage disparaît de l écran Pour désa...

Page 35: ... au lave vaisselle 5 Laissez sécher complètement toutes les pièces ou essuyez les avec un torchon Nettoyage de la soupape d évacuation de la vapeur Si la soupape d évacuation de la vapeur 8 est encrassée nettoyez la de la façon suivante 1 Enlevez la soupape d évacuation de la vapeur du couvercle 2 Retournez la soupape tournez la flèche gravée vers le symbole et extrayez en l élément interne illustr...

Page 36: ... déclenché au tableau électrique boîte à fusibles Trop d appareils sont bran chés sur le même circuit électrique Réduisez le nombre d appareils sur le circuit électrique Les aliments ne sont pas cuits de façon uniforme Différents aliments nécessi tant des temps de cuisson différents ont été cuits en même temps Placez en premier dans l ap pareil les aliments nécessitant un temps de cuisson plus long ...

Page 37: ...ppareils neufs L odeur de vrait disparaître après plusieurs utilisations de l appareil Mise au rebut Jeter le matériel d emballage de manière écologique via le tri des ma tières recyclables L appareil est assujetti à la directive européenne 2012 19 UE applicable aux déchets d équipements électriques et électroniques DEEE L appareil ne doit pas être jeté avec les ordures ménagères et doit être mis ...

Page 38: ...______________________ 47 Technische gegevens _______________________________________________ 48 Storingen verhelpen ________________________________________________ 49 Afvoeren _________________________________________________________ 50 Uitleg van de symbolen Gevaarsymbolen deze symbolen geven verwondingsgevaren aan bijv door stroom of vuur De bijhorende veiligheidsaanwijzingen aandachtig doorle...

Page 39: ... gaarruimte 17 Gaarruimte 18 Ventilatieopeningen aan de onderzijde 19 Opvangschaal voor condenswater 20 Deksel Bedieningspaneel Afbeelding E 21 START start toets inschakelen 22 Lampjes weergave van het actieve programma 23 MENÜ menu toets programmakeuze 24 STARTVORWAHL voorselectie van de starttijd toets timer oproepen 25 MINUTEN minuten toets bij de programmakeuze terugspringen temperatuur vermin...

Page 40: ... gebruikt door kinderen in de leef tijd tussen 0 en 8 jaar Dit apparaat kan door kinderen vanaf 8 jaar en ouder worden gebruikt wanneer zij continu onder toe zicht staan Dit apparaat kan worden gebruikt door personen met beperkte lichamelijke sensorische of geestelijke vermogens of kinderen die niet beschikken over ervaring en of kennis wanneer zij on der toezicht staan en instructies hebben gekre...

Page 41: ...n aanwezig worden opgesteld om morsen van de hete vloeistof te voorkomen Dompel het apparaat en het aansluitsnoer nooit in water of an dere vloeistoffen en zorg ervoor dat deze niet in het water kun nen vallen of nat kunnen worden Geen vloeistoffen direct in de gaarruimte gieten Er bestaat gevaar van een elektrische schok door water Het apparaat moet altijd van het stroomnet worden losgekop peld als...

Page 42: ...itlaat van het apparaat steken en erop letten dat deze niet zijn verstopt Let erop dat olie en vethoudende etenswaren niet worden oververhit Dek het apparaat tijdens de werking niet af om ontbranden van het apparaat te voorkomen Bij brand blus niet met water Doof vlammen met een blusdeken of een geschikte brandblusser WAARSCHUWING Gevaar voor letsel Kinderen en dieren buiten bereik houden van plas...

Page 43: ...randen wordt ge legd en dat het niet in aanraking komt met hete oppervlakken bijv van het apparaat Plaats nooit zware voorwerpen op het apparaat of het aansluitsnoer Alleen originele toebehoren van de fabrikant gebruiken om de werking van het appa raat niet te benadelen en om eventuele schade te voorkomen Vóór het eerste gebruik 1 Eventuele folie stickers of transportbeveiliging van het apparaat v...

Page 44: ... noch ander keukengerei in het ingeschakel de apparaat laten liggen Het apparaat met name de binnenpan en de verwarmingsplaat schoonhouden De verontreinigingen zouden kunnen aanbranden en eventueel tot storingen kunnen lei den Voorbereidingen 1 Het apparaat op het keukenwerkblad of een ander droog schoon vlak en hittebe stendig werkblad plaatsen Daarbij voldoende vrije ruimte naar alle kanten toe ...

Page 45: ...1 Het bedieningspaneel activeren door indrukken van een willekeurige toets 2 De MENÜ menu toets 23 zo vaak indrukken tot het veld van het gewenste pro gramma is gemarkeerd Alternatief kunt u na het indrukken van de MENÜ menu toets met de toetsen STUNDEN uren en MINUTEN minuten wisselen tus sen de programma s Programma Temperatuur ca Gaartijd Reis rijst 115 130 C ca 1 h Braten gebraad 153 158 C ca ...

Page 46: ...treken gaartijd en bij de overige programma s de resterende gaartijd weergegeven Na afloop van de gaartijd Na afloop van de ingestelde gaartijd wordt het apparaat uitgeschakeld en klinkt er een signaal In aansluiting op enkele programma s wordt automatisch de warmhoudfunctie geactiveerd zie onderstaand Op het display wordt daarbij bb weergegeven 1 Is de warmhoudfunctie geactiveerd de WARMHALTEN ABBR...

Page 47: ... zijn afhankelijk van de grootte en de hoeveelheid van de levensmiddelen en van de gaartemperatuur Over het algemeen zijn de gaartijden echter korter dan in een gewone oven of pan Met kortere gaartijden beginnen en de gaartijden achteraf aanpassen aan uw persoonlijke smaak Bij de bereiding van industrieel geproduceerde diepvriesproducten moet u zich rich ten naar de tijds en temperatuurgegevens va...

Page 48: ...r het symbool draaien en het binnenste eruit halen afbeelding B 3 Beide delen met afwasmiddel en warm water afspoelen en grondig afdrogen resp laten drogen 4 De delen weer monteren en de pijl naar het symbool draaien 5 De stoomuitlaat in de deksel plaatsen Technische gegevens Artikelnummer 04820 Modelnummer KF T50 Spanningsvoorziening 220 240V 50 60Hz Vermogen 860W Elektrische veiligheidsklasse I ...

Page 49: ...len neem dan contact op met de klantenservice De zekering in de zekeringskast is ge sprongen Te veel apparaten op dezelf de stroomkring aangesloten Het aantal apparaten in de stroomkring verminderen De levensmiddelen zijn niet gelijkmatig gegaard Er werden verschillende levensmiddelen met uiteen lopende gaartijden gelijktijdig bereid Levensmiddelen met een langere gaartijd eerst in het apparaat do...

Page 50: ...araten De geur moet verdwijnen nadat het apparaat meerdere keren werd gebruikt Afvoeren Verwerk het verpakkingsmateriaal op milieuvriendelijke wijze en breng dit naar een recyclepunt Het apparaat valt onder de Europese richtlijn 2012 19 EU voor afgedankte elek trische en elektronische apparatuur Waste Electrical and Electronical Equipment WEEE Het apparaat mag niet bij het normale huisafval worden...

Page 51: ......

Page 52: ......

Reviews: