These instructions and the images herein are proprietary. Any unauthorized reproduction is prohibited.
GVW-RAINFLY
Wasser-Stopper Pop-Top Rainfly [Vanagon]
Page 2 of 3
GoWesty Camper Products
•
1119 Los Olivos Ave, Los Osos, CA 93402
•
888-469-3789
•
www.gowesty.com
Rear Strap Attachment
4.
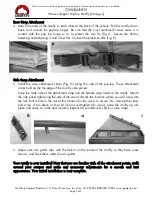
Attach the ends of the rainfly to each other at the back of the vehicle. Pull the rainfly down,
back, and around the pop-top hinges. Be sure that the vinyl reinforced corner seam is in
contact with the pop top hinge so as to protect the rain fly (Fig J). Secure the Velcro,
tweaking and adjusting it until it lays flat. Connect the plastic buckle (Fig. K).
Side Snap Attachment
5.
Install the snap attachment straps (Fig. G) along the side of the pop-top. These attachment
straps hold up the top edge of the rain fly side panels.
Snap the male side of the attachment strap into the female snap head on the rainfly. Stretch
the side panel tight along the side of the van and mark the location where you will screw into
the rail. Drill a hole in the rail at this location for the screw to secure into. Unsnap the strap,
and screw it into place on the rail (
do not overtighten this screw). Snap the rainfly up into
place and move on to the next location. Repeat this procedure for all four snap straps.
6.
Adjust side rain gutter clips with the Velcro on the inside of the rainfly so they have some
tension, and hook them under the rain gutter.
Your rainfly is now installed! Now that you are familiar with all the attachment points, walk
around your camper and make any necessary adjustments for a smooth and taut
appearance. Your initial installation is now complete.


