background image

5.  

ASSEMBLY STEPS


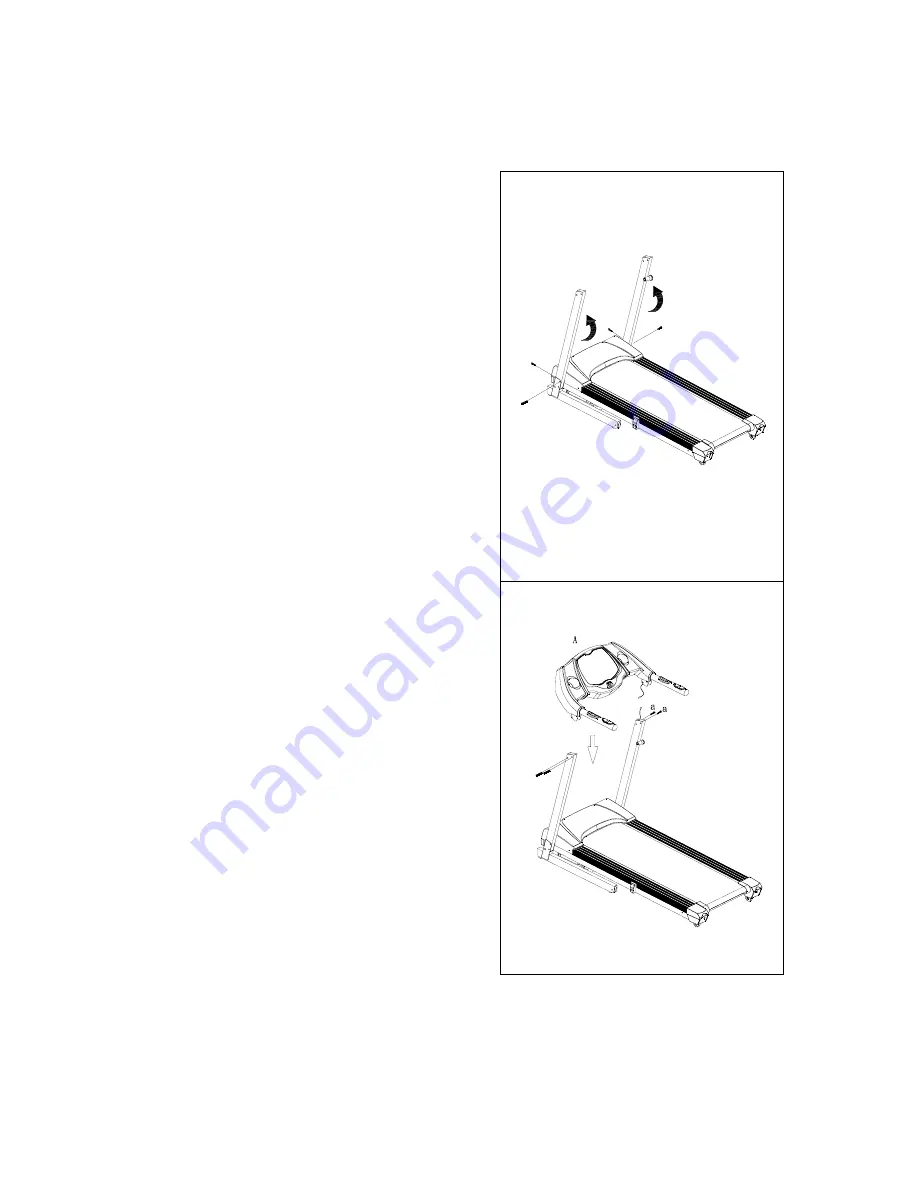
Two people are required to finish the assembly steps. (Please 

pay attention to follow assembly procedure , to avoid injury.) 


1. Put up left and right Uprights and tighten with Allen 

Bolt (b) (a). 


a

a

b

b

2. Put Computer Console (A) on the Upright and connect 

Control Wires between Handrail and Upright. Fix 

Computer Console with Allen Bolt (a).   


a

a


Summary of Contents for TREADMILL 201 - Journey

Page 1: ...TREADMILL 201 Journey OWNER S MANUAL...

Page 2: ...INDEX 1 OVERVIEW DRAWING 3 2 IMPORTANT SAFETY INSTRUCTION 4 3 GROUNDING INSTRUCTION 5 4 PRE ASSEMBLY CHECK LIST 6 5 ASSEMBLY STEPS 7 6 MAINTENANCE 9 7 COMPUTER OPERATION INSTRUCTION 10...

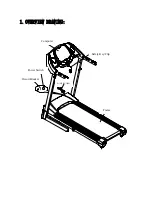
Page 3: ...1 OVERVIEW DRAWING Computer Safety Key Clip POWER CORD Power Switch Circuit Breaker Frame...

Page 4: ...not carry this appliance by supply cord or use cord as a handle 7 Keep the cord away from heated surfaces 8 Never operate the appliance with the air openings blocked Keep the air openings free of lin...

Page 5: ...he plug provided with the product if it will not fit the outlet have a proper outlet installed by a qualified electrician This product is for use on a nominal 220V 240V circuit and has a grounding plu...

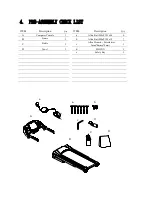
Page 6: ...c d e B C D ITEM Description Qty ITEM Description Qty A Computer Console 1 a Allen Bolt M8xP1 25x40 6 B Frame 1 b Allen Bolt M8xP1 25x15 2 C Bottle 1 c Allen Wrench Screwdriver 5mm 70mmx70mm 1 D Towe...

Page 7: ...ase pay attention to follow assembly procedure to avoid injury 1 Put up left and right Uprights and tighten with Allen Bolt b a a a b b 2 Put Computer Console A on the Upright and connect Control Wire...

Page 8: ...out the POP Pin as the direction shown in the drawing do not take your hands away until the treadmill is slowly drop to the ground Before you change to angle fold the treadmill according to the steps...

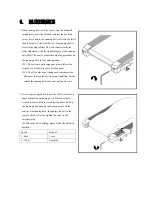
Page 9: ...important please follow the steps above to deal in the case of it happens Ps 2 The off center issue is happened sometime when differ user is using the unit in normal condition Just be careful the runn...

Page 10: ...n under START READY position under this situation user can hold the grip pulse sensor to detect heart rate value directly It will show the relationship that whether the amount of the running is adequa...

Page 11: ...enter other functions If the safety key clip is not placed in the recess of the console at this time all windows will display which means the treadmill has not entered start ready status During exerc...

Page 12: ...will stop blinking 6 3 After the grade is selected center TIME window starts to blink Press to change time After the time you need is set press to confirm TIME window will stop blinking Time pre set...

Page 13: ......

Page 14: ......

Page 15: ......

Page 16: ......

Page 17: ......

Page 18: ......

Reviews: