16
(ID: 040708)
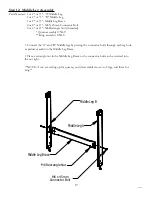
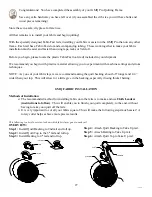
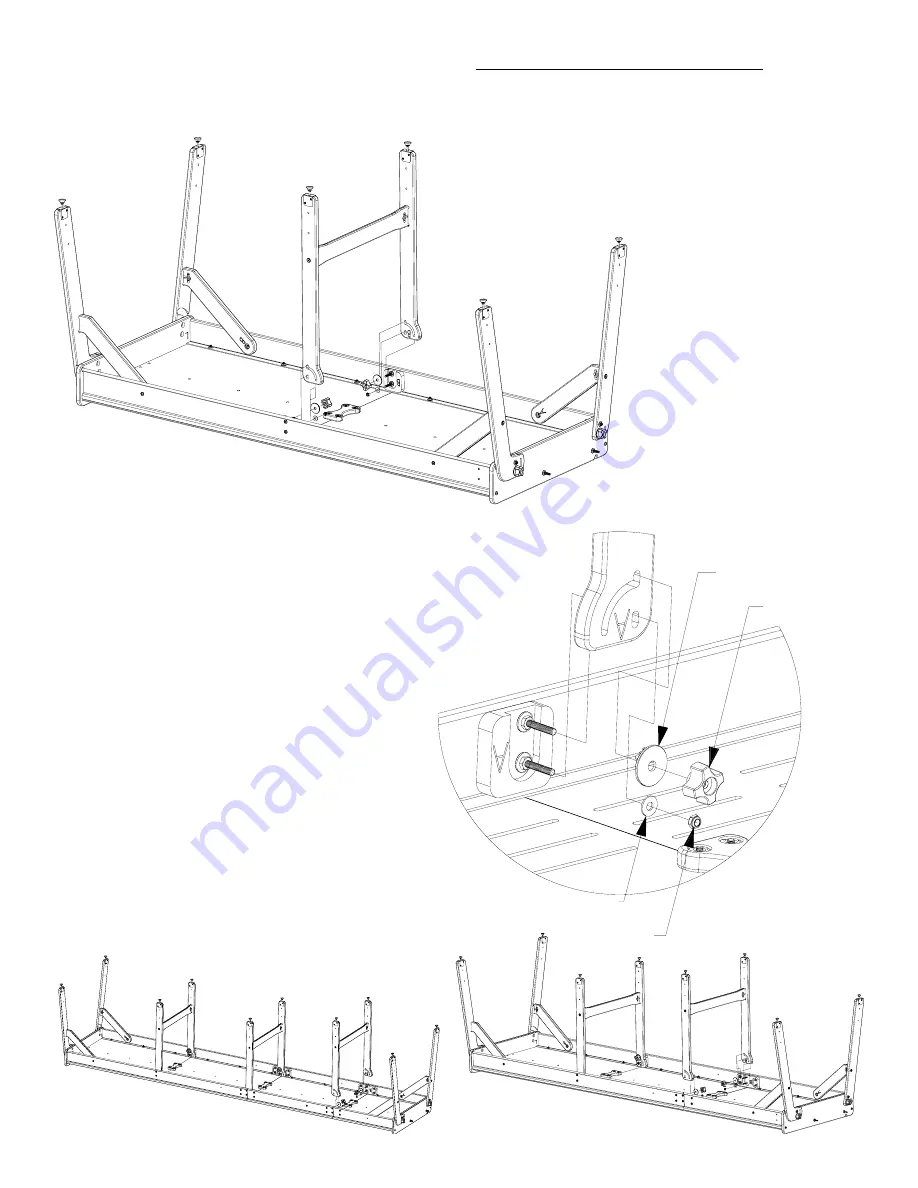
1/4" Plastic Knob
1-1/4" Fender Washer
1/4" Nylock Nut
1/4" Flat Washer
NOTe: This illustration shows the Middle Leg
Brace assembled to the Middle Legs. Do this
AFTeR you have installed your Middle Legs
to the frame (Step 13).
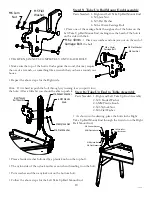
Step 11: Middle Leg Installation
Parts Needed: 1 or 2* or 3**- Middle Leg (assembled)
2 or 4* or 6**- 6MM Plastic Knob
2 or 4* or 6**- M8 Fender Washer
2 or 4* or 6**- M6 Nylock Nut
2 or 4* or 6**- M6 Flat Washer
*Queen Assembly ONLY
**King Assembly ONLY
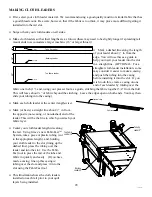
• Make sure your GMQ
Pro is still upside down, as
illustrated left.
• Put the “B” side of your
Middle Leg on the bolts,
which are on the front of
your frame. **Don’t worry
about putting side “A” on
yet.**
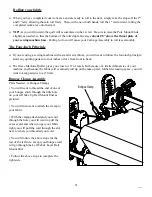
• You will have to push the “A” Side in enough to get it on the bolts on the
back side of your frame.
**It is okay to tap the leg into place with your hand, it will be a tight
fit when you start.**
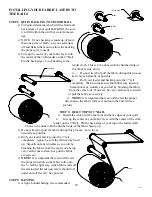
• The bolt to the bottom, closest to the table, is where you
will put a flat washer followed by a nylock nut.
**NOTe!! Leave all the nylock nuts loose enough to
slide in the joint, and loose enough to allow the washer
to turn in your fingers!**
• On the top bolt you will put a fender washer and then a
plastic knob.
• You will follow the above steps to put on your other legs
for Queen or King.
M6 Flat Washer
M6 Nylock Nut
6MM Plastic
Knob
M8 Fender Washer


