18
(ID: 040708)
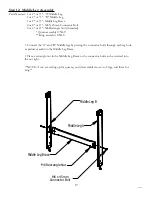
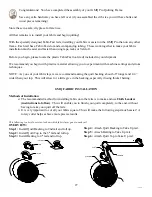
1/4" X 1-1/2"
Carriage Bolt
3/16" Flat Washer
1/4" Jam Nut
1/4" Jam Nut
3/16" Flat Washer
1/4" X 1-1/2"
Carriage Bolt
Left Take Up
Side Assembly
1/4" Plastic Knob
1-1/4" Fender Washer
1/4" Plastic Knob
Right Take Up
Side Assembly
1-1/4" Fender Washer
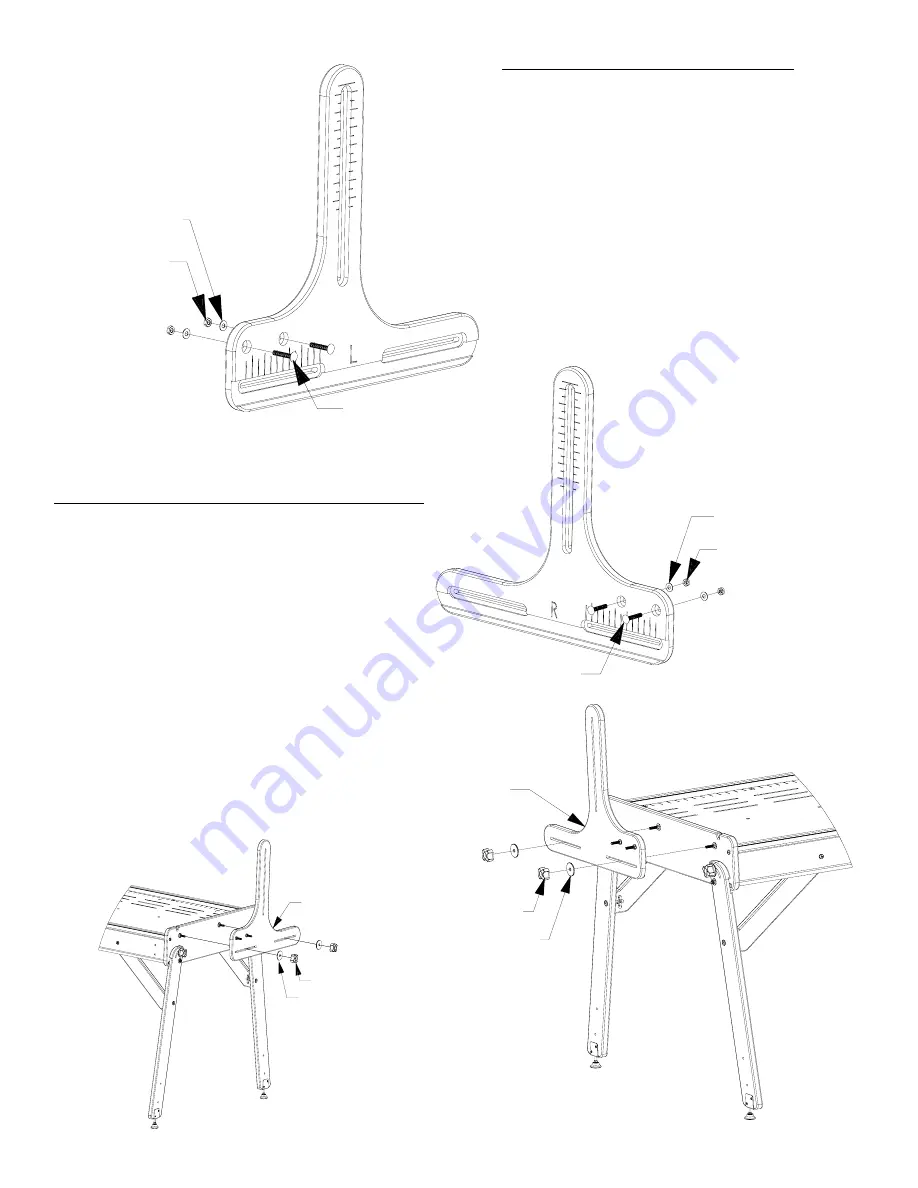
Step 13: Take Up Sides Assembly
Parts Needed: 1- Right and Left Take Up Side
4- M6 Jam Nut
4- M5 Flat Washers
4- M6 x 40mm Carriage Bolt
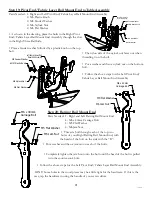
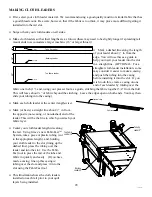
• Place one of the carriage bolts through each of the holes
on the Left Take Up Side, making sure the head of the
bolt is on the side with the L.
• Place one washer and one jam nut on the end of
the bolt.
• TIGHTeN JAM NUTS COMPLeTeLY
ONTO eACH BOLT.
**Make sure the top of the bolt
is flush against the wood, this will
require the use of a wrench.**
• Follow the above steps to
complete the Right Take Up Side.
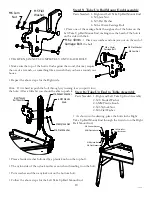
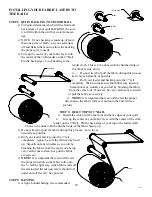
• Make sure your table is right side up, if it is not
that way already, as pictured left.
• Take your Left Take Up Side and place it on the
bolts that stick out of your Left Frame end, (as
pictured left).
• Place a fender washer on the end of each of the
bolts.
• Screw a plastic knob on the end of each of the
bolts.
• Follow the above instructions to attach the Right
Take Up Side to the Table.
Step 14: Take Up Sides to Table Assembly
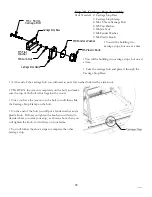
Parts Needed: 1- Right and Left Take Up Side (assembled)
4- 6MM Plastic Knobs
4- M8 Fender Washers
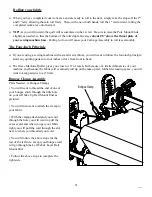
M6 Jam Nut
M5 Flat Washer
M6 x 40mm
Carriage Bolt
M5 Flat Washer
M6 Jam Nut
M6 x 40mm
Carriage Bolt
M8 Fender Washer
6MM Plastic Knob
M8 Fender Washer
6MM Plastic Knob


