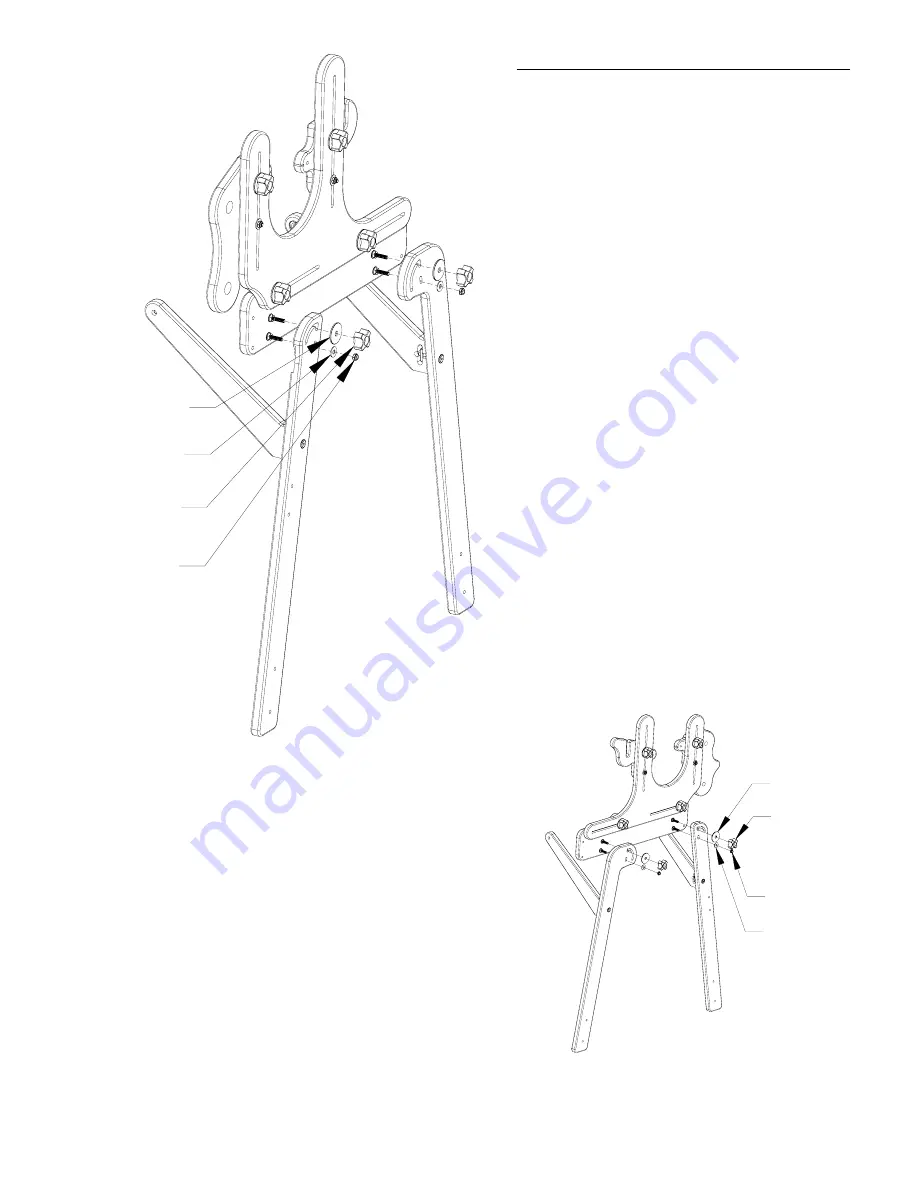
13
1-1/4" Fender Washer
1/4" Flat Washer
1/4" Nylock Nut
1/4" Plastic Knob
1-1/4" Fender Washer
1/4" Plastic Knob
1/4" Flat Washer
1/4" Nylock Nut
Left Frame End
Outside View
• Place a fender washer on the top bolt, and then thread and tighten
the plastic knob onto the bolt.
• Place the flat washer on the bottom bolt, and then tighten the
nylock nut.
• Make sure nylock nuts are loose enough to allow the washer to turn
in your fingers.
• Follow the above steps to complete the left side.
• The nylon side of the nylock nut faces out when threading it on
the bolt.
• NOTE!! Leave all the nylock nuts loose enough to slide in the
joint, and loose enough to allow the washer to turn in your fingers!
Right Frame End
Outside View
• Put the Right Front Side Leg on the pre-
installed bolts on the Right Frame End (below
the Fabric Layer Rail Mount End).
• Place a fender washer on the top bolt, and
then thread and tighten the plastic knob onto
the bolt.
• Place the flat washer on the bottom bolt,
and then tighten the nylock nut.
• Make sure nylock nuts are loose enough to
allow the washer to turn in your fingers.
• Put the Right Back Side Leg on the pre-
installed bolts on the Right Frame End (below
the Take Up Rail Mount End).
Step 8: Legs to Frame End Assembly
Parts Needed: 1- Right and Left Frame End
1- Right and Left Front Side Leg
1- Right and Left Back Side Leg
4- 1/4” Nylock Nut
4- 1/4” Flat Washer
4- 1- 1/4” Fender Washer
4- 1/4” Plastic Knob


