Using the parts list as a reference, take the parts out of the box and make sure your package is complete.
(If there is something missing or damaged, do not call the store or dealer from whom you purchased the product.
Contact The Grace Company directly–1-800-264-0644).
Tools Needed
To assemble your frame, you will need the following common tools:
1. One ½" wrench
2. One 7/16" wrench (A combination or socket wrench is preferable)
3. Phillips Head Screw Driver
4. Wing Grip Tool (provided)
5. Alan Wrench (provided)
Note: To help you distinguish between wood parts, all Left Side parts are marked with an “L” grooved into the wood on the inside of
the part. Right side parts are also marked with an “R” on the inside. Also, before beginning collect and separate the all the
Carriage Bolts and sort out the 2 shorter ones for step 3.
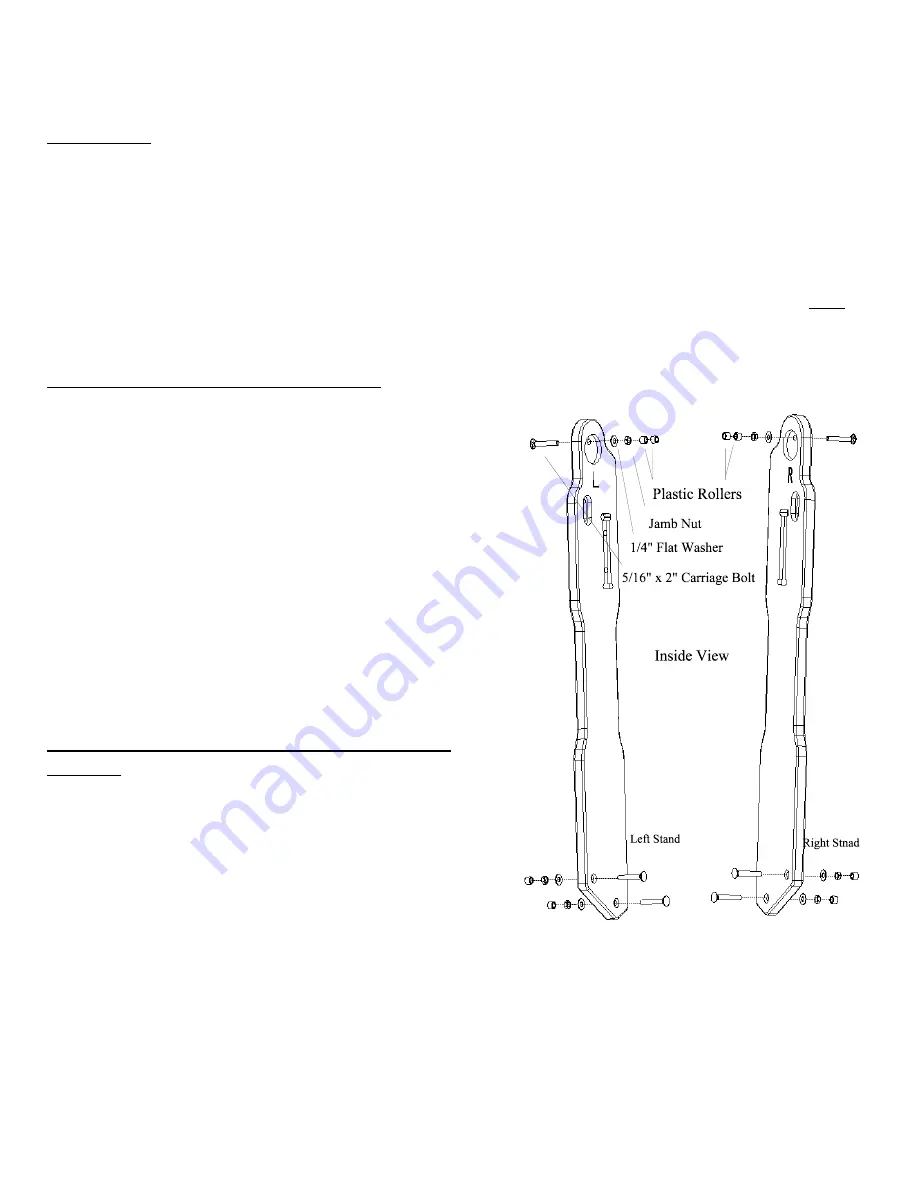
Step 1: Hardware to Diagonal Stands
Parts Needed: Right and Left Diagonal Stands
6 - 5/16"x2" Carriage Bolts (longer)
6 - Jamb Nuts
6 - 1/4" Smaller Flat Washers
8 - Plastic Rollers
<
Note direction carriage bolt goes through the part.
<
Tighten jamb nuts on carriage bolts to pull the square
part of the bolts into the wood until they are seated into
the wood parts.
<
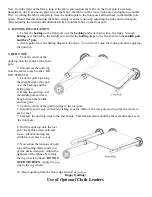
Slide two plastic rollers onto both top Carriage Bolts,
and one Plastic Roller onto each of the four bottom
Carriage Bolts. These will fit loosely and will be held in
place by the parts assembled in Step 4.
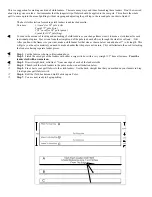
Step 2: Hardware and LampHolders to Pivot
Sections
Parts Needed: Right and Left Pivot Sections
4 - 5/16"x 2" Carriage Bolts (longer)
2 - LampHolders
4 - Jamb Nuts
1 - Alan Wrench
4 - 1/4" Smaller Flat Washers
6 - Plastic Rollers
2 - Cap Bolts
2 - Rectangle Nuts
<
Note direction of carriage bolts to Pivot Sections.
<
Position carriage bolts through pivot sections as shown in drawing. Tighten jamb nuts over end of
carriage bolts until the square part of the carriage bolt is drawn and seated into the wood.


