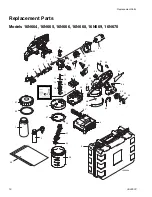
background image

Replacement Parts

3A2853C

21

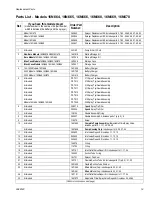
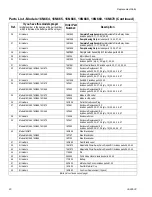
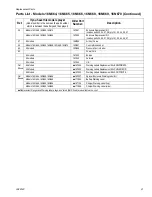
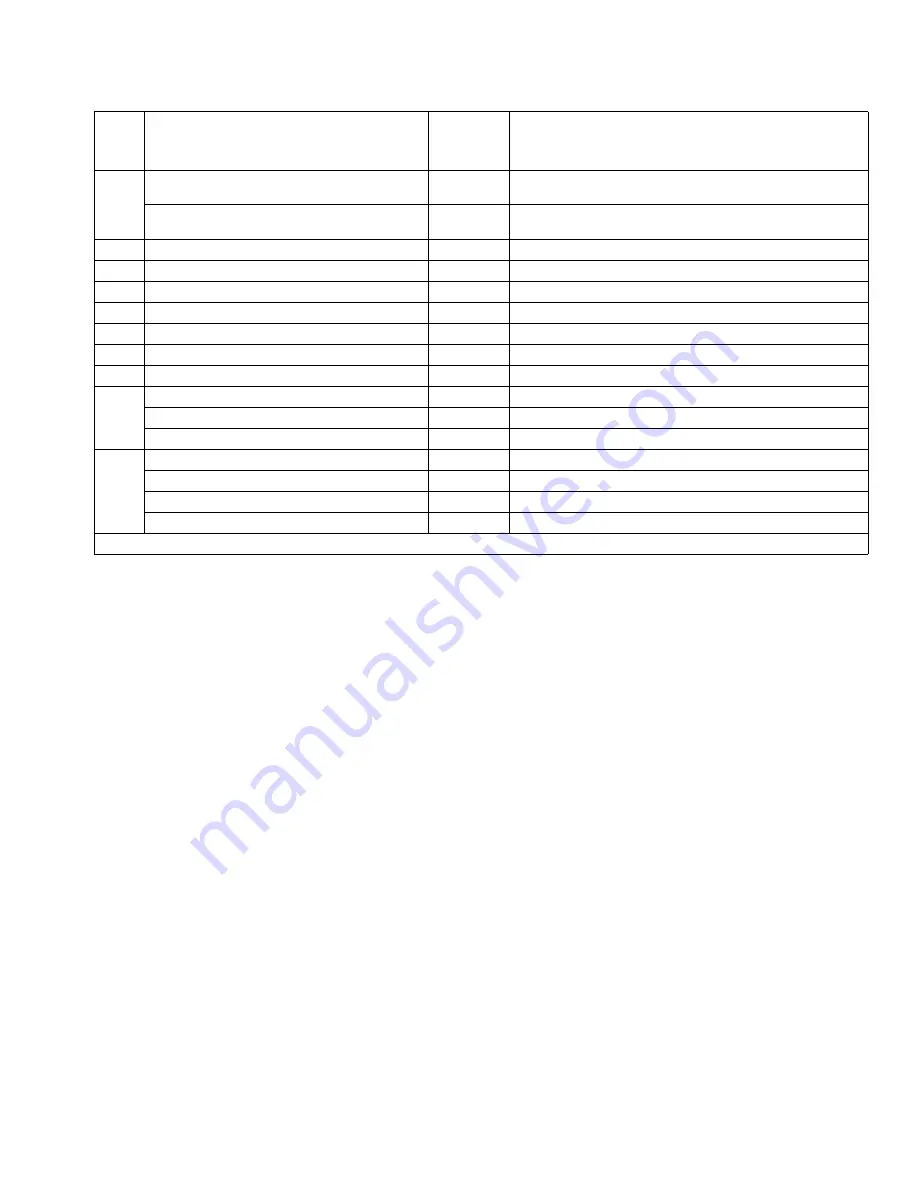
Parts List - Models 16N664, 16N665, 16N666, 16N668, 16N669, 16N670 (Continued)

Ref.

If you have this model sprayer 

(model number is the same as the part number, 

which is between the battery and the sprayer)

Order Part 

Number:

Description

56

Models 16N668, 16N669, 16N670

16P461

Enclosure Replacement Kit: 

includes parts 32, 34-37, 38 (qty. 10), 39, 44, 56, 57

Models 16N664, 16N665, 16N666

16P462

Enclosure Replacement Kit: 

includes parts 32, 34-37, 38 (qty. 10), 39, 44, 56, 57

57

All models

16M890

Air Vent Valve

59

Models 16N664, 16N665, 16N668, 16N669, 16N670

16R891

Cup Lip Brand Label

60

All models

16R889

Pressure Control Label

62

Power Cord

All models

16Y542

Europe

All models

16Y543

Australia

All models

16Y544

U.K.

Not 

Shown

All Models

16P459

Warning Labels Replacement Kits ENG/FRE/SPA

All Models

16P002

Warning Labels Replacement Kits CHI/JAP/KOR

All Models

16P003

Warning Labels Replacement Kits SPA/POR/ITA

Not 

Shown

Models 16N664, 16N665, 16N666

16P207

Sprayer Enclosure Warning Label Kit

Models 16N664, 16N665, 16N666

17C995

Battery Warning Label

Models 16N664, 16N665, 16N666

16T125

Charger Warning Label (top)

Models 16N664, 16N665, 16N666

17C996

Charger Warning Label (side)

 Replacement Danger and Warning labels, tags, and cards (Not Shown) are available at no cost.

Summary of Contents for 16N664

Page 1: ...N668 100V 16N669 230V 16N670 230V EN ti19605a WARNING WARNING WARNING WARNING FIRE AND EXPLOSION HAZARD Use only water based materials Do not use materials which state FLAMMABLE on the packaging For m...

Page 2: ...chnical Data 31 Preferred Material Settings Log 32 Notes 33 Graco Standard Warranty 34 Important User Information Before using your sprayer read this Operation manual for complete instructions on prop...

Page 3: ...on when cleaning and changing nozzle tips In the case where the nozzle tip clogs while spraying remove battery and follow the Pressure Relief Procedure for relieving the pressure before removing the n...

Page 4: ...ater or rain Do not use a charger that is cracked or damaged If the supply cord is damaged replace the charger or cord depending on model Never force the battery into the charger Disconnect the charge...

Page 5: ...ay Tip Guard Assembly B Spray Tip Filter Reverse Threaded C Air Vent Valve D Flexible Suction Tube E Pump Armor Storage Startup Tool F Battery Charger G Pressure Control Knob H Material Cup Liners 5 i...

Page 6: ...ode with water for a minute Once battery warms to operating temperature sprayer will operate normally Battery Storage To maximize battery life between uses store batteries with a full charge in temper...

Page 7: ...cator ti14990a Label Appearance Description Solid green light Indicates a full charge Battery can be used Flashing green light Battery is charging indicates 80 charge Battery can be used Flashing red...

Page 8: ...ti18874a ti18866a UP position For priming and releasing DOWN position Ready to spray ti14999a pump pressure ti16700a ti16701a Do not operate or spray near children Do not aim the sprayer at or spray a...

Page 9: ...ng like it is slow ing down and will result in a poor spray pattern To exit this mode turn pressure control knob down to lowest pressure setting that results in an acceptable spray pattern If spraying...

Page 10: ...aterial in cup Use only water based materials Do not use materi als which state FLAMMABLE on the packaging For more information about your material request SDS from distributor or retailer Spraying ce...

Page 11: ...ull trigger and release 5 Put prime spray valve UP to release pressure Then rotate spray tip back to spray position NOTE Failure to perform this operation could result in poor spray pattern If sprayer...

Page 12: ...h for that surface Tip hole size controls flow rate the amount of paint that comes out of the gun HINTS As you spray the tip wears and enlarges Starting with a tip hole size smaller than the maximum w...

Page 13: ...on If material is pulsating you are moving too fast If material drips you are moving too slow See Trouble shooting page 25 Triggering Sprayer Pull trigger after starting stroke Release trigger before...

Page 14: ...spray valve DOWN to spray position and resume spraying 6 If spray tip is still clogged you may have to repeat steps 1 5 and rotate the spray tip from SPRAY to UNCLOG several times Repeat step 1 to rel...

Page 15: ...MABLE on the packaging For more information about your material request SDS from distrib utor or retailer Spraying certain materials may cause static build up in the sprayer that can result in static...

Page 16: ...d fluid Remove air vent valve clean and reinstall 14 Remove spray tip guard assembly and clean with water or flushing fluid A soft brush can be used to loosen and remove dried material if needed To av...

Page 17: ...or flows out drain tube 5 Remove Pump Armor nozzle and replace child resistant cap and tighten securely for storage 6 Attach flexible suction tube and material cup Push valve DOWN to spray position 7...

Page 18: ...lacement Parts Models 16N664 16N665 16N666 16N668 16N669 16N670 51 52 53 1 2 40 41 59 3 4 23 22 21 20 57 56 38 11 13 15 17 17 12 14 16 36 34 35 39 42 43 45 44 46 31 33 37 27 25 26 31 30 29 28 24 9 10...

Page 19: ...l models PST413 413 Spray Tip Guard Assembly All models PST515 515 Spray Tip Guard Assembly All models PST517 515 Spray Tip Guard Assembly Models 16N664 16N665 16N666 PST309 309 Spray Tip Guard Assemb...

Page 20: ...s 32 34 37 38 qty 10 39 44 56 57 Models 16N664 16N665 16N666 16P462 Enclosure Replacement Kit includes parts 32 34 37 38 qty 10 39 44 56 57 35 Models 16N668 16N669 16N670 16E859 Made in USA Label Mode...

Page 21: ...5 16N668 16N669 16N670 16R891 Cup Lip Brand Label 60 All models 16R889 Pressure Control Label 62 Power Cord All models 16Y542 Europe All models 16Y543 Australia All models 16Y544 U K Not Shown All Mod...

Page 22: ...et valve fitting d Push inlet fitting up into pump cavity 2 Hold inlet in place and turn sprayer upside down Remove inlet valve fitting and visually check to see that inlet valve has seated correctly...

Page 23: ...ty Installation 1 Screw outlet valve fitting into threads Use tool supplied and tighten to 8 ft lb 11 N m 2 Press outlet valve fitting access plug into place This equipment stays pressurized until pre...

Page 24: ...ly engage pressure control knob with retainer 5 Install washer onto pressure control knob 6 Install valve handle onto stem 7 Insert pin into valve handle Use pliers to press pin into hole NOTE If pin...

Page 25: ...lution Sprayer makes no sound when trigger is pulled Trigger is locked Disengage trigger lock See page 8 Sprayer status indicator light is solid RED when triggering indicating that the battery charge...

Page 26: ...ray tip to SPRAY position Spray tip is clogged See Unclogging Spray Tip Guard Assembly page 14 Spray tip filter is clogged Remove and clean Spray tip filter See Unclogging Spray Tip Guard Assem bly pa...

Page 27: ...Inlet or outlet valve fitting is worn See Outlet Valve Fitting Repair page 23 and Inlet Valve Fitting Removal Ser vice page 22 Pressure is set too high for thin mate rial Turn pressure control knob do...

Page 28: ...tip is worn or damaged Replace spray tip See Install Spray Tip Guard Assembly page 13 Spray pattern is too narrow Sprayer is too close to target surface Move sprayer away from surface 10 in 25 cm Inc...

Page 29: ...clogged or dam aged Clean or replace filter See page 14 Spray tip guard assembly not threaded com pletely onto sprayer See Install Spray Tip Guard Assembly page 13 Seat is worn Replace spray tip guard...

Page 30: ...embly is worn out Replace o ring 108195 If 3 solutions above do not stop the leaking replace needle assembly kit Sprayer is leaking fluid at Point C Prime spray valve assembly is worn out Replace prim...

Page 31: ...73 2 dBa sound pressure level 84 2 dBa sound power level 73 2 dBa sound pressure level 84 2 dBa sound power level Vibration level acceleration Less than 5 5 feet s2 Less than 1 7 m s2 Charger Charging...

Page 32: ...Preferred Material Settings Log 32 3A2853C Preferred Material Settings Log Date Item Sprayed Material Sprayed Spray Tip Pressure Setting Mark Dial 03 24 2011 Crown molding PST517 EXAMPLE...

Page 33: ...Notes 3A2853C 33 Notes...

Page 34: ...prepaid return of the equipment claimed to be defective to an authorized Graco distributor for verification of the claimed defect If the claimed defect is verified Graco will repair or replace free of...

Reviews: