background image

5

308-493

Setup

II.

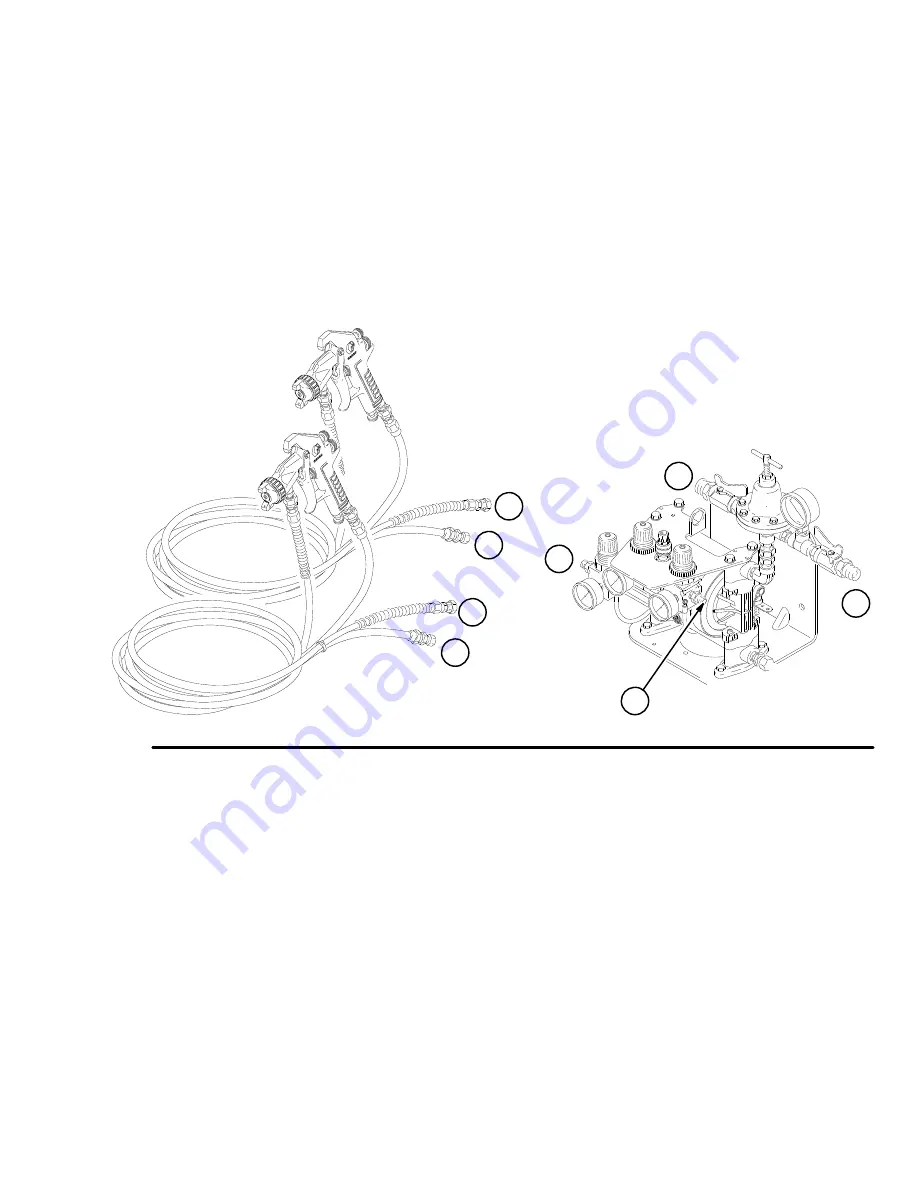
Connect the hoses and the gun to
the system.

1.

Connect the gun to the air and fluid hoses as
instructed in your spray–system instruction
manual.

2.

Connect the hoses to the system by matching the
letters at the ends of the hoses to the correspond-
ing letters at the air and fluid outlets. See Fig. 3.

NOTE: The reference letters A and C are fluid hoses.
The reference letters B and D are air hoses.

NOTE: All air hoses have 1/4–18 npsm(f) fittings. All
fluid hoses have 3/8–18 npsm fittings. The electrostatic
gun and air hose have special left–hand threads.

3.

Verify that all fittings throughout the system are
tightened securely.

III.

Ground the spray system.

Refer to your spray–system instruction manual to
ensure that the system is electrically grounded.

Fig. 3

A

B

C

D

A

C

B

D

Summary of Contents for 237–428

Page 1: ...equired additional equipment Part No 236 015 Order this Optimiser HVLP gun for use with the Hose Kit 237 428 Part No 217 780 Order this G700N air spray gun and air cap 106 706 for use with the Hose Ki...

Page 2: ...8 Graco Phone Numbers 8 Symbols Warning Symbol WARNING This symbol alerts you to the possibility of serious injury or death if you do not follow the instructions Caution Symbol CAUTION This symbol al...

Page 3: ...serious injury D This equipment is for professional use only D Read all instruction manuals tags and labels before operating the equipment D Use the equipment only for its intended purpose If you are...

Page 4: ...A 1 2 9 4 3 I Install the hose kit NOTE A wall mounted system is shown in Fig 1 The instructions for installing the kit are the same for all systems 1 Relieve the pressure 2 Replace the plug B in the...

Page 5: ...luid outlets See Fig 3 NOTE The reference letters A and C are fluid hoses The reference letters B and D are air hoses NOTE All air hoses have 1 4 18 npsm f fittings All fluid hoses have 3 8 18 npsm fi...

Page 6: ...d hose are primed decrease the air pressure for the pump to 20 to 30 psi 1 4 to 2 1 bar 3 Repeat the priming procedure for the second gun and hose III Set the fluid and air pressure 1 Be sure the air...

Page 7: ...1 7 168 160 BUSHING 1 4 18 npt f x 3 8 18 npt m 2 8 237 528 BALL VALVE 1 4 18 npt mbe 2 9 188 077 NIPPLE 1 4 18 6 special thread x 1 4 18 npt 1 10 110 110 SEALANT 1 11 236 410 HOSE KIT Includes items...

Page 8: ...e equipment does not disclose any defect in fluid or workmanship repairs will be made at a reasonable charge which charges may include the costs of parts labor and transportation DISCLAIMERS AND LIMIT...

Reviews: