background image

Service 

6

3A5053B

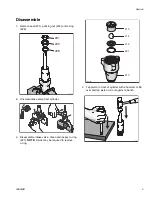
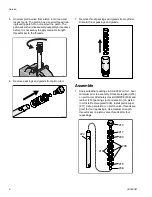
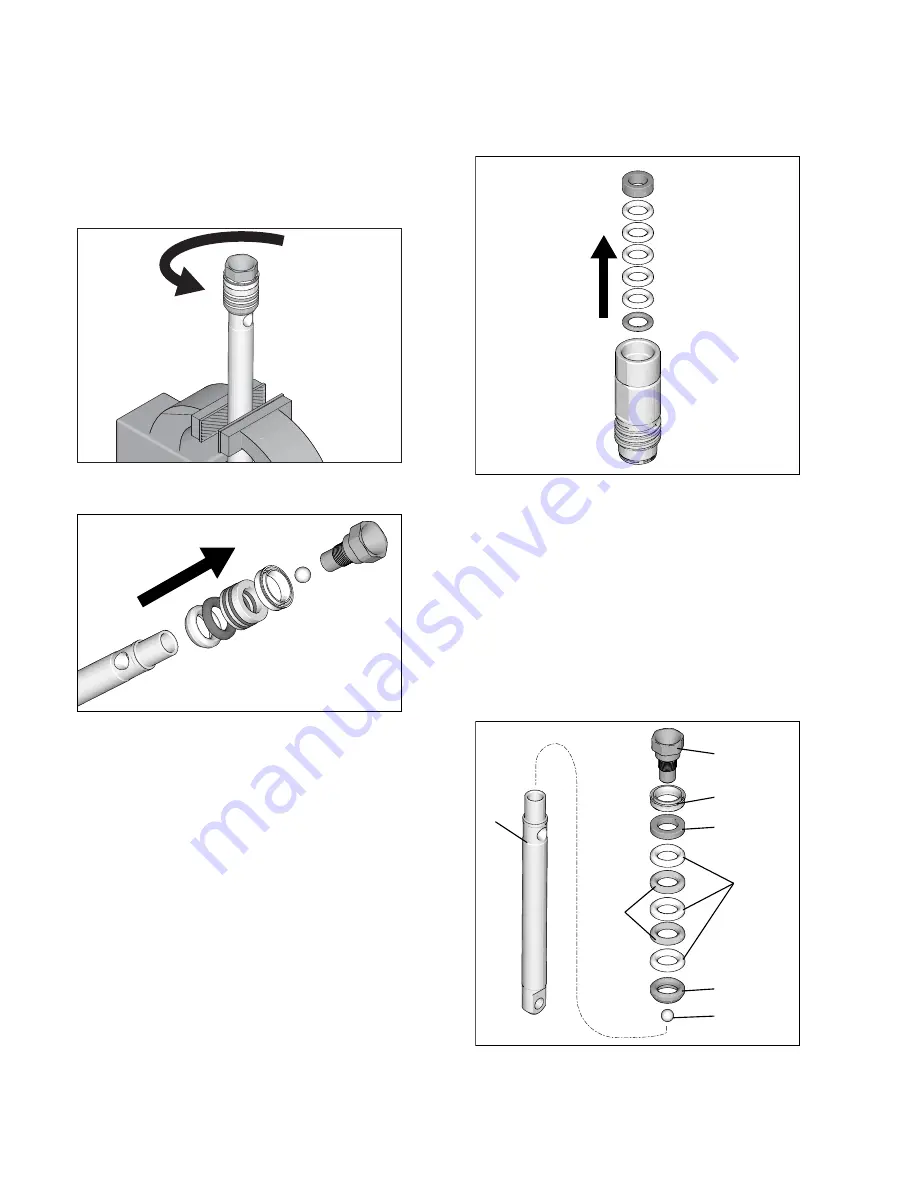
5. Unscrew piston valve from piston rod. Clean and 

inspect parts. The piston has a special thread lock-
ing/sealing patch. Do not remove the patch. The 
patch allows four disassembly/assembly procedures 
before it is necessary to apply medium strength 
threadlocker to the threads.

6. Remove packings and glands from piston rod. 

7. Remove throat packings and glands from cylinder. 

Discard throat packings and glands. 

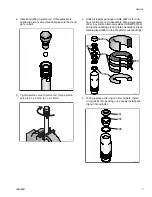
Assemble

1. Soak all leather packings in SAE 30W oil for 1 hour 

minimum prior to assembly. Stack male gland (219) 
on piston rod. Alternately stack UHMWPE (208) and 
leather (218) packings (note orientation) on piston 
rod. Install female gland (209). Install piston wiper 
(217) (note orientation) on piston valve, threads are 
good for four repackings. Use medium strength 
threadlocker on piston valve threads after four 
repackings.

ti31050a

ti31062a

ti31052a

210

217

209

208

218

219

206

222

ti31051a

Summary of Contents for field lazer s100

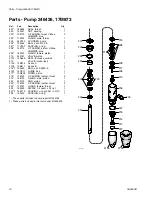
Page 1: ...227 bar Maximum Working Pressure Model 246426 Series A Model 17M873 Series B Important Safety Instructions Read all warnings and instructions in this manual related striping manuals and on the equipm...

Page 2: ...Service 4 Pressure Relief Procedure 4 Pump Repair Kits 4 Tools Materials Needed 4 Cleaning and Inspecting Parts 4 Disassemble 5 Assemble 6 Cross Section Reference 9 Parts Pump 246426 17M873 10 Techni...

Page 3: ...ipment Alterations or modifications may void agency approvals and create safety hazards Use equipment only for its intended purpose Call your distributor for information Do not use 1 1 1 trichloroetha...

Page 4: ...osen completely Clear hose or tip obstruction Pump Repair Kits Tools Materials Needed Vise 12 in adjustable open end wrench 2 Hammer 20 oz maximum Small screwdriver Pick or long small screwdriver Thro...

Page 5: ...ake valve from cylinder 3 Disassemble intake valve Clean and inspect o ring 227 NOTE A pick may be required to remove o ring 4 Tap piston rod out of cylinder with a hammer or flip over and tap piston...

Page 6: ...at packings and glands from cylinder Discard throat packings and glands Assemble 1 Soak all leather packings in SAE 30W oil for 1 hour minimum prior to assembly Stack male gland 219 on piston rod Alte...

Page 7: ...ll leather packings in SAE 30W oil for one hour minimum prior to assembly Place male gland 204 in cylinder Alternately stack UHMWPE 203 and leather packings 223 note orientation Place female gland 224...

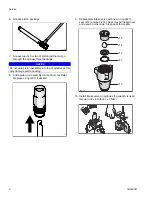
Page 8: ...o ring 207 if desired 9 Reassemble intake valve with new o ring 227 seat 212 and ball 214 Seat may be flipped over and used on other side Clean seat thoroughly 10 Install intake valve on cylinder If a...

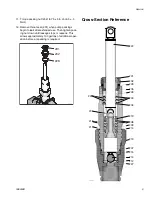
Page 9: ...leak after extended use Then tighten pack ing nut down until leakage stops or lessens This allows approximately 100 gallons of additional oper ation before a repacking is required Cross Section Refere...

Page 10: ...arbide 1 213 VALVE intake foot 213a 15B874 Series A 1 213b 15B611 Series B 1 214 105445 BALL set 0 5000 in 1 215 15C011 GUIDE ball 1 217 15G234 WIPER piston 1 218 176749 V PACKING leather throat 2 219...

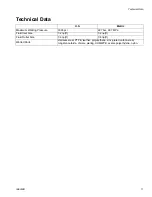
Page 11: ...orking Pressure 3300 psi 227 bar 22 7 MPa Fluid Inlet Size 1 2 npt f 1 2 npt f Fluid Outlet Size 1 4 npt f 1 4 npt f Wetted Parts stainless steel PTFE leather polyurethane zinc plated carbon steel tun...

Page 12: ...t disclose any defect in material or workmanship repairs will be made at a reasonable charge which charges may include the costs of parts labor and transportation THIS WARRANTY IS EXCLUSIVE AND IS IN...

Reviews: