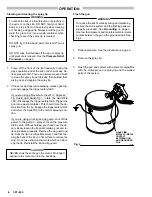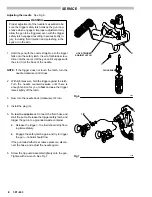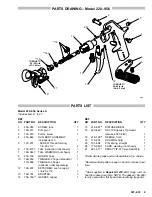
7
307–633
SERVICE
WARNING
To reduce the risk of serious bodily injury, including
fluid injection, splashing in the eyes or on the skin,
always follow the Pressure Relief Procedure on
page 2 before adjusting, cleaning or repairing the
gun.
Periodically disassemble the gun to clean and inspect
parts. Clean all parts thoroughly, and check them careful-
ly for damage or wear. Replace parts as needed.
If the gun leaks at the tip when the trigger is released, the
needle or seat is worn or damaged and must be replaced.
See the procedure below. Repair Kit 218–143 is avail-
able. See page 11 to order.
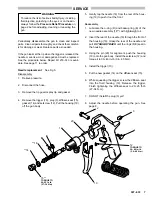
Needle replacement
See Fig 5.
Disassembly
1.
Relieve pressure.
2.
Disconnect the hose.
3.
Remove the tip guard, spray tip and gasket.
4.
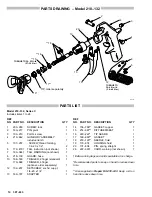
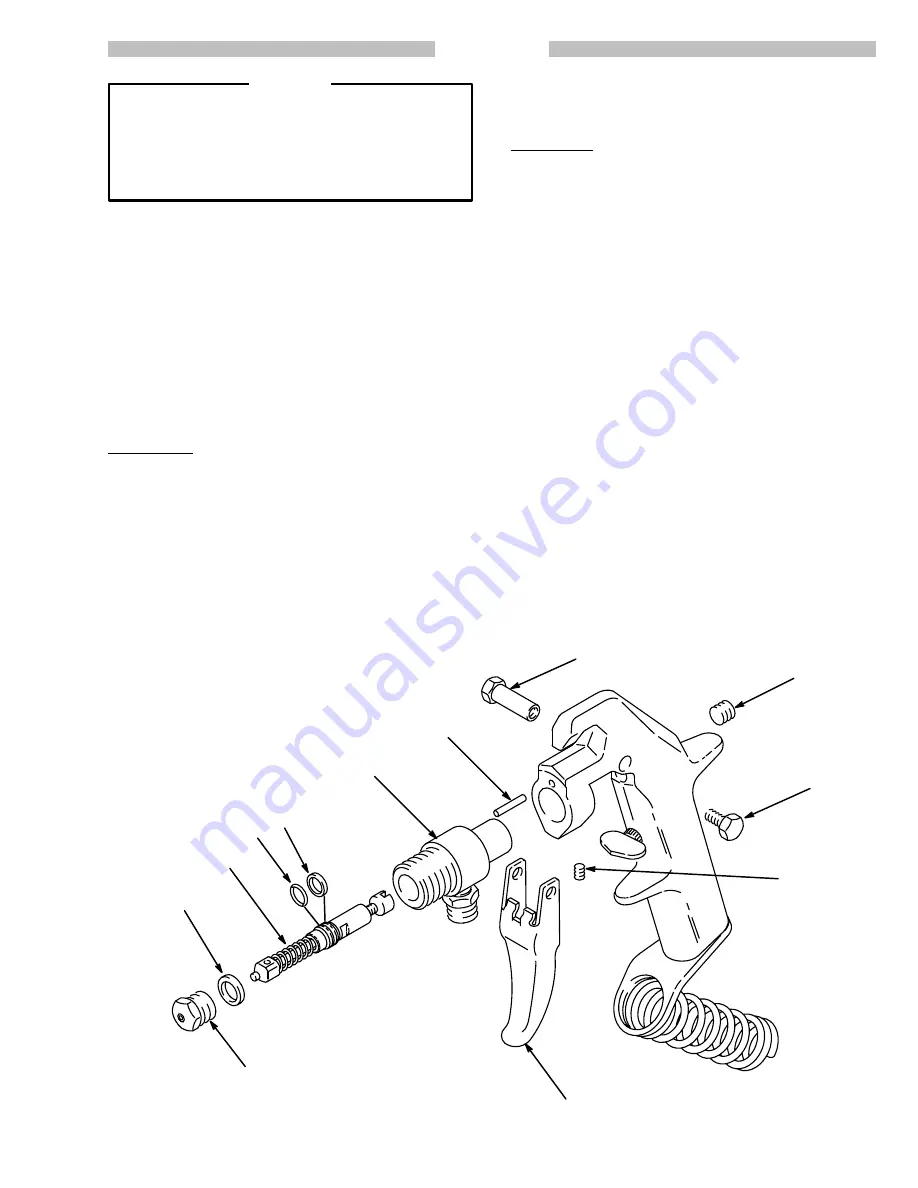
Remove the trigger (10), plug (3), diffuser–seat (15),
gasket (14) and setscrew (12). Pull the housing (19)
off the gun body.
5.
Gently tap the needle (18) from the rear of the hous-
ing (19) to push it out the front.
Reassembly
1.
Lubricate the o–ring (D) and backup ring (E) of the
new needle assembly (18**) with lightweight oil.
2.
Insert the rear of the needle (18) through the front of
the housing (19). Grasp the rear of the needle and
pull it
STRAIGHT BACK until the rings (D,E) seat in
the housing.
3.
Using the pin (20) for alignment, push the housing
(19) onto the gun body. Install the setscrew (12) and
torque it to 30–40 in–lb (3.4–4.5 N.m).
4.
Install the trigger (10).
5.
Put the new gasket (14) on the diffuser-seat (15).
6.
While squeezing the trigger, screw the diffuser–seat
into the fluid housing (19). Release the trigger.
Finish tightening the diffuser-seat to 20–25 ft–lb
(27–34 N.m).
7.
DO NOT install the plug (3) yet!
8.
Adjust the needle before operating the gun. See
page 8.
15**
**14
**18
2
3
1
10
TORQUE TO
20–25 ft–lb
(27–34 N.m)
12
TORQUE TO
30–40 in–lb
(3.4–4.5 N.m)
D
E
19
20


