Maintenance
333011D
21
NOTE:
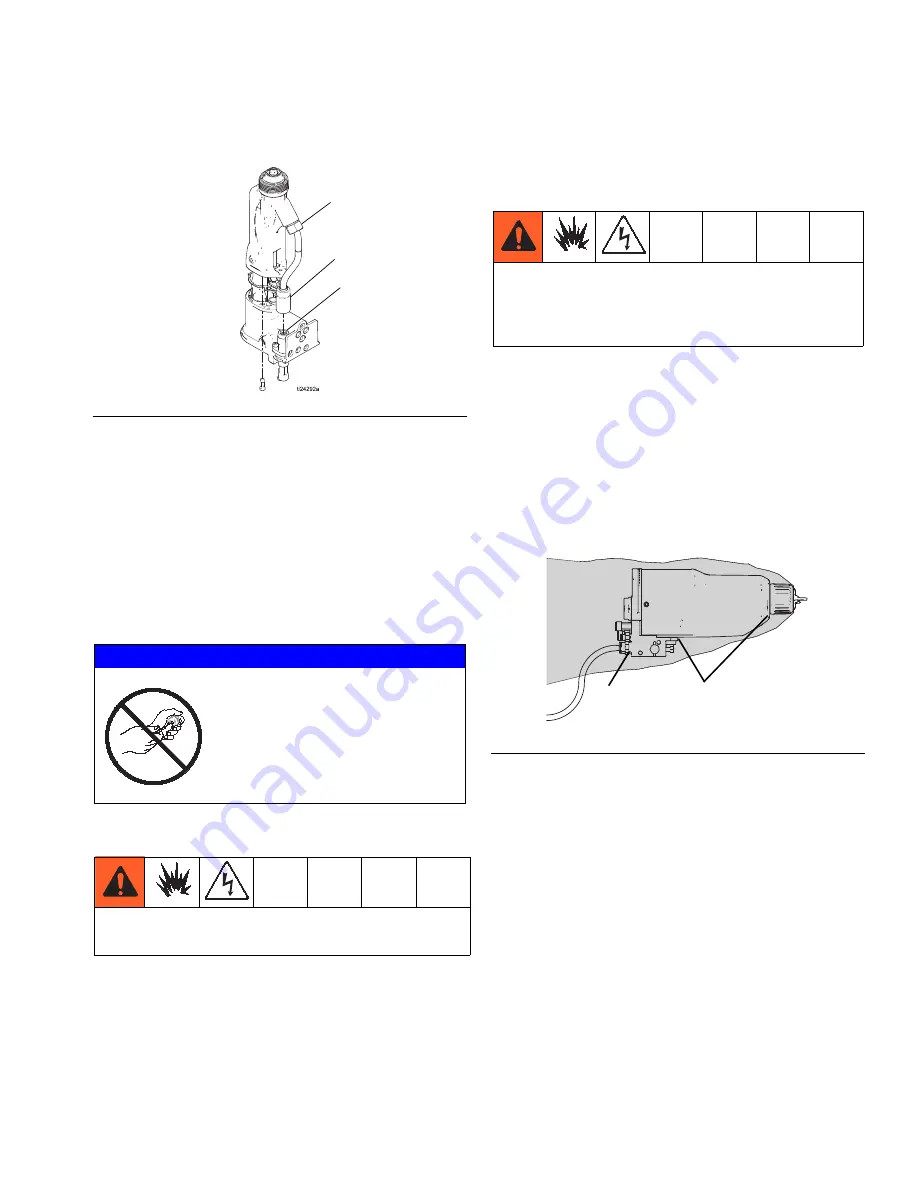
Use two wrenches to remove the fluid tube fitting
(C).
7. Reinstall the filter (20) and fitting (C). Do not over
tighten the fitting, and make sure the top fitting (D)
remains tight.
NOTE:
Use two wrenches to install the fluid tube fitting
(C).
8. Clean the retaining ring (24), air cap/tip guard
assembly (25), and spray tip (3) with a soft brush
daily, minimum. Replace any damaged parts. Be
careful not to damage the electrode (25a).
9. Wipe off the parts with a dry cloth. Be careful not to
damage the electrode.
10. Check the electrode (25a). Replace if damaged.
11. Install the spray tip, page 17.
12. Install the spray tip and air cap/tip guard, shroud,
and retaining ring, page 17. Be sure the electrode
(25a) is in place.
13.
Test Gun Resistance
, page 22.
Check for Fluid Leakage
During operation, periodically check all openings of the
gun shroud (ZZ) for the presence of fluid. See F
IGURE
12. Fluid in these areas indicates leakage into the
shroud, which could be caused by leaks at the fluid tube
connections or fluid packing leakage.
If fluid is seen in these areas, stop spraying immedi-
ately. Relieve the pressure, then remove the gun for
repair.
F
IG
. 15 Clean the Inline Fluid Filter
NOTICE
Do not use metal tools to clean the air
cap/tip guard or spray tip holes as this
could scratch them, and make sure
the electrode is not damaged.
Scratches in the air cap or spray tip or
a damaged electrode can distort the
spray pattern.
To reduce the risk of fire, explosion, or electric shock,
never operate the gun with a damaged electrode.
C
20
D
If any fluid leakage from the gun is detected, stop
spraying immediately. Fluid leakage into the gun
shroud could cause fire or explosion and result in
serious injury and property damage.
F
IG
. 16 Check for Fluid Leakage
WLD
ZZ
ZZ


