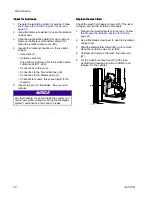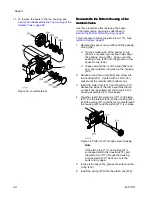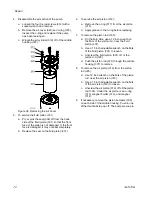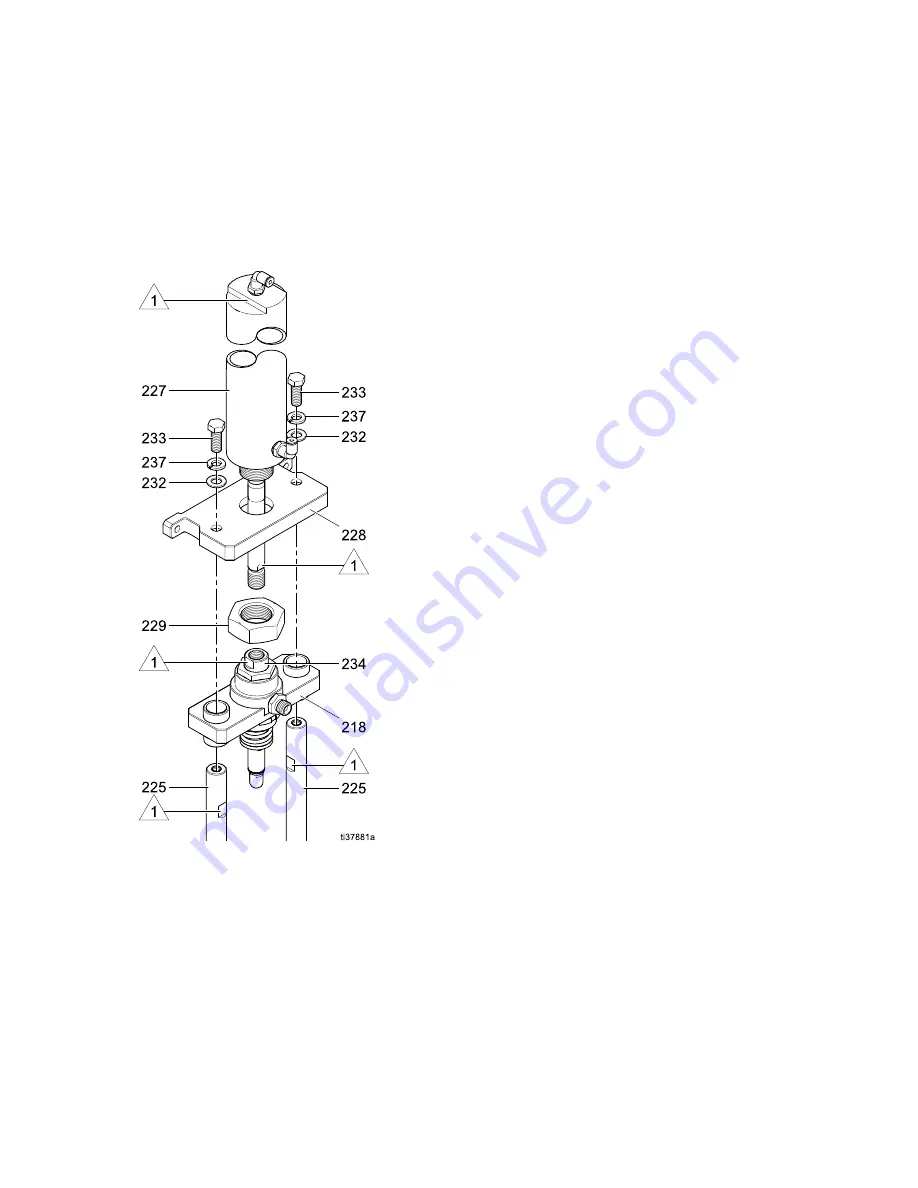
10. Disassemble the air cylinder (227) from the block
mount (224):
a.
Place the retaining nut (229) at the bottom of
the air cylinder in a vise.
b.
Use a wrench on the flats on the top of the
air cylinder (227) to turn the cylinder until the
retaining nut is loose. Remove the nut and
block mount (224).
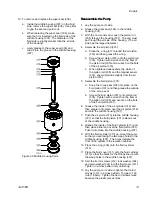
Figure 26 Isolation Valve Components
Reassemble
Reassemble
Reassemble the
the
the Isolation
Isolation
Isolation Valve
Valve
Valve
Components
Components
Components
Use this procedure to reassemble the air cylinder
(227), block mount (224), connecting rods (225),
shuttle housing (218), and base housing (201).
Perform this procedure on a flat surface so that the
components are aligned. Misaligned components
could result in performance issues.
1.
Hold the air cylinder (227) so that the air fitting
faces forward. Thread the air cylinder through
the center of the block mount (224). The block
mount should be flat against the cylinder.
2.
Apply medium strength, removable thread lock to
the threads on the air cylinder (227).
3.
Screw the retaining nut (229) onto the air cylinder
(227) until it bottoms out. To tighten the nut,
place the nut and air cylinder in a vise. Keep the
block mount (224) lined up with the air fitting on
the cylinder.
4.
Use a wrench on the flats on the top of the
air cylinder (227) to turn the cylinder until the
retaining nut (229) is tight.
5.
Apply removable thread lock to the threads on
the air cylinder (227) shaft .
6.
Assemble the shuttle housing (218) and the air
cylinder (227):
a.
Screw the air cylinder (227) shaft into the
shuttle housing (218) assembly until snug.
b.
To tighten, use a 9/16 inch or adjustable
wrench on the flat section on the air cylinder
shaft and an adjustable wrench on the shuttle
collar. Turn in opposing directions.
Note
Be careful not to scratch the air cylinder
shaft.
7.
Attach the connecting rods (225) to the block
mount (224):
a.
Slide a connecting rod through the shuttle
housing (218) and secure in the block mount
(224) with a screw (233), lock washer (237),
and flat washer (232).
b.
Grip the flats of the connecting rod with an
adjustable wrench. On the other side of the
block mount, use an adjustable wrench to
tighten the screw to 120 in. lb. (13.6 N•m).
c.
Attach the second connecting rod.
8.
Slide the entire base housing (201) onto the
connecting rods (225).
9.
Secure the base housing (201) into the
connecting rods (225) with a screw (233), lock
washer (237), and flat washer (232).
64
3A7370B

