


308496 39
Service
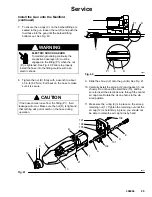
Fluid Packing Rod Removal and Repair
(continued)
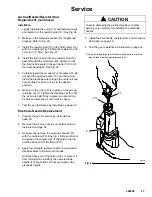
7.
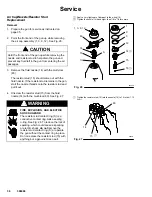
Place the packing nut (28c) and o-ring (28g) on the
fluid rod (28b). Flats on the packing nut must be
facing toward the back of the fluid rod.
8.
Fill the entire inner cavity of the spacer (28d) with
the dielectric grease included with the gun. Place
the spacer on the fluid rod (28b), in the direction
shown in Fig. 30. Generously apply the grease to
the outside of the spacer.
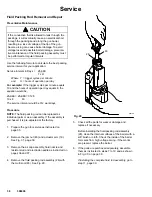
9.
Place the fluid packing (28f), needle packing (28e),
and housing (28a) on the fluid rod (28b), as shown
in Fig. 30.
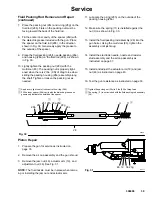
10. Lightly tighten the packing nut (28c) with the
multi-tool (83). The packing nut is properly tight-
ened when there is 2 lbs. (9 N) of drag force when
sliding the packing housing (28a) assembly along
the shaft. Tighten or loosen the packing nut as
needed.
11. Lubricate the o-ring (28h) on the outside of the
packing housing (28a).
12. Make sure the spring (11) is installed against the
nut (U) as shown in Fig. 30.
13. Install the fluid packing rod assembly (28) into the
gun barrel. Using the multi-tool (83), tighten the
assembly until just snug.
14. Install the electrode needle, nozzle and resistor
stud assembly and the air cap assembly as
instructed on page 37.
15. Install and adjust the actuator arm (19) and jam
nut (46) as instructed on page 40.
16. Test the gun resistance as instructed on page 33.
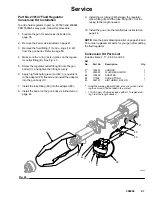
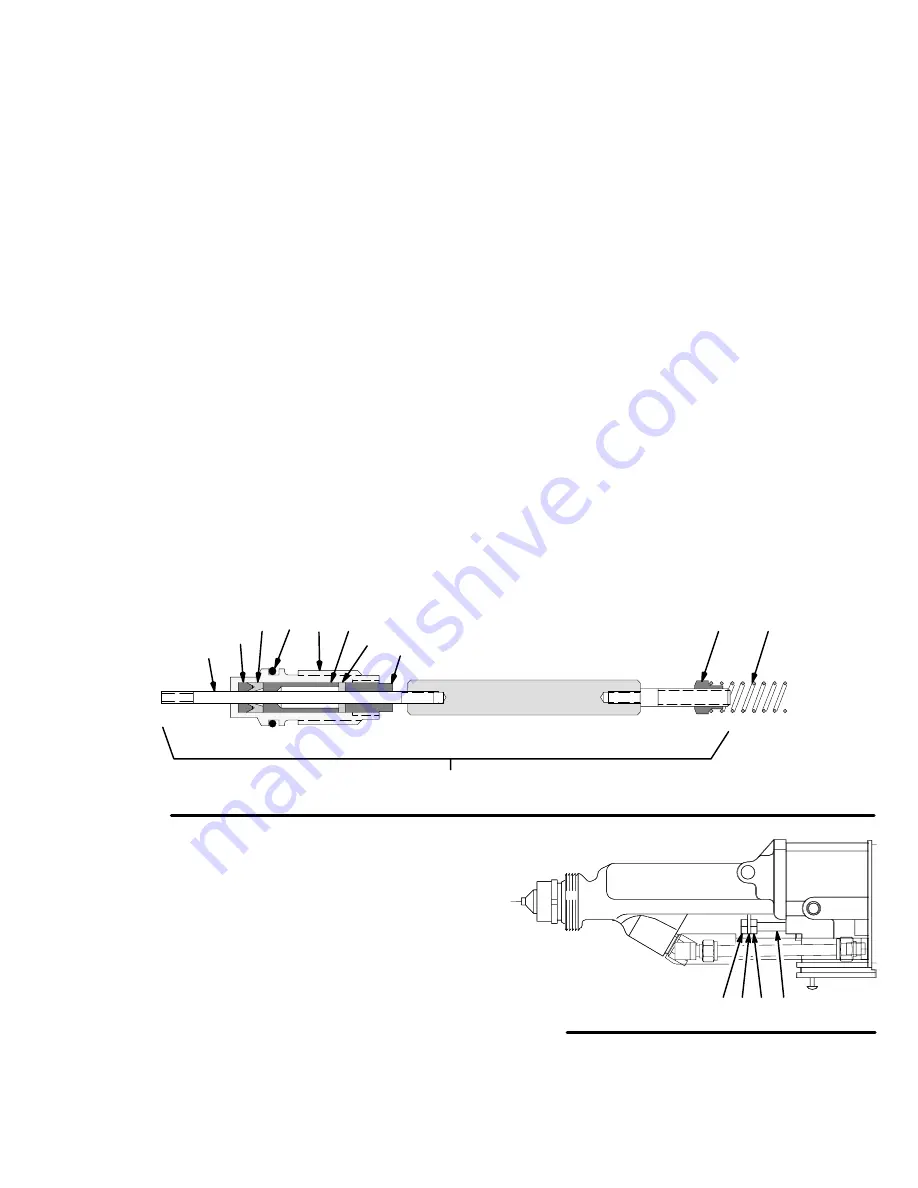
Apply a very light coat of lubricant to the o-ring (28h).
Fill the inner spacer (28d) cavity with the dielectric grease and
generously lubricate the outside of the spacer.
Tighten the packing nut (28c) to 2 lbs (9 N) of drag force.
The spring (11) is not included with the fluid packing rod assembly
(28).
Fig. 30
28
28e
28a 28d
28b
28h
11
U
03224
28c
28f
28g
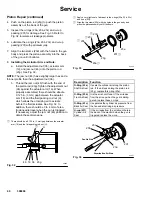
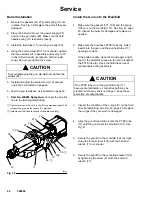
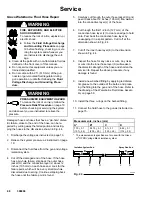
Piston Repair
1.
Prepare the gun for service as instructed on
page 35.
2.
Remove the air cap assembly and the gun shroud.
3.
Remove the jam nut (46), actuator arm (19), and
adjustment nut (36). See Fig. 31.
NOTE: The fluid nozzle must be in place when remov-
ing or installing the jam nut and actuator arm.
Fig. 31
46 19 36 23g
04317
Summary of Contents for PRO 5500wb
Page 49: ...308496 49 Notes ...
Page 59: ...308496 59 Notes ...


