Alternator
Alternator
Alternator Removal
Removal
Removal and
and
and Replacement
Replacement
Replacement
Replace alternator bearings after 2000 hours of
operation. Order Part No. 24N706 Bearing Kit. Parts
included in the kit are marked with a symbol (♦).
1.
Follow the steps in
Prepare the Gun for Service, page 48
2.
Remove the power supply (11) / alternator
assembly (15) and disconnect the alternator.
See
Power Supply Removal and Replacement,
.
3.
Measure resistance between the two outer
terminals of the 3-wire connector (PC); it should
be 2.0–6.0 ohms. If outside this range, replace
the alternator coil (15a).
4.
Using a flat blade screwdriver, pry the clip (15h)
off the housing (15d). Remove the cap (15f),
using a thin blade or screwdriver.
5.
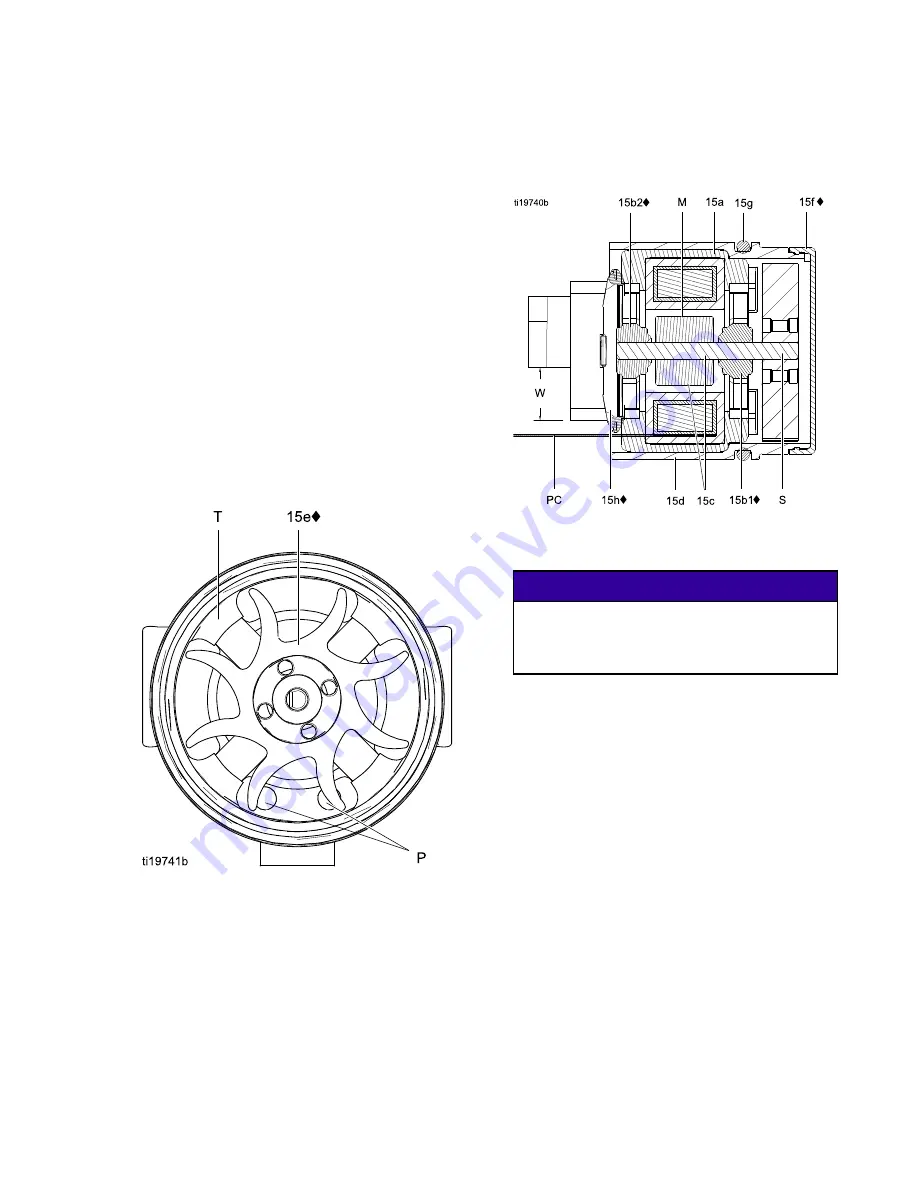
If necessary, rotate the fan (15e) so its blades
clear the four bearing tabs (T) of the housing
(15d).
Figure 33 Fan Orientation
6.
Push the fan and coil assembly (15a) out the
front of the housing (15d).
Figure 34 Alternator Cross-Section
♦
28 is not shown in illustration.
NOTICE
NOTICE
NOTICE
To prevent damage, do not scratch or damage
the magnet (M) or shaft (S). Do not pinch
or damage the 3–wire connector (PC) when
disassembling and reassembling the bearings.
7.
Hold the coil assembly (15a) on a workbench
with the fan end facing up. Using a wide blade
screwdriver, pry the fan (15e) off the shaft (S).
8.
Remove the top bearing (15b2).
9.
Remove the bottom bearing (15b1).
10. Install the new bottom bearing (15b1♦) on the
long end of the shaft (S). The flatter side of the
bearing must face away from the magnet (M).
Install in the coil (15a) so the bearing blades are
flush with the surface of the coil.
11. Press the new top bearing (15b2♦) onto the short
end of the shaft so the bearing blades are flush
with the surface of the coil (15a). The flatter side
of the bearing must face away from the coil.
3A7504A
57


