How to Spray
16
3A7649A
NOTE:
Spray Tip will wear with use and need
periodic replacement.
Starting Your Spray and
Adjusting Pressure
Always refer to the disinfectant
manufacturer’s recommendations for an
acceptable spray of disinfectant.
1.
Point sprayer towards the surface to be
sprayed.
2.
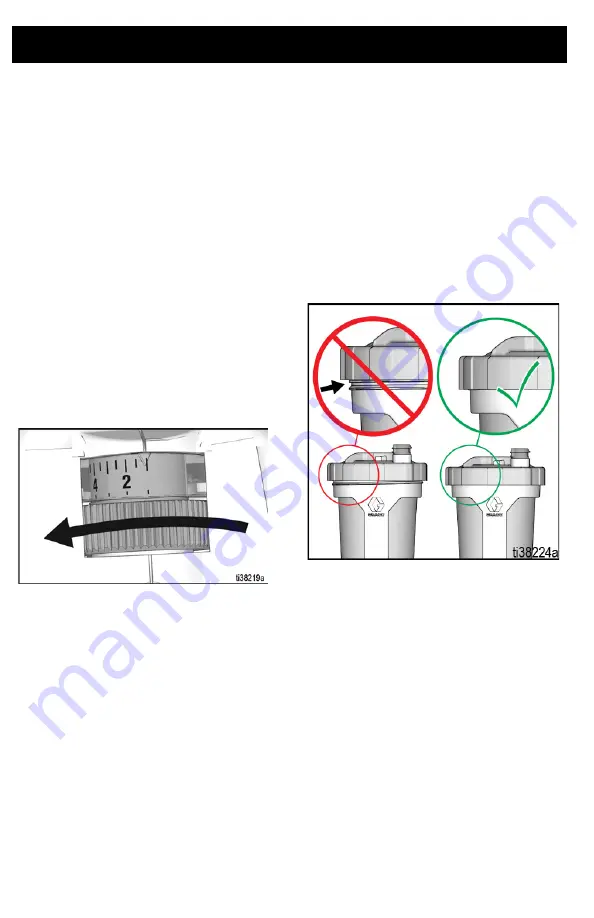
Set the Speed Control to the lowest
setting.
3.
Pull and hold Sprayer Trigger.
4.
Slowly increase pressure using the
Speed Control. Set the minimum setting
necessary to produce an acceptable
spray of disinfectant. This will help
reduce overspray.
5.
Adjust the sprayer’s distance from the
surface and your hand speed to achieve
the desired surface coverage.
NOTE:
For best results, and to evacuate all
disinfectant from the FlexLiner when the
disinfectant is nearly gone, gently squeeze
the bottom of the FlexLiner to push the last of
the disinfectant up to the Cup Lid.
If sprayer does not spray, try the
steps below:
•
Make certain there is only one FlexLiner
in Cup Support. It is possible for two
liners to nest tightly together and appear
as only one.
•
Make certain the Cup Lid is properly
threaded to the Cup Support. If threads
are visible below the Cup Lid when tight,
then the cover is cross-threaded. Fully
remove the Cup Lid and reinstall to the
Cup Support so no threads are visible
when tight.
•
Repeat steps 7 – 10 on page 14 to
ensure all the air is evacuated from the
FlexLiner.
•
Make certain the Spray Tip is not
clogged. See
•
If sprayer sprays disinfectant while
holding sprayer upside down, there is air
in the cup. See
•
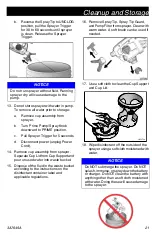
Replace VacuValve Cap. Two new
VacuValve caps came with your sprayer.
•
If sprayer still does not spray, see


