


Setup/Startup
12
3A8108A
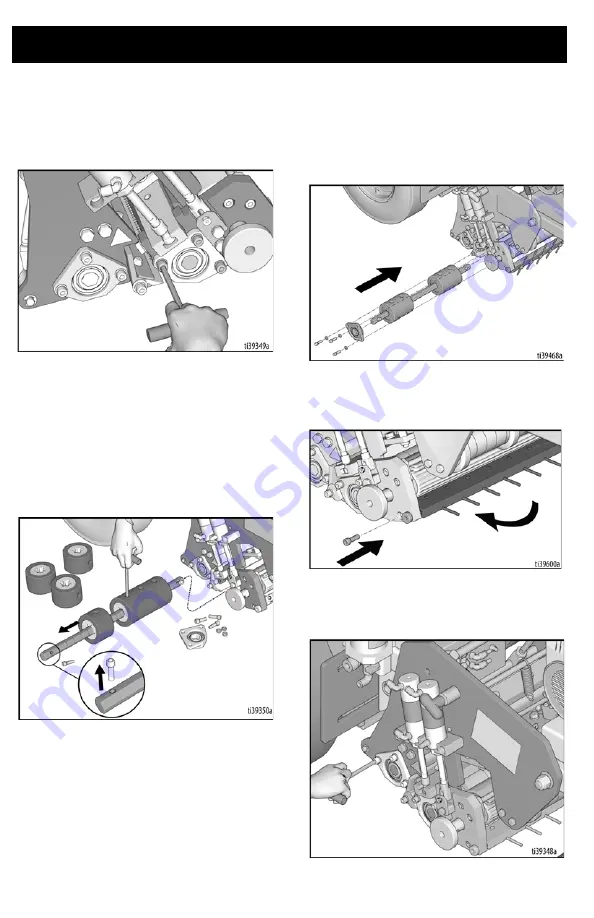
4.
Rotate pivot bar away from applicator
roller.
5.
Using a 1/4 in. Allen wrench, remove the
three bolts holding the end plate on the
applicator roller.
NOTE:
It is only necessary to remove the end
plate on one side of the carriage to remove
the applicator roller.
6.
Remove applicator roller and using a 1/4
in. Allen wrench remove the bolt on one
end of the hex shaft. Loosen set screws
in rollers to remove or adjust them to the
necessary width and location to match
the tape.
NOTE:
Removed rollers can be stored on the
vertical posts located in front of the
handlebars.
7.
Tighten set screws on roller segments
once in place and re-install bolt on end of
hex shaft.
8.
Re-install applicator roller, plate and
bolts. Tighten bolts with 1/4 in. Allen
wrench.
9.
Rotate the pivot bar back into place and
replace the bolts on both sides of the
carriage.
10. Using a 1/4 in. Allen wrench, remove the
three bolts holding the end plate on the
tamping roller.
Summary of Contents for TapeLazer HP Automatic
Page 15: ...Setup Startup 3A8108A 15 7 Using a 1 4 in Allen wrench tighten bolts ...
Page 25: ...Operation 3A8108A 25 TapeLazer LiveLook Display ...
Page 51: ...Troubleshooting 3A8108A 51 Solenoid Ports Reference ...
Page 52: ...Parts 52 3A8108A Parts TapeLazer Parts ...
Page 54: ...Parts 54 3A8108A Front End Parts ...
Page 56: ...Parts 56 3A8108A Carriage Applicator Parts ...
Page 58: ...Parts 58 3A8108A Display Unit Parts ...
Page 60: ...Parts 60 3A8108A Additional Parts ...
Page 62: ...Air Line Schematic 62 3A8108A Air Line Schematic ...
Page 64: ...Wiring Diagram 64 3A8108A Wiring Diagram ...
Page 65: ...Universal Symbols Key 3A8108A 65 Universal Symbols Key ...


