


Setup/Startup
16
3A8108A
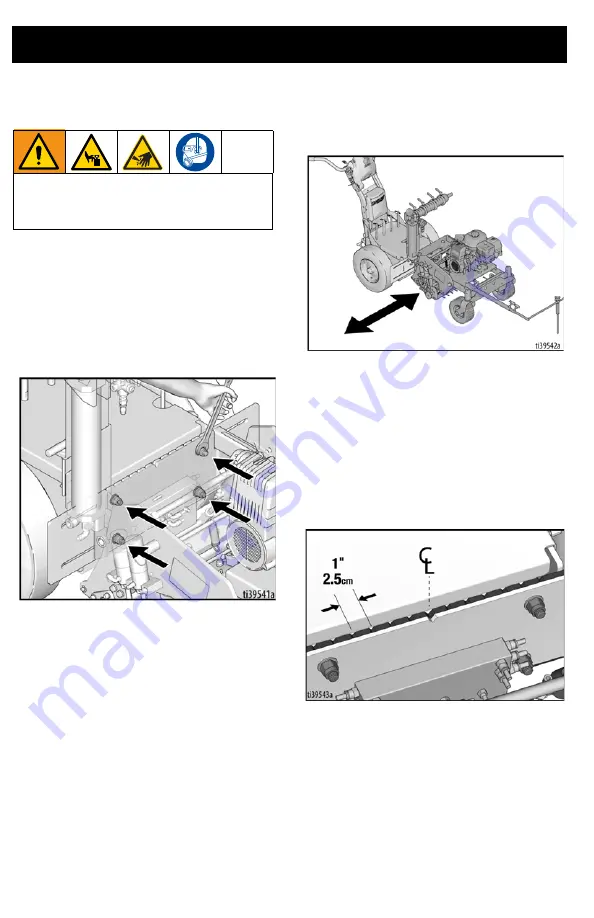
Carriage Adjustment
Often it is desirable to adjust the carriage to
an offset position to accommodate curbs or
difficult areas along the road edge. To adjust
the carriage into an offset position, follow the
steps below:
1.
Using a 3/4 in. wrench, loosen the four
bolts connecting the carriage to the
frame of theTapeLazer.
2.
Slide carriage left or right to the desired
location.
NOTE:
Have a second person push down on
the TapeLazer handlebars to relieve tension
on the bolts while you slide the carriage right
or left.
3.
Notches are set in the carriage and
frame at one inch intervals which match
the lines on rollers to help with
alignment. A larger center notch allows
for easy reorientation to the center
position.
4.
Tighten bolts.
To help prevent serious injury from
pinching or cutting, keep clear of the
cutting blade and moving carriage parts.
Summary of Contents for TapeLazer HP Automatic
Page 15: ...Setup Startup 3A8108A 15 7 Using a 1 4 in Allen wrench tighten bolts ...
Page 25: ...Operation 3A8108A 25 TapeLazer LiveLook Display ...
Page 51: ...Troubleshooting 3A8108A 51 Solenoid Ports Reference ...
Page 52: ...Parts 52 3A8108A Parts TapeLazer Parts ...
Page 54: ...Parts 54 3A8108A Front End Parts ...
Page 56: ...Parts 56 3A8108A Carriage Applicator Parts ...
Page 58: ...Parts 58 3A8108A Display Unit Parts ...
Page 60: ...Parts 60 3A8108A Additional Parts ...
Page 62: ...Air Line Schematic 62 3A8108A Air Line Schematic ...
Page 64: ...Wiring Diagram 64 3A8108A Wiring Diagram ...
Page 65: ...Universal Symbols Key 3A8108A 65 Universal Symbols Key ...


