Setup/Startup
22
3A8108A
7.
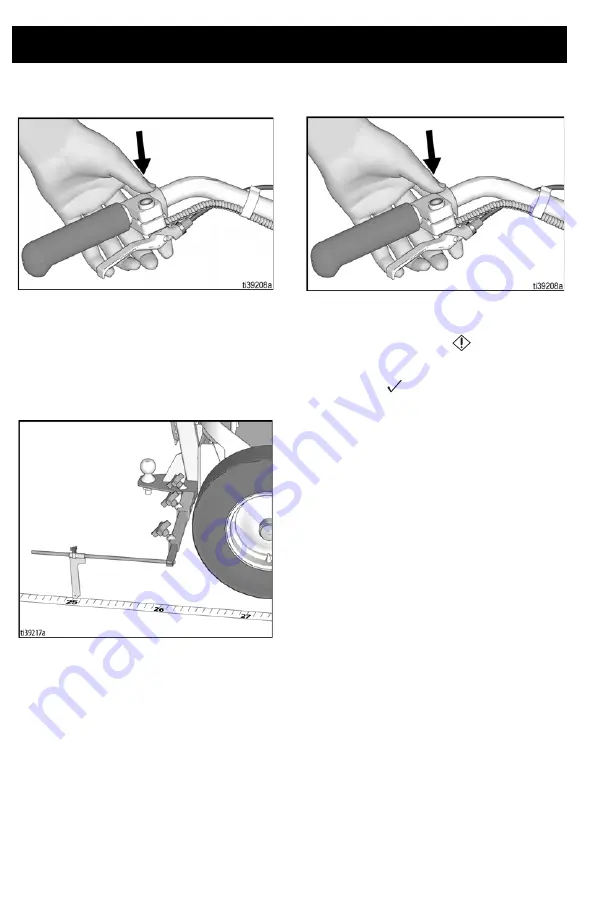
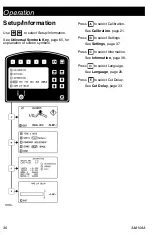
Press and release tape application
button to start calibration.
8.
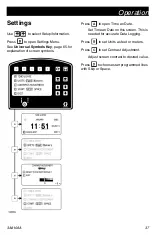
Move TapeLazer forward. Keep guide
on steel tape.
9.
Stop when guide aligns with 25 ft mark
on steel tape (a total traveled distance of
24 ft.), or to whatever distance you
entered on the screen.
10. Press and release tape application
button to complete calibration.
NOTE:
Calibration is
NOT
complete when
the exclamation symbol
is displayed.
NOTE:
Calibration is finished when the check
mark symbol
is displayed.
11. Calibration is now complete.
Summary of Contents for TapeLazer HP Automatic
Page 15: ...Setup Startup 3A8108A 15 7 Using a 1 4 in Allen wrench tighten bolts ...
Page 25: ...Operation 3A8108A 25 TapeLazer LiveLook Display ...
Page 51: ...Troubleshooting 3A8108A 51 Solenoid Ports Reference ...
Page 52: ...Parts 52 3A8108A Parts TapeLazer Parts ...
Page 54: ...Parts 54 3A8108A Front End Parts ...
Page 56: ...Parts 56 3A8108A Carriage Applicator Parts ...
Page 58: ...Parts 58 3A8108A Display Unit Parts ...
Page 60: ...Parts 60 3A8108A Additional Parts ...
Page 62: ...Air Line Schematic 62 3A8108A Air Line Schematic ...
Page 64: ...Wiring Diagram 64 3A8108A Wiring Diagram ...
Page 65: ...Universal Symbols Key 3A8108A 65 Universal Symbols Key ...


