Setup/Startup
3A8108A
11
9.
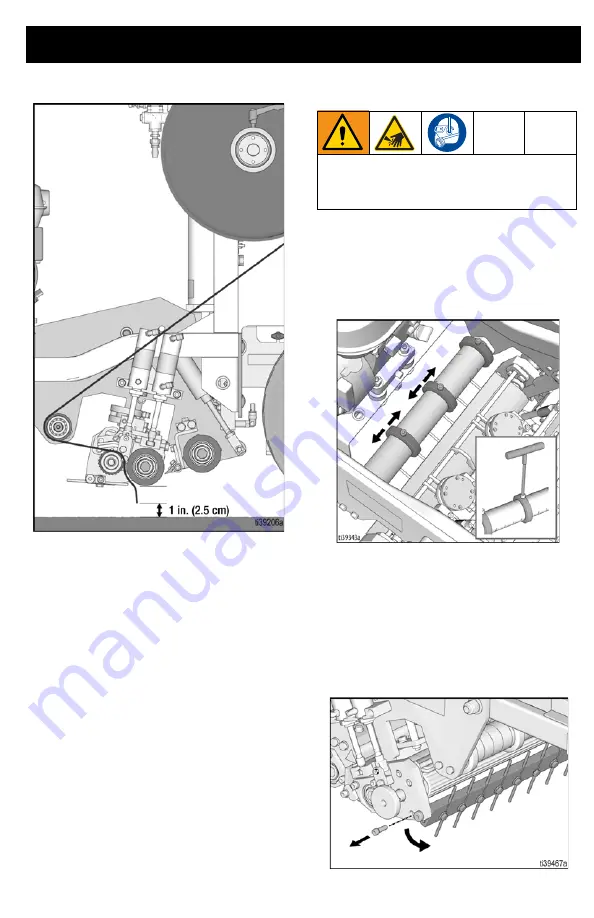
Feed tape through rollers as shown.
NOTE:
When installing tape through the
lower rollers, it is helpful to tamp the tape to
the brake roller and feed it through by
manually turning the roller (about half of a
turn) until tape appears on the other side
between the brake roller and applicator roller.
Pull tape away from the brake roller and to
within one inch of the ground.
Roller Adjustment
1.
Perform pressure relief procedure, see
2.
Using a 1/4 in. Allen wrench, adjust the
tape collars on the guide roller to match
the width and position of the tape.
NOTE:
It is recommended you either have
the blade guard in place or remove the blade
prior to removing the applicator roller. See
Blade Guard Removal and Installation
page 14.
3.
Remove front bolts on
both
sides of the
carriage holding the pivot bar in place
with a 1/4 in. Allen wrench.
To help prevent injury from cutting, install
the blade guard or remove blade prior to
adjusting rollers.
Summary of Contents for TapeLazer HP Automatic
Page 15: ...Setup Startup 3A8108A 15 7 Using a 1 4 in Allen wrench tighten bolts ...
Page 25: ...Operation 3A8108A 25 TapeLazer LiveLook Display ...
Page 51: ...Troubleshooting 3A8108A 51 Solenoid Ports Reference ...
Page 52: ...Parts 52 3A8108A Parts TapeLazer Parts ...
Page 54: ...Parts 54 3A8108A Front End Parts ...
Page 56: ...Parts 56 3A8108A Carriage Applicator Parts ...
Page 58: ...Parts 58 3A8108A Display Unit Parts ...
Page 60: ...Parts 60 3A8108A Additional Parts ...
Page 62: ...Air Line Schematic 62 3A8108A Air Line Schematic ...
Page 64: ...Wiring Diagram 64 3A8108A Wiring Diagram ...
Page 65: ...Universal Symbols Key 3A8108A 65 Universal Symbols Key ...


