Setup/Startup
14
3A8108A
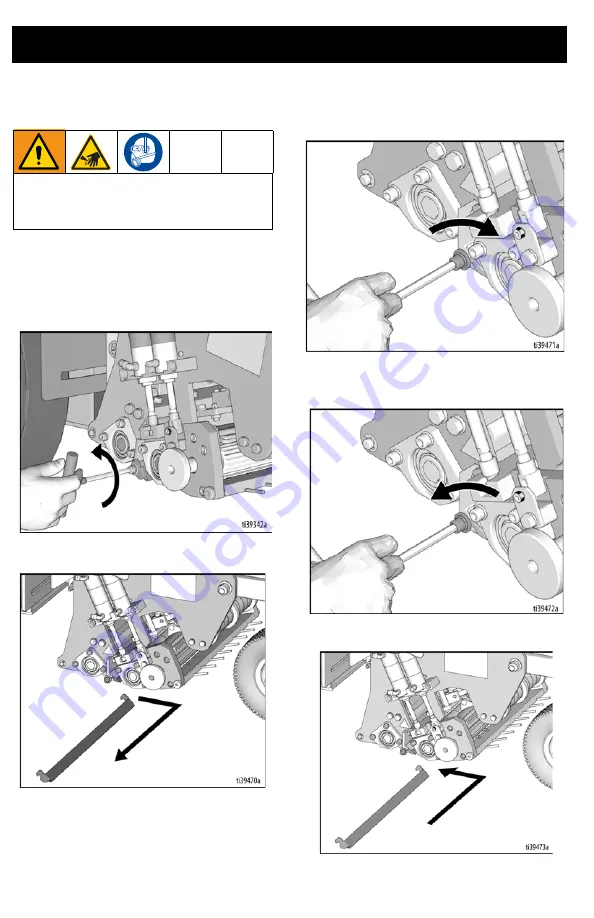
Blade Guard Removal and Installation
1.
Perform pressure relief procedure, see
2.
Using a 1/4 in. Allen wrench, loosen bolts
holding blade guard in place on both
sides of the unit.
3.
Remove blade guard.
4.
Tighten bolts.
5.
To re-install, use 1/4 in. Allen wrench to
loosen bolts holding the blade in place.
6.
Carefully re-install blade guard.
To help prevent injury from cutting, install
the blade guard or remove blade prior to
adjusting rollers.
Summary of Contents for TapeLazer HP Automatic
Page 15: ...Setup Startup 3A8108A 15 7 Using a 1 4 in Allen wrench tighten bolts ...
Page 25: ...Operation 3A8108A 25 TapeLazer LiveLook Display ...
Page 51: ...Troubleshooting 3A8108A 51 Solenoid Ports Reference ...
Page 52: ...Parts 52 3A8108A Parts TapeLazer Parts ...
Page 54: ...Parts 54 3A8108A Front End Parts ...
Page 56: ...Parts 56 3A8108A Carriage Applicator Parts ...
Page 58: ...Parts 58 3A8108A Display Unit Parts ...
Page 60: ...Parts 60 3A8108A Additional Parts ...
Page 62: ...Air Line Schematic 62 3A8108A Air Line Schematic ...
Page 64: ...Wiring Diagram 64 3A8108A Wiring Diagram ...
Page 65: ...Universal Symbols Key 3A8108A 65 Universal Symbols Key ...


