Start Up
3A4476E
11
7.
Install battery onto sprayer.
8.
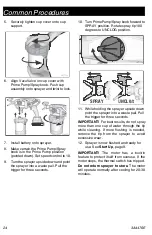
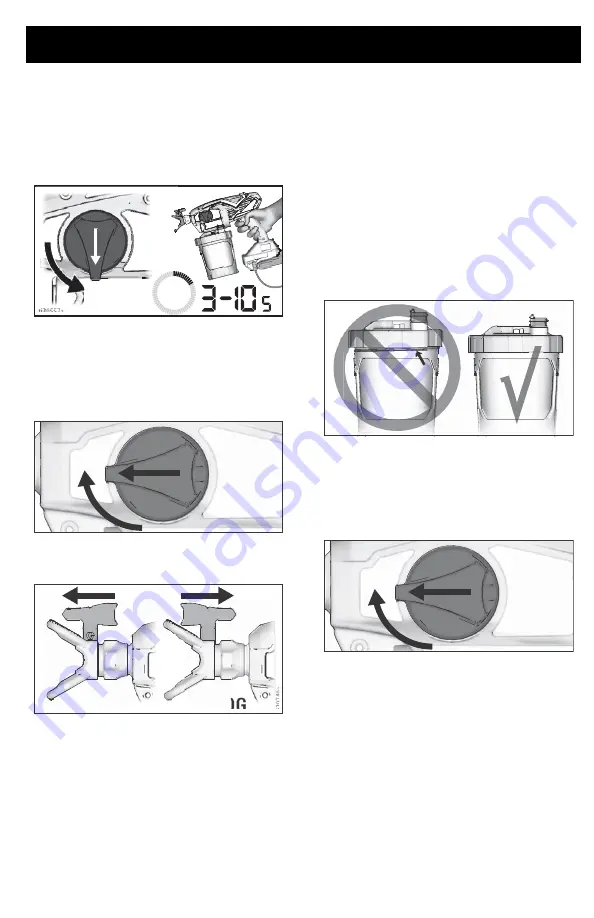
Turn Prime Pump/Spray knob down to
Prime Pump position. Turn spray tip to
the UNCLOG position. To fill sprayer
with fluid, point sprayer into a waste area
and hold the trigger in for 3–10 seconds.
9.
Air from pump may have entered the
FlexLiner during priming. Repeat Steps
4 – 6 to ensure all air is evacuated.
10. Turn Prime Pump/Spray knob forward to
spray position.
11. Make certain spray tip is in the spray
position.
12. You are now ready to spray.
NOTE:
For best results; to evacuate all
material from the FlexLiner when the material
is nearly gone, gently squeeze the bottom of
the FlexLiner to push the last of the material
up to the cup lid.
If sprayer does not spray, try one of
the steps below:
•
Make certain there is only one FlexLiner
in cup support. It is possible for two liners
to nest tightly together and appear as
only one.
•
Make certain the cup cover is properly
threaded to the cup support. If threads
are visible below the cup cover when
tight, then the cover is cross-threaded.
Fully remove the cup cover and reinstall
to the cup support so no threads are
visible when tight.
•
Repeat steps 2 – 6 on pages 10 – 10 to
ensure all the air is evacuated from the
FlexLiner.
•
Make certain the Prime Pump/Spray
knob is in the Spray position.
•
If sprayer still does not spray, see
, page 30. If
material sprays while upside down there
is air in the cup. Repeat steps above.
•
Replace VacuValve cap. Two new
VacuValve caps came with your sprayer.
ti30557a
ti29739a
ti29740a
SPRAY
UNCLOG
ti29741a
ti29739a
Summary of Contents for TC Pro
Page 36: ...Notes 36 3A4476E Notes ...
Page 37: ...Notes 3A4476E 37 Notes ...


