13
309916
Removing and Installing Cooler
WARNING
Pages 2 and 6
Removing Cooler
1.
Relieve Pressure
, page 6.
2. Remove Compressor Power Pack (Z) , page 7.
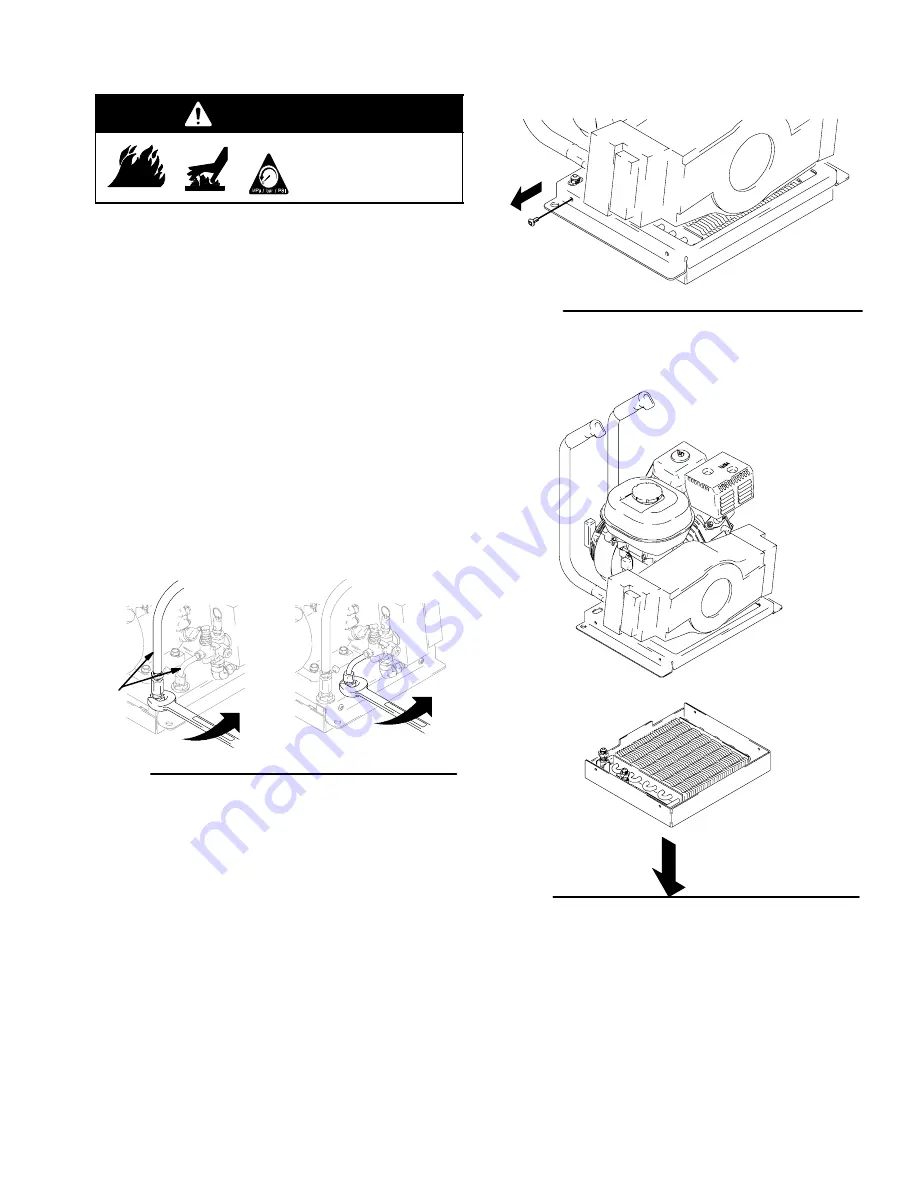
3. Remove 2 air lines (ee) Fig 17.
4. Remove 2 bulk head nuts. Fig. 17.
Fig. 17
ee
Note:
The cooler attaches to the Compressor Power
Pack (Z) and the bulk head. To avoid damaging
tubing, when servicing or accessing compressor,
always follow steps 4 and 5 first.
5. Remove 4 set screws. Fig. 18.
Fig. 18
6. Remove screws securing bottom to Compressor
Power Pack (Z) . Separate the Compressor
Power Pack (Z) from the bottom. Fig. 19.
Fig. 19


