background image

313381L

Operation

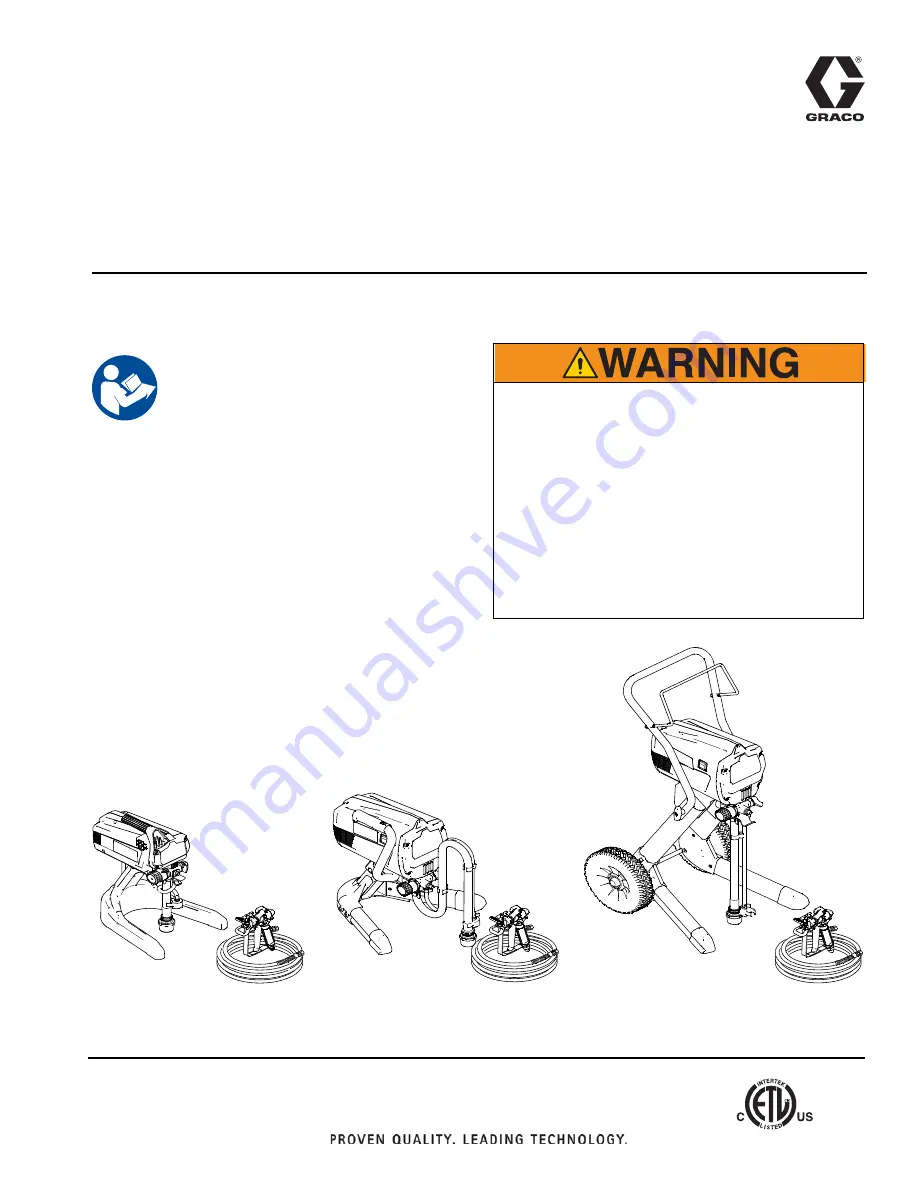
Tradeworks

 Project Painter, 

Tradeworks

 150 and Tradeworks

 170

(Specifications, page 10.)


Tradeworks 150

Model: 826620

Tradeworks 170

Model: 826630

IMPORTANT SAFETY INSTRUCTIONS.

Read all warnings and instructions in this 
manual and related manuals. Be familiar 
with the controls and the proper usage of 
the equipment. Save these instructions. See 
page 10 for model and series information 
including dispense rate, recommended 
hose length, guns, and maximum working 
pressure.

Tradeworks Project Painter

Model: 826610

ti12937a

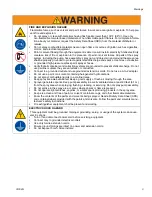
FIRE AND EXPLOSION HAZARD

Use only non-flammable or water-based materi-

als, or non-flammable paint thinners. Do not use 

materials having flash points lower than 100°F 

(38°C). This includes, but is not limited to, ace-

tone, xylene, toluene, and naphtha. For more 

information about your material, request Safety 

Data Sheet (SDS) from the supplier.

Spraying flammable or combustible materials in 

a factory or fixed location must comply with 

NFPA 33 and OSHA 1910.94(c) requirements in 

the USA and with all similar local regulations in 

other countries.

- For portable spray applications of architectural paints and coatings - 

Visit our website:
http://tradeworkssprayers.com

EN

Summary of Contents for Tradeworks 150

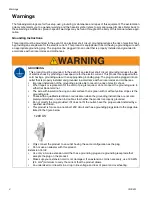
Page 1: ... Project Painter Model 826610 ti12937a FIRE AND EXPLOSION HAZARD Use only non flammable or water based materi als or non flammable paint thinners Do not use materials having flash points lower than 100 F 38 C This includes but is not limited to ace tone xylene toluene and naphtha For more information about your material request Safety Data Sheet SDS from the supplier Spraying flammable or combusti...

Page 2: ...installed and grounded in accordance with all local codes and ordinances Improper installation of the grounding plug is able to result in a risk of electric shock When repair or replacement of the cord or plug is required do not connect the grounding wire to either flat blade terminal The wire with insulation having an outer surface that is green with or without yellow stripes is the grounding wir...

Page 3: ... or conductive Connect to a grounded outlet and use grounded extensions cords Do not use a 3 to 2 adapter Do not use a paint or a solvent containing halogenated hydrocarbons Do not spray combustible liquids in a confined area Keep spray area well ventilated Keep a good supply of fresh air moving through the area Sprayer generates sparks Keep pump assembly in a well ventilated area a least 20 feet ...

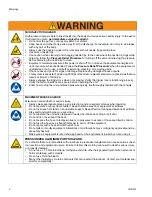
Page 4: ...ating the unit Know how to stop the unit and bleed pressure quickly Be thoroughly familiar with the controls EQUIPMENT MISUSE HAZARD Misuse can cause death or serious injury Always wear appropriate gloves eye protection and a respirator or mask when painting Do not operate or spray near children Keep children away from equipment at all times Do not overreach or stand on an unstable support Keep ef...

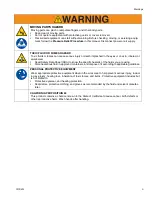
Page 5: ...Read Safety Data Sheet SDS to know the specific hazards of the fluids you are using Store hazardous fluid in approved containers and dispose of it according to applicable guidelines PERSONAL PROTECTIVE EQUIPMENT Wear appropriate protective equipment when in the work area to help prevent serious injury includ ing eye injury hearing loss inhalation of toxic fumes and burns Protective equipment inclu...

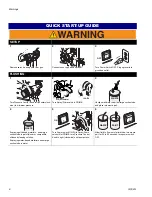
Page 6: ...small drain tube from large suction tube and place into waste pail 4 If spraying oil based materials submerge suction tube in paint thinner or compatible oil based cleaning solution If spraying water based materials submerge suction tube in water 5 Turn Power switch ON With Spray Prime valve still at PRIME turn Pressure Control Knob to right clockwise until pump starts 6 Allow fluid to flow out of...

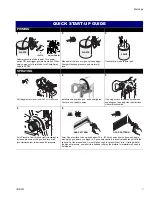
Page 7: ...clog occurs this spray tip reverses enabling you to quickly clear obstructions without disassembly 4 Turn Pressure Control Knob right clockwise to increase pressure at the gun and turn it left counterclockwise to decrease the pressure 5 Point Gun at surface to be sprayed about 12 in 304 mm away from surface and begin moving the gun before you trigger it A good spray pattern is evenly distributed a...

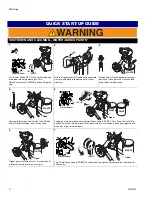
Page 8: ...e and inlet screen 4 Unscrew inlet screen from suction tube Thread Power Flush attachment onto suction tube 5 Trigger gun into paint pail and turn Spray Prime valve to SPRAY Turn Power Switch ON to push paint in hose into paint pail When water comes out of the gun keep gun triggered and move aim of gun into waste pail 6 Trigger gun into waste pail for 1 2 minutes until relatively clear water comes...

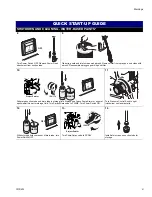
Page 9: ...d filter 10 Submerge suction tube and drain tube in storage fluid Always use Graco Pump Armor or mineral spirits paint thinner for storage fluid Turn Spray Prime valve to PRIME Turn Power Switch ON 11 Turn Pressure Control Knob to right clockwise until pump starts 12 When storage fluid comes out of drain tube turn Power Switch OFF 13 Turn Prime Spray valve to SPRAY 14 Install inlet screen on sucti...

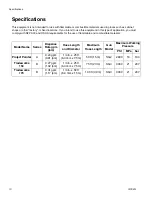
Page 10: ...33 and OSHA requirements for the use of flammable and combustible materials Model Name Series Dispense Rate gpm lpm Hose Length and Diameter Maximum Hose Length Gun Model Maximum Working Pressure PSI MPa bar Project Painter A 0 24 gpm 0 91 lpm 1 4 in x 25 ft 6 4 mm x 7 5 m 50 ft 15 m SG2 2800 19 193 Tradeworks 150 B 0 27 gpm 1 02 lpm 1 4 in x 25 ft 6 4 mm x 7 5 m 75 ft 23 m SG3 3000 21 207 Tradewo...

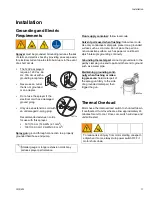
Page 11: ... Solvent pails used when flushing follow local code Use only conductive metal pails placed on a grounded surface such as concrete Do not place the pail on a nonconductive surface such as paper or cardboard which interrupts grounding continuity Grounding the metal pail connect a ground wire to the pail by clamping one end to pail and other end to ground such as a water pipe Maintaining grounding co...

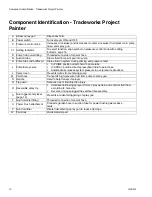
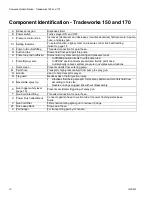
Page 12: ...s fluid to prime tube In SPRAY position directs pressurized fluid to paint hose Automatically relieves system pressure in overpressure situations L Inlet screen Prevents debris from entering pump M Paint hose Transports high pressure fluid from pump to spray gun N Handle Used to help transport sprayer Q Tip guard Reduces risk of fluid injection injury R Reversible spray tip Atomizes fluid being sp...

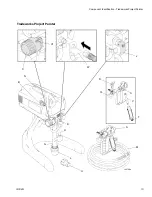
Page 13: ...Component Identification Tradeworks Project Painter 313381L 13 L Tradeworks Project Painter ti13768a C1 M V R Q L G D H J B N C S A T U W ...

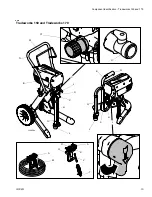
Page 14: ... position directs pressurized fluid to paint hose Automatically relieves system pressure in overpressure situations L Inlet screen Prevents debris from entering pump M Paint hose Transports high pressure fluid from pump to spray gun N Handle Used to help transport sprayer Q Tip guard Reduces risk of fluid injection injury R Reversible spray tip Atomizes fluid being sprayed forms spray pattern and ...

Page 15: ...Component Identification Tradeworks 150 and 170 313381L 15 e s A A B B D C C1 H G G H W L L D J J M R Q S T V U X N N Tradeworks 150 and Tradeworks 170 ti12939a ...

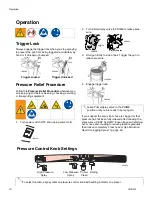
Page 16: ...4 Engage trigger lock If you suspect the spray tip or hose is clogged or that pressure has not been fully relieved after following the steps above VERY SLOWLY loosen tip guard retaining nut or hose end coupling to relieve pressure gradually then loosen completely Clear hose or tip obstruction Read Unclogging Spray Tip page 20 ti8908a Trigger Locked Trigger Unlocked ti8909a ti2810a Leave Prime Spra...

Page 17: ...nd to gun Use two wrenches to tighten securely 3 Connect other end of hose to sprayer 4 Turn OFF power switch 5 Turn Pressure Control Knob all the way left counter clockwise to minimum pressure ti12960a ti9681a ti12944a If hose is already connected make sure connections are tight ti2810a ti12940a ...

Page 18: ...switch OFF These units are not intended for lacquers When spraying water based materials flush the system thoroughly with water When spraying oil based materials flush the sys tem thoroughly with mineral spirits or compatible oil based flushing solvent To spray water based materials after spraying oil based materials flush the system thoroughly with water first The water flowing out of prime tube ...

Page 19: ... Release trigger Engage trigger lock 16 Transfer prime tube to paint pail and clip prime tube to suction tube Install Tip and Guard on Gun 1 Engage trigger lock 2 Verify tip and guard parts are assembled in order shown 3 Screw tip and guard assembly on gun Tighten retaining nut ti9653a ti5580a ti8909a ti12938a ti13960a Project Painter 150 170 ti8908a Motor stopping indicates pump and hose are prim...

Page 20: ...tructions are provided in Get ting Started with Basic Spraying Techniques section of this manual page 22 Unclogging Spray Tip To avoid fluid splashback Never pull gun trigger when arrow shaped handle is between SPRAY and UNCLOG positions Tip must be pushed all the way into guard 1 To UNCLOG tip obstruction engage trigger lock 2 Point arrow shaped handle backward to UNCLOG position 3 Aim gun at pie...

Page 21: ...ls flow rate the amount of paint that comes out of the gun HINTS Use larger tip hole sizes with thicker coatings and smaller tip hole sizes with thinner coatings Tips wear with use and need periodic replacement Fan Width Fan width is the size of the spray pattern which deter mines the area covered with each stroke Narrower fans deliver a thicker coat and wider fans deliver a thinner coat HINTS Sel...

Page 22: ...rect spray angle causes an uneven finish Flex wrist to keep gun pointed straight Fanning gun to direct spray at angle causes uneven finish Triggering Gun Pull trigger after starting stroke Release trigger before end of stroke Gun must be moving when trigger is pulled and released Aiming Gun Aim tip of gun at bottom edge of previous stroke over lapping each stroke by half 12 in 30 cm even finish th...

Page 23: ...r or flushing solvent 8 Turn pressure control knob to the Prime Clean set ting 9 Turn power switch ON 10 Flush until approximately 1 3 of the flushing fluid is emptied from the pail 11 Turn power switch OFF For short term shutdown periods overnight to two days refer to Short Term Storage page 27 For flushing after spraying oil based coatings use compatible oil based flushing fluid or min eral spir...

Page 24: ...waste pail until flushing fluid dispensed from gun is relatively clear 14 Stop triggering gun Engage the trigger lock 15 Turn prime spray valve to Prime 16 Turn power switch OFF 17 Clean InstaClean Fluid Filter and gun page 26 18 Fill unit with Pump Armor storage fluid Read Long Term Storage page 27 o preserve paint in hose trigger gun into paint pail to expel the remaining paint Step 12 is for re...

Page 25: ...re Control knob to the Prime Clean set ting 7 Screw power flush attachment to garden hose Close valve 8 Turn on water Open valve Rinse paint off suction tube prime tube and inlet screen 9 Turn lever to close power flush attachment 10 Unscrew inlet screen from suction tube Place inlet screen in waste pail 11 Connect garden hose to suction tube with Power Flush attachment Leave prime tube in waste p...

Page 26: ...h ment 22 Unscrew Power Flush attachment from suction tube 23 Clean InstaClean Fluid Filter and gun page 26 24 Fill unit with Pump Armor storage fluid Read Long Term Storage page 27 Cleaning Gun Clean gun fluid filter d with water or flushing sol vent and a brush every time you flush the system Replace gun filter if dam aged Remove tip and guard and clean with water or flush ing solvent A soft bru...

Page 27: ...nd remove dried on material if needed d Wipe paint off outside of gun using a soft cloth moistened with water or flushing solvent Long Term Storage more than 2 days 1 Place suction tube in Pump Armor storage fluid bot tle and prime tube in waste pail 2 Turn Prime Spray valve to PRIME 3 Turn power switch ON ti12946a ti12945a ti8908a ti9671a Always circulate Pump Armor storage fluid through system a...

Page 28: ...er 1 Screw inlet screen onto suction tube 2 Coil hose Leave it con nected to sprayer Wrap hose around hose wrap bracket 3 Secure a plastic bag around suction tube to catch any drips 4 Store sprayer indoors NOTICE Before storing sprayer make sure all water is drained out of sprayer and hoses Do not allow water to freeze in sprayer or hose Do not store sprayer under pressure ti12949a ti2018a ti12938...

Page 29: ...ips may require replace ment after 15 gallons 57 liters or they may last through 60 gallons 227 liters depending on abra siveness of paint Do not spray with worn tip Pump Packings 150 170 When pump packings wear paint will begin to leak down outside of pump Replace pump packings at first sign of leaking or addi tional damage could occur Purchase a pump repair kit and install according to instructi...

Page 30: ...Replace extension cord Read Grounding and Electric Require ments page 11 Sprayer electric cord is damaged Check for broken insulation or wires Replace electric cord if damaged Paint and or water is frozen or hardened in pump Unplug sprayer from outlet If fro zen do NOT try to start sprayer until it is completely thawed or you may damage the motor con trol board and or drivetrain Make sure power sw...

Page 31: ...ion tube is leaking Tighten suction tube connection Inspect for cracks or vacuum leaks Pump does not prime with fluid Remove suction tube from paint Prime pump with water or sol vent based flushing fluid Fluids are viscous or sticky Some fluids may prime faster if the Power Switch is momentarily turned off so the pump can slow and stop Repeat several times if necessary Pump cycles but does not bui...

Page 32: ...h gauge Replace extension cord Grounding and Electrical Requirements page 11 Spray gun fluid filter is clogged Clean or replace spray gun fluid filter page 26 Inlet screen is clogged Clean debris off inlet screen Pump valves are worn or clogged with debris Check for worn pump valves a Prime sprayer with paint b Trigger gun momentarily When trigger is released pump should cycle momen tarily and sto...

Page 33: ...eving pressure through prime tube System is over pressurizing Take sprayer to an authorized ser vice center Paint leaks down outside of pump Pump packings are worn Replace pump packings Motor is hot and runs intermit tently Motor automatically shuts off due to excessive heat dam age can occur if cause is not cor rected Thermal Overload page 11 Vent holes in enclosure are plugged or sprayer is cove...

Page 34: ...18 2 in 46 3 cm 37 0 in 94 0 cm Dimensions Folded Length N A N A 19 3 in 49 0 cm Width N A N A 15 3 in 38 9 cm Height N A N A 29 2 in 74 2 cm Power cord 18 AWG 3 wire 6 ft 1 8 m Fluid inlet fitting 3 4 in internal thread standard garden hose thread Fluid outlet fitting 1 4 NPSM external thread Inlet screen on suction tube 35 mesh 450 micron Wetted parts pump hose stainless steel brass leather ultr...

Page 35: ...Notes 313381L 35 Notes ...

Page 36: ...of the equipment does not disclose any defect in material or workmanship repairs will be made at a reasonable charge which charges may include the costs of parts labor and transportation THIS WARRANTY IS EXCLUSIVE AND IS IN LIEU OF ANY OTHER WARRANTIES EXPRESS OR IMPLIED INCLUDING BUT NOT LIMITED TO WARRANTY OF MERCHANTABILITY OR WARRANTY OF FITNESS FOR A PARTICULAR PURPOSE Graco s sole obligation...

Reviews: