

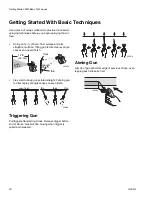
Setup
18
313381L
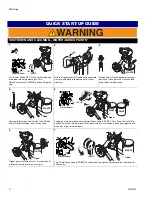
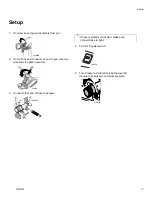
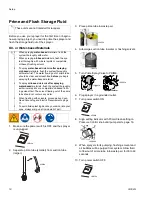
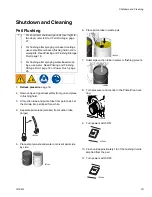
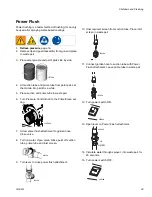
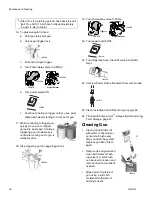
Prime and Flush Storage Fluid
Before you use your sprayer for the first time or begin a
new spraying project, you need to prime the sprayer and
flush the storage fluid out of the sprayer.
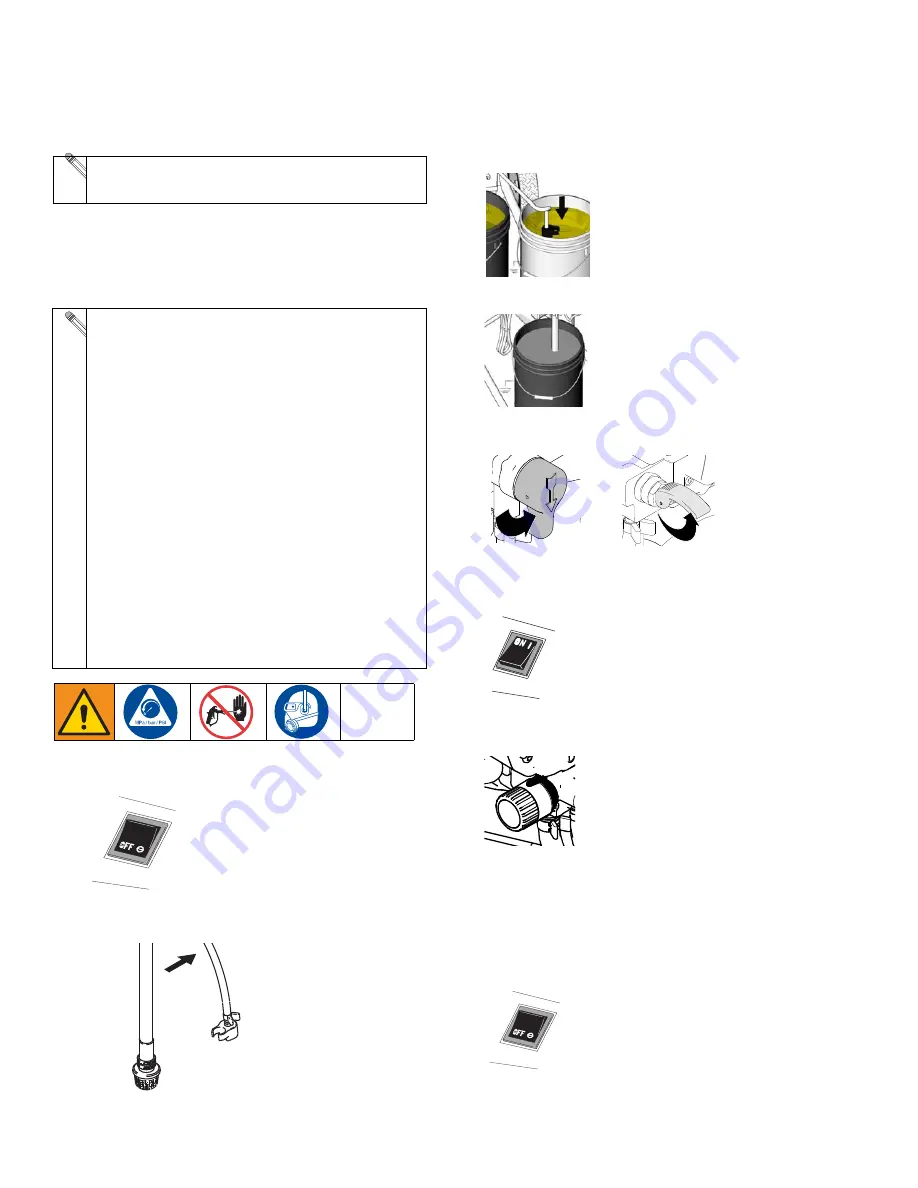
Oil- or Water-based Materials
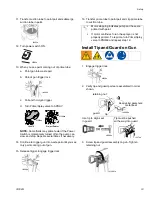
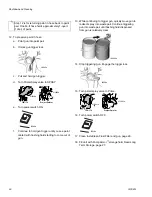
1. Make sure the power switch is OFF and the sprayer
is unplugged.
2. Separate prime tube (smaller) from suction tube
(larger).
3. Place prime tube in waste pail.
4. Submerge suction tube in water or flushing solvent.
5. Turn Prime/Spray Valve to PRIME.
6. Plug sprayer in a grounded outlet.
7. Turn power switch ON.
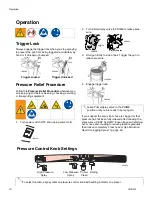
8. Align setting indicator with Prime/Clean setting on
Pressure Control knob until pump starts, page 16.
9. When sprayer starts pumping, flushing solvent and
air bubbles will be purged from system. Allow fluid
to flow out of prime tube, into waste pail, for 30 to 60
seconds.
10. Turn power switch OFF.
These units are not intended for lacquers.
•
When spraying
water-based
materials, flush the
system thoroughly with water.
•
When spraying
oil-based
materials, flush the sys-
tem thoroughly with mineral spirits or compatible,
oil-based flushing solvent.
•
To spray
water-based
materials
after spraying
oil-based
materials, flush the system thoroughly
with water first. The water flowing out of prime tube
should be clear and solvent-free
before
you begin
spraying the water-based material.
•
To spray
oil-based
materials
after spraying
water-based
materials, flush the system thoroughly
with mineral spirits or a compatible oil-based flush-
ing solvent first. The solvent flowing out of the prime
tube should not contain any water.
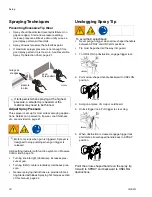
•
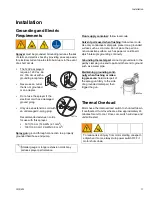
When flushing with solvents, ground pail and gun.
Read Grounding and Electric Requirements, page
11.
•
To avoid fluid splashing back on your skin or into your
eyes, always aim gun at inside wall of pail.
ti2810a
ti2039a
ti9652a
ti9651a
ti12941a
ti13961a
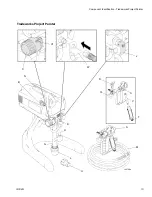
Project Painter
150/170
ti5580a
ti12948a
ti2810a
Summary of Contents for Tradeworks 150
Page 35: ...Notes 313381L 35 Notes ...


