16
309303
Service
Ball Check Repair
Tools Required
D
O-ring pick
Disassembly
NOTE:
Ball Check Repair Kit 245067 is available.
Parts included in the kit are marked with a double
dagger, for example (21
}
). Use all the parts in the kit
for the best results.
1.
Remove the fluid covers. See page 14.
2.
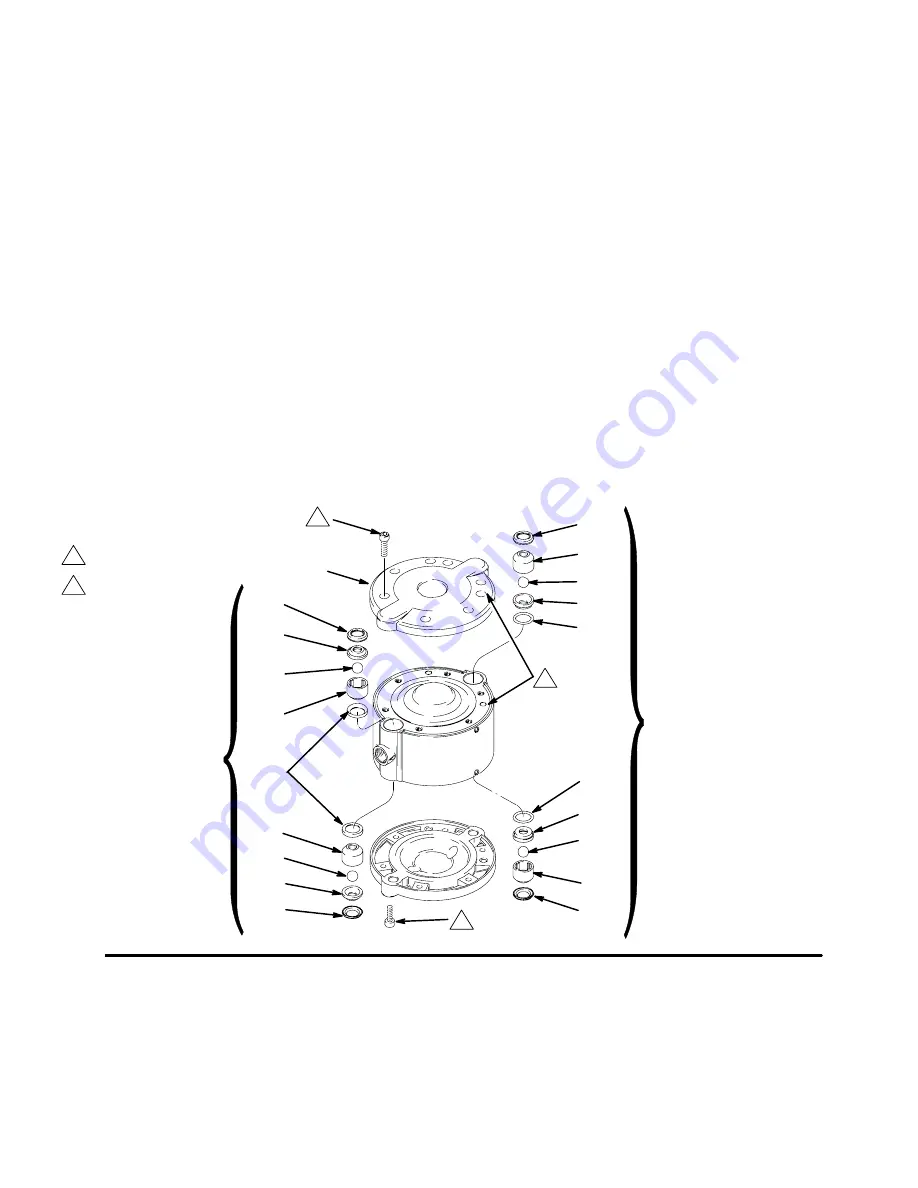
Remove the inlet and outlet ball checks. Note that
the orientation of the inlet check parts is different
from the outlet check parts. See Fig. 4.
NOTE:
If the inlet seats (26) are difficult to remove,
drive them out from the opposite side using a brass
rod and hammer.
3.
Clean all parts and inspect for wear or damage.
Replace parts as needed.
Reassembly
1.
Reinstall the inlet and outlet ball checks on one
side of the pump. The inlet and outlet checks are
assembled differently. Install the parts exactly as
shown in Fig. 4.
2.
Install one cover (32) loosely, to prevent the ball
checks from falling out. See page 14.
3.
Turn the pump over and install the ball checks on
the opposite side, exactly as shown.
4.
Reinstall the fluid covers. See page 14.
Fig. 4
1
2
70 in-lb (8 N
S
m)
Align
1
1
2
}
21
21
}
}
22
}
23
}
24
24
}
25
}
26
}
27
}
}
27
}
24
}
23
}
21
}
27
24
}
27
}
21
}
26
}
25
}
Inlet Ball Checks
Outlet Ball Checks
32
ti1032a


