


Troubleshooting
18
3A0705B
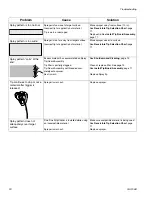
Troubleshooting
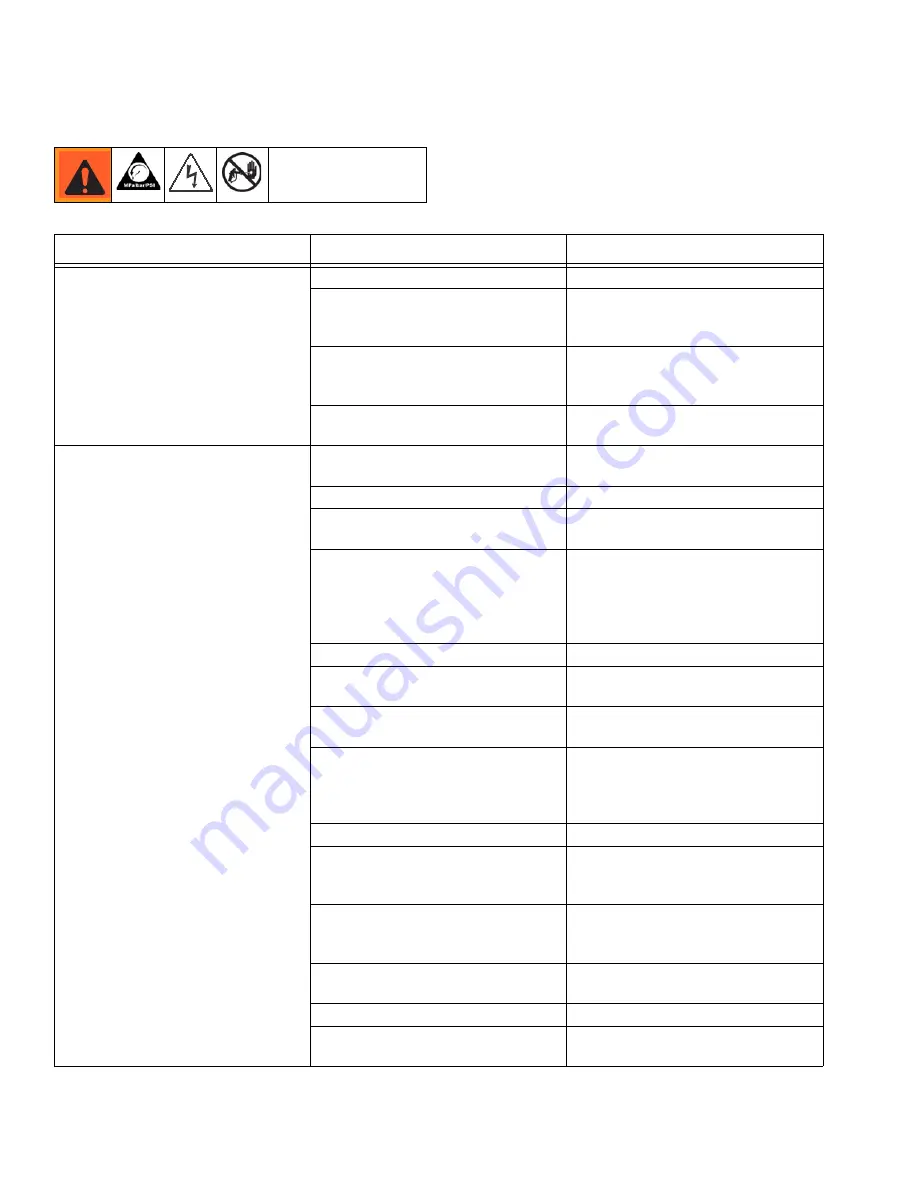
Check everything in this Troubleshooting Table before
you bring the sprayer to an authorized service center.
Problem
Cause
Solution
Sprayer makes no sound when
trigger is pulled
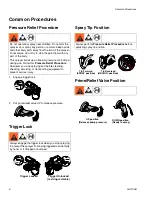
Trigger is locked.
Disengage trigger lock. See page 6.
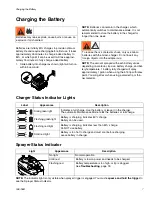
Status Indicator Light is solid RED
when triggering, indicating that the
battery charge is low.
Replace with charged battery and
place old battery in charger.
Status Indicator Light is flashing RED
when triggering, indicating that the
battery is too hot to operate.
Allow battery to cool.
Status Indicator Light does not light
when sprayer is triggered.
Battery is not installed or is
damaged.
Sprayer makes sound but no material
is sprayed when trigger is pulled
Sprayer is not primed.
Prime the pump. See
Starting a new
Job (or Refilling the Cup)
, page 10.
Prime/relief valve is in UP position.
Pull valve DOWN to spray position.
Suction Tube is missing or improperly
installed.
Make sure Suction Tube is properly
installed.
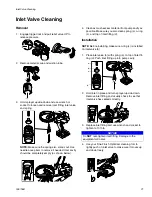
Inlet valve is stuck from material
residue left in sprayer.
Use a pencil or thin rod to lightly push
on inlet valve to make sure it moves
up and down freely. See
Starting a
new Job (or Refilling the Cup)
,
page 10.
Tip is not in SPRAY position.
Turn tip to SPRAY position.
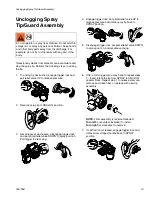
Tip is clogged.
See
Unclogging Tip/Guard
Assembly
, page 13.
Suction Tube screen is clogged.
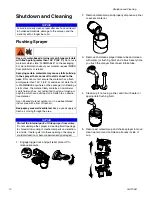
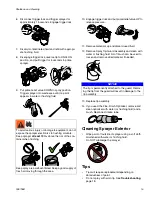
See
Shutdown and Cleaning
, page
14.
Sprayer has been tilted too far and
suction tube has lost contact with
material.
Make sure cup is filled with material.
Do not tilt the cup too far. Prime the
pump. See
Starting a new Job (or
Refilling the Cup)
, page 10.
No or low material in cup.
Refill cup with material.
Tip filter is clogged.
Remove and clean tip filter. See
Unclogging Tip/Guard Assembly
,
page 13.
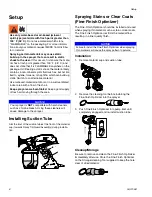
Fine Finish Optimizer is installed
while using an incompatible material.
Make sure compatible material is
being used. See
Reversible Tip
Selection Chart
, page 11.
Suction Tube o-rings are damaged or
missing.
Replace Suction Tube and o-rings.
Sprayer has reached maximum life.
Replace sprayer.
Material is leaking from hole in front
of sprayer.
Replace sprayer.
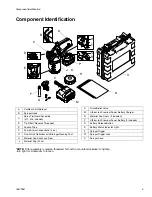
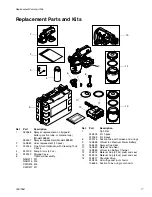
Summary of Contents for TrueCoat Plus
Page 23: ...Notes 3A0705B 23 Notes ...


