Operation
3A2799D
9
4. The spray tip orifice and spray angle determines the
coverage and size of pattern. When more coverage
is needed, use a larger spray tip rather than
increasing fluid pressure.
Gun Care
•
Do not try to “blow back” material; this is not an air
spray gun.
•
Do not wipe fluid buildup off the gun or spray tip
until pressure is relieved.
Clean the Gun
1. Follow the
2. Use a solvent-soaked brush to clean the spray tip.
Clean the front of the tip frequently during the day to
help reduce buildup.
3. Clean the tip and tip guard at the end of each work
day.
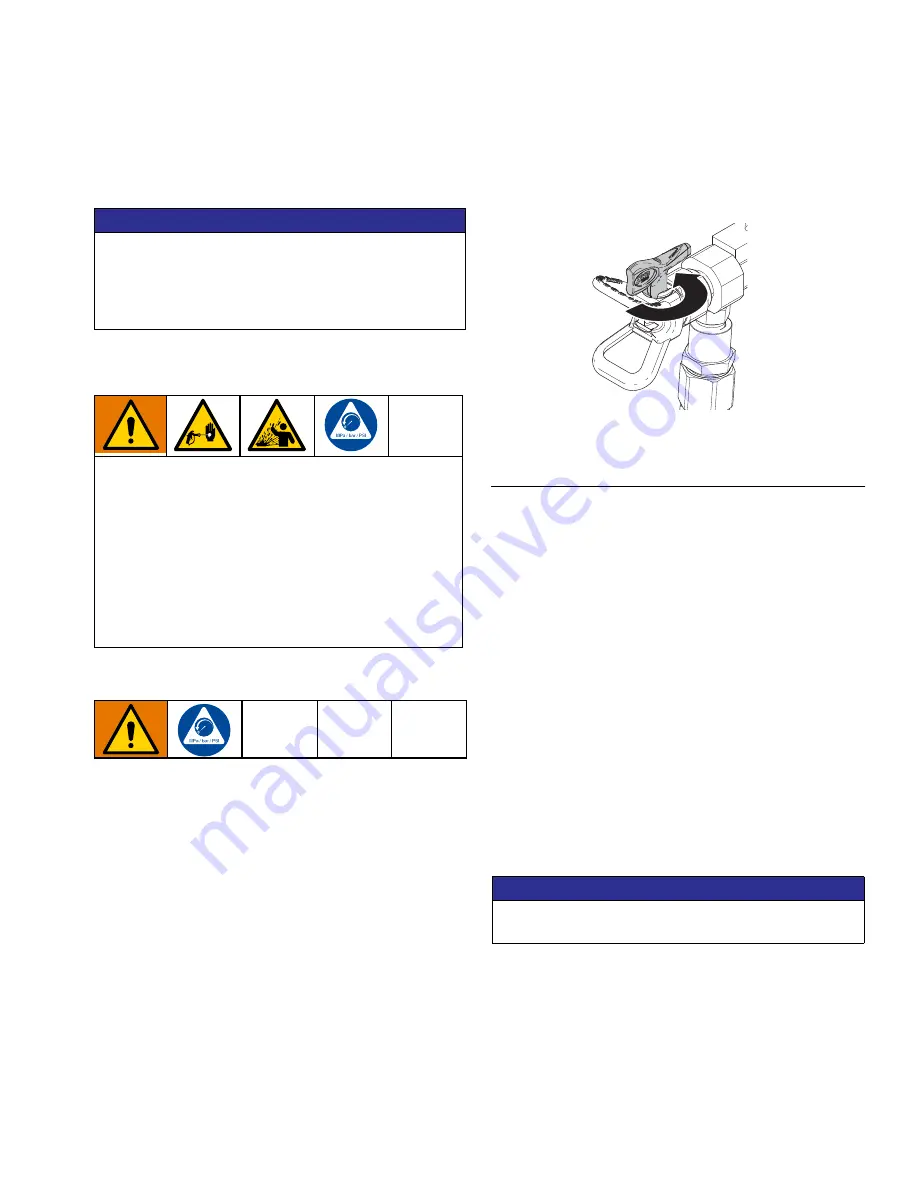
Clean the Spray Tip / Clear Clogs
Spraying position shown. Rotate tip handle 180°
and trigger gun to clear clog.
ti19268a
NOTICE
1. Engage the gun trigger lock.
2. Rotate the RAC SwitchTip handle 180° (see F
3. Disengage the gun trigger lock.
4. Trigger the gun into a pail or onto the ground to
remove the clog.
5. Engage the gun trigger lock.
6. Rotate the tip handle back to the spraying position.
7. Disengage the gun trigger lock and continue
spraying.
8. If the tip is still clogged:
a. Engage the gun trigger lock.
b. Follow the
c. Remove the RAC SwitchTip and clean. See
Guard Installation and Removal
NOTICE
Openings in the tip guard reduce material buildup on
the guard while spraying. Damage to the sharp edges
of the openings causes material to collect in the
damaged area. To prevent this, never hang the gun
by the tip guard.
To reduce the risk of fluid injection or splashing in the
eyes or on the skin, do not point gun at anyone or at
any part of the body when cleaning or checking a
clogged tip. Point the gun toward the ground or into a
waste container when checking to see if the spray tip
is cleared.
F
IG
. 2: Rotate RAC tip handle for cleaning
Never soak the entire gun in solvent. Prolonged
exposure to solvent can damage the packings.


