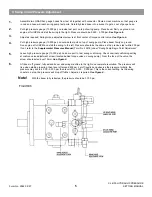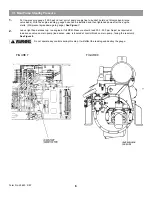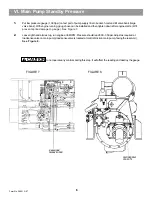
Move high pressure gauge (10,000 psi) to front hoist test port. Run engine at full RPM, lower boom to ground
and stall hoist. Pressure should be 2,200 - 2,400 psi. Adjust front port relief as required.
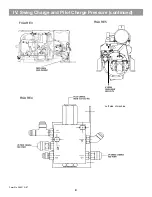
See Figure 10.
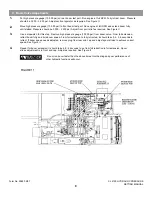
Move high pressure gauge (10,000 psi) to rear test port. Rotate section regulator adjusting screw clockwise one
and one-half turns. Raise hoist fully up, use procedure for “cracking” pressure. (See Page 1). Pressure should be
4,100 - 4,150 psi. Adjust rear port relief as needed.
See Figure 10.
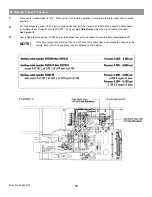
Leave high pressure gauge (10,000 psi) on rear hoist test port. Return section regulator adjusting screw to origi-
nal position. Run engine at full RPM and stall hoist up. Pressure should be 3,900 - 3,950 psi. Adjust section reg-
ulator as required.
See Figure 10.
NOTE!
Perform the following test only if doing an inspection, or if hoist performance is in question.
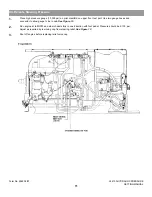
Use stopwatch for this step. Remove high pressure gauge (10,000 psi) from hoist valve. Retract boom fully and
place boom on ground with empty bucket. Run engine at full RPM and raise boom from ground to fully up. It
should take 3.3 - 3.6 seconds to fully raise boom. If hoist-up speed needs adjusted, remove plug from stroke
limiter on front end cap. Adjust as required.
See Figure 10.
FIGURE 10
1.
2.
3.
4.
From No. 29620 2/97
8
IX. Hoist Valve Adjustment
Summary of Contents for XL4000
Page 2: ......
Page 73: ......
Page 76: ... 5MP ...
Page 145: ......
Page 146: ......
Page 160: ......
Page 161: ......
Page 162: ......
Page 175: ......
Page 176: ......
Page 177: ......
Page 178: ......
Page 192: ......
Page 193: ......
Page 194: ......
Page 207: ......
Page 208: ......
Page 210: ...500P ...
Page 229: ......
Page 230: ......
Page 245: ......
Page 246: ......
Page 247: ......
Page 248: ......
Page 265: ......
Page 266: ......
Page 267: ......
Page 268: ......
Page 280: ......
Page 281: ......
Page 282: ......
Page 297: ......
Page 298: ......
Page 299: ......
Page 300: ......
Page 301: ......
Page 302: ......
Page 303: ......
Page 304: ......


