
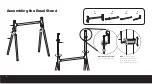


7
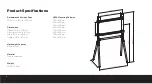
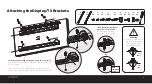
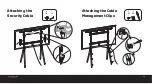
Attaching the Display/TV Brackets
Selecting the Right VESA Mounting Hardware for Your Display:
A variety of screws are included to fit VESA standards on the backs
of most displays.
Select the M5, M6, or M8 screws and washers that best fit your
display. Hand-thread the screws to determine the correct diameter.
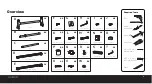
J
L
M
N
K
I
O
8X
4X
4X
4X
4X
4X
4X
D
1X
P
8X
R
2X
W
2X
E
1X
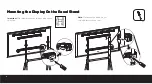
If Your Display Has Recessed
Mounting or a Curved Back,
install the spacers between
the bracket and your display.
TOP
D
E
R
R
N
OR
With
combined
spacers
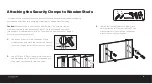
Too
Short
Too
Long
Warning
If the screw is too short, it
may not hold the display.
If it’s too long, it may
damage the display.
D
E


