background image

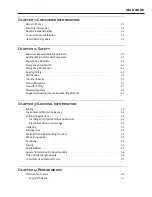
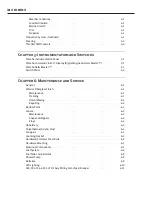
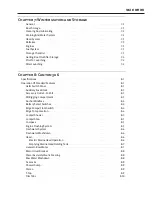
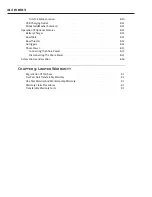
Table of Contents

Chapter 7: Winterization and Storage

General

  . . . . . . . . . . . . . . . . . . . . . . . . . . . . . . . . . . . . . . . . . . . . . . . . . . . . . . . . . . . . . . . . . . . .

7-1

Boat Storage

  . . . . . . . . . . . . . . . . . . . . . . . . . . . . . . . . . . . . . . . . . . . . . . . . . . . . . . . . . . . . . . .

7-1

Cleaning And Lubricating

  . . . . . . . . . . . . . . . . . . . . . . . . . . . . . . . . . . . . . . . . . . . . . . . . . . . . .

7-2

Draining And Water System

  . . . . . . . . . . . . . . . . . . . . . . . . . . . . . . . . . . . . . . . . . . . . . . . . . . .

7-2

Head System

  . . . . . . . . . . . . . . . . . . . . . . . . . . . . . . . . . . . . . . . . . . . . . . . . . . . . . . . . . . . . . . .

7-3

Batteries

  . . . . . . . . . . . . . . . . . . . . . . . . . . . . . . . . . . . . . . . . . . . . . . . . . . . . . . . . . . . . . . . . . . .

7-3

Engines

  . . . . . . . . . . . . . . . . . . . . . . . . . . . . . . . . . . . . . . . . . . . . . . . . . . . . . . . . . . . . . . . . . . . .

7-3

Fuel System

  . . . . . . . . . . . . . . . . . . . . . . . . . . . . . . . . . . . . . . . . . . . . . . . . . . . . . . . . . . . . . . . .

7-3

Storage Checklist

  . . . . . . . . . . . . . . . . . . . . . . . . . . . . . . . . . . . . . . . . . . . . . . . . . . . . . . . . . . .

7-3

Getting Boat Out After Storage

  . . . . . . . . . . . . . . . . . . . . . . . . . . . . . . . . . . . . . . . . . . . . . . . . .

7-4

Prior To Launching

  . . . . . . . . . . . . . . . . . . . . . . . . . . . . . . . . . . . . . . . . . . . . . . . . . . . . . . . . . . .

7-4

After Launching

  . . . . . . . . . . . . . . . . . . . . . . . . . . . . . . . . . . . . . . . . . . . . . . . . . . . . . . . . . . . . .

7-4

Chapter 8: Canyon 306

Specifications

  . . . . . . . . . . . . . . . . . . . . . . . . . . . . . . . . . . . . . . . . . . . . . . . . . . . . . . . . . . . . . . . . . .

8-1

Operation Of Standard Features

  . . . . . . . . . . . . . . . . . . . . . . . . . . . . . . . . . . . . . . . . . . . . . . . . . . .

8-1

Helm Switch Panel

  . . . . . . . . . . . . . . . . . . . . . . . . . . . . . . . . . . . . . . . . . . . . . . . . . . . . . . . . . . .

8-1

Auxiliary Fuse Block

  . . . . . . . . . . . . . . . . . . . . . . . . . . . . . . . . . . . . . . . . . . . . . . . . . . . . . . . . .

8-3

Accessory Outlet - 12 Volt

  . . . . . . . . . . . . . . . . . . . . . . . . . . . . . . . . . . . . . . . . . . . . . . . . . . . . .

8-3

Aft Rigging Compartment

  . . . . . . . . . . . . . . . . . . . . . . . . . . . . . . . . . . . . . . . . . . . . . . . . . . . . .

8-3

Anchor Windlass

  . . . . . . . . . . . . . . . . . . . . . . . . . . . . . . . . . . . . . . . . . . . . . . . . . . . . . . . . . . . .

8-4

Battery Select Switches

  . . . . . . . . . . . . . . . . . . . . . . . . . . . . . . . . . . . . . . . . . . . . . . . . . . . . . .

8-4

Bilge Pumps/Float Switch

  . . . . . . . . . . . . . . . . . . . . . . . . . . . . . . . . . . . . . . . . . . . . . . . . . . . .

8-4

Bilge Pump Location

  . . . . . . . . . . . . . . . . . . . . . . . . . . . . . . . . . . . . . . . . . . . . . . . . . . . . . . . . .

8-4

Cockpit Shower

  . . . . . . . . . . . . . . . . . . . . . . . . . . . . . . . . . . . . . . . . . . . . . . . . . . . . . . . . . . . . .

8-5

Cockpit Step

  . . . . . . . . . . . . . . . . . . . . . . . . . . . . . . . . . . . . . . . . . . . . . . . . . . . . . . . . . . . . . . . .

8-5

Compass

  . . . . . . . . . . . . . . . . . . . . . . . . . . . . . . . . . . . . . . . . . . . . . . . . . . . . . . . . . . . . . . . . . . .

8-5

Engine Flushing System

  . . . . . . . . . . . . . . . . . . . . . . . . . . . . . . . . . . . . . . . . . . . . . . . . . . . . . .

8-5

Freshwater System

  . . . . . . . . . . . . . . . . . . . . . . . . . . . . . . . . . . . . . . . . . . . . . . . . . . . . . . . . . .

8-6

Freshwater Washdown

  . . . . . . . . . . . . . . . . . . . . . . . . . . . . . . . . . . . . . . . . . . . . . . . . . . . . . . .

8-6

Head

  . . . . . . . . . . . . . . . . . . . . . . . . . . . . . . . . . . . . . . . . . . . . . . . . . . . . . . . . . . . . . . . . . . . . . .

8-6

Electric Marine Head Operation

  . . . . . . . . . . . . . . . . . . . . . . . . . . . . . . . . . . . . . . . . . . . . .

8-6

Emptying Marine Head Holding Tank

  . . . . . . . . . . . . . . . . . . . . . . . . . . . . . . . . . . . . . . . . .

8-7

Livewell - Raw Water

  . . . . . . . . . . . . . . . . . . . . . . . . . . . . . . . . . . . . . . . . . . . . . . . . . . . . . . . . .

8-7

Main Circuit Breaker

  . . . . . . . . . . . . . . . . . . . . . . . . . . . . . . . . . . . . . . . . . . . . . . . . . . . . . . . . .

8-8

Power Assist Hydraulic Steering

  . . . . . . . . . . . . . . . . . . . . . . . . . . . . . . . . . . . . . . . . . . . . . . .

8-8

Raw Water Washdown

  . . . . . . . . . . . . . . . . . . . . . . . . . . . . . . . . . . . . . . . . . . . . . . . . . . . . . . . .

8-8

Seacocks

  . . . . . . . . . . . . . . . . . . . . . . . . . . . . . . . . . . . . . . . . . . . . . . . . . . . . . . . . . . . . . . . . . .

8-9

Shower Sump

  . . . . . . . . . . . . . . . . . . . . . . . . . . . . . . . . . . . . . . . . . . . . . . . . . . . . . . . . . . . . . . .

8-9

Stereo

  . . . . . . . . . . . . . . . . . . . . . . . . . . . . . . . . . . . . . . . . . . . . . . . . . . . . . . . . . . . . . . . . . . . . .

8-9

T-Top

  . . . . . . . . . . . . . . . . . . . . . . . . . . . . . . . . . . . . . . . . . . . . . . . . . . . . . . . . . . . . . . . . . . . . . .

8-9

Trim Tabs

  . . . . . . . . . . . . . . . . . . . . . . . . . . . . . . . . . . . . . . . . . . . . . . . . . . . . . . . . . . . . . . . . .

8-10

Summary of Contents for Canyon 306

Page 1: ...highly dependent on the operation maintenance and care of your boat so please read this manual thoroughly and keep it around for reference If you need further explanation or hands on help don t hesitate to ask the people at your Grady White dealership they have experience with the systems and operations of your boat If for any reason you need additional help please feel free to call us at the fact...

Page 2: ......

Page 3: ...rbon Monoxide 2 5 Propeller Safety 2 7 Watersport Safety 2 7 Suggested Boating Classes And Reading Material 2 7 Chapter 3 General Information Fueling 3 1 Environmental Protection Agency 3 2 Pollution Regulations 3 2 Discharge of Oil or Hazardous Substances 3 2 Disposal of Plastics or Garbage 3 3 Trailering 3 3 Predeparture 3 3 Casting Off and Approaching The Dock 3 4 Reboarding Ladder 3 4 Anchorin...

Page 4: ...witch Panel 5 4 Chapter 6 Maintenance and Service General 6 1 Exterior Fiberglass Finish 6 1 Maintenance 6 1 Cleaning 6 1 Finish Waxing 6 2 Repairing 6 2 Bottom Paint 6 3 Canvas 6 3 Maintenance 6 3 Snaps and Zippers 6 4 Vinyl 6 4 Upholstery 6 4 Polyethylene Acrylic Vinyl 6 4 Scuppers 6 5 Caulking Gasket 6 5 Hardware Stainless Steel Rails 6 5 Hardware Mounting 6 5 Aluminum Components 6 5 Fuel Syste...

Page 5: ...elm Switch Panel 8 1 Auxiliary Fuse Block 8 3 Accessory Outlet 12 Volt 8 3 Aft Rigging Compartment 8 3 Anchor Windlass 8 4 Battery Select Switches 8 4 Bilge Pumps Float Switch 8 4 Bilge Pump Location 8 4 Cockpit Shower 8 5 Cockpit Step 8 5 Compass 8 5 Engine Flushing System 8 5 Freshwater System 8 6 Freshwater Washdown 8 6 Head 8 6 Electric Marine Head Operation 8 6 Emptying Marine Head Holding Ta...

Page 6: ...Table 8 12 Bow Thruster 8 12 Outriggers 8 12 Shore Power 8 13 Connecting The Shore Power 8 13 Disconnecting The Shore Power 8 15 Safety Labels and Location 8 16 Chapter 9 Limited Warranty Registration Of Purchase 9 1 Five Year Hull Transferable Warranty 9 1 One Year Material And Workmanship Warranty 9 1 Warranty Claim Procedures 9 3 Transferable Warranty Form 9 5 ...

Page 7: ...Manual a book published by the National Marine Manufacturer sAssociation NMMA hasbeenincludedwithyourOwner sManualasasupplement This publication will be referenced in your Grady White Owner s Manual to present additional instructions and information on basic boating Warranty Information The Grady White warranty is located in the last chapter of this manual Upon the purchase of your new Grady White...

Page 8: ...d periodic servicing of the boat in accordance with suggestions in the Owner s Manual and Packet Return the boat to the selling dealer for an engine inspection Refer to the engine s owner s manual for the proper maintenance schedule Grady White Boats has a permanent record of your boat which is retained under its Hull Identification Number HIN Data regarding equipment and accessories as well as de...

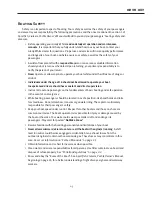
Page 9: ...ous situations which WILL cause severe personal injury or death if the warning is ignored WARNING This symbol alerts you to potentially hazardous situations or unsafe practices that COULD result in severe personal injury or death if the warning is ignored C AUTION This symbol alerts you to potentially hazardous situations that MAY result in minor personal injury or cause product or property damage...

Page 10: ...1 4 Chapter 1 Consumer Information ...

Page 11: ...times Sound Signaling Device Horn Bell Or Whistle Your Grady White is equipped with a horn that meets USCG requirements Visual Distress Signals USCG approved visual distress signals are required on U S waters See page 42 of the pamphlet Sportfish Cruisers Yachts Owner s Manual enclosed with this manual for more information Lighting Grady White boats are equipped with navigational lights that meet ...

Page 12: ...whether they happen aboard your vessel or someone else s Anticipate and plan for specific situations such as fire man overboard collision etc to give you the confidence and ability necessary to handle an emergency The key is to remain calm For emergency procedures see Section 4 in Sportfish Cruisers Yachts Owner s Manual Rendering Assistance The owner or operator of a vessel is required by law to ...

Page 13: ...on the fundamentals of basic boating and safe operation in the event of an emergency While boating passengers should be located in a safe position Use hand holds and rails for steadiness Do not allow bow transom or gunwale riding The captain is ultimately responsible for their passenger s safety Keep your boat speed under control Respect for other boaters and those on shore are common courtesies T...

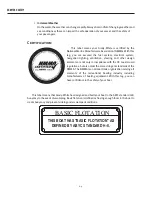
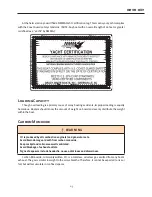
Page 14: ... elements are not only in compliance with the US Coast Guard regulations but also meet the more stringent standards of the NMMA The NMMA is a national trade organization serving all elements of the recreational boating industry including manufacturers of boating equipment With this tag you can have confidence in the safety of your boat This label means that Grady White has designed and built your ...

Page 15: ...f weight on board and evenly distribute the weight within the boat Carbon Monoxide WARNING CO is produced by all combustion engine s and generator sets Avoid brain damage or death from carbon monoxide Keep cockpit and cabin areas well ventilated Avoid blockage of exhaust outlets Signs of exposure include headache nausea dizziness and drowsiness Carbon Monoxide commonly written CO is a colorless od...

Page 16: ...motorwell area Do not board your vessel with the engine s running Also do not occupy the motorwell area with the engine s running Operators need to be aware of the influence of other boats on their vessel as well as the effects they have on neighboring crafts Of primary concern is the operation of an auxiliary generator with boats moored along side each other This situation creates an atmosphere w...

Page 17: ...rt safety please refer to the Towed Watersports Safety Guidelines brochure included in your Owner s Packet Suggested BoatingClassesAnd Reading Material Like a car boats must be operated according to safety rules and traffic regulations Although we includesomebasicboatingtipsinthismanual athoroughreviewofthesafetyrulesandregulations for boating is beyond the scope of this text A listing of boating ...

Page 18: ...sen s Guide To Powerboats Eric Sorensen For more information on boating safety courses in your area call Boating Education Hotline 1 800 336 BOAT 2628 US Coast Guard Boating Hotline 1 800 368 5647 Contact Your Local Coast Guard ...

Page 19: ...gasoline in some fuel blends that oxygenates the fuel to reduce emissions Use a 10 micron fuel filter to capture particulate contaminants that may be loosened from the fuel system due to the solvent nature of alcohol blended fuels Carry spare fuel filters with a 10 micron rating on your boat for emergency replacement if required Before Fueling Shut down all engines Turn battery select switch es to...

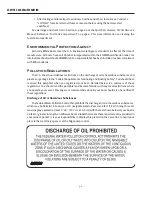
Page 20: ...rge of oil or hazardous substances and plastics or garbage in the Federal Requirements for Boating and Boating Safety You should have received this pamphlet when you registered your boat Detailed below is a summary of those regulations You should read the pamphlet and become familiar with any local restrictions where you operate your vessel Passengers or crew members aboard your boat should also b...

Page 21: ...ew and passengers Trailering The adjustment and balance of your boat on the trailer determines how easily your boat may be transported The tongue weight on the hitch ball should be 5 10 of the total weight of your boat motor and trailer Tail heavy loads cause swaying while trailering The rollers and or bunkers of your trailer should be adjusted so that the weight is distributed evenly across the s...

Page 22: ...ater The ladder is telescopic and can be extended by manually pushing or pulling on the last rung When the ladder is not in use it should be retracted and kept in the stowed position on the platform Some boat models are equipped with an additional ladder in the bow or a removable ladder for use with a cockpit side door These ladders are not intended to be used for unassisted reboarding DANGER To a...

Page 23: ... should be used It is important to keep the slack out of the propeller area Watch the action of the towing boat If excessive slack develops in the towline and contact is obvious turn in either direction to avoid hitting the stern WARNING As a precaution passengers on both boats should stay clear of the towline lines under stress could snap and fly in either direction causing injury ShallowWater Mo...

Page 24: ... speeds Accelerating and deceleration rates Time and distance to bring the boat to a stop at different speeds Control of the boat in close quarters Time required to bring the boat on plane Also read the section in Sportfish Cruisers Yachts Owner s Manual beginning on page 59 for information on safe operating speed Twin andTriple Engine Boats Twin and triple engine boats are easier to maneuver than...

Page 25: ...oard distance measure between waterline and deck Gunwale Gunnel point where the deck and hull join Hatch an opening in the deck to provide access below Headroom vertical distance between the floor and over head structure or canopy ceiling Hull major component that provides a watertight platform buoyant enough to float a craft and its load Keel the major longitudinal member of a hull the lowest ext...

Page 26: ...3 8 Chapter 3 General Information ...

Page 27: ...uel are added This extra load will affect the performance of your boat according to the distribution of the weight Another type of extra load that could affect performance is the accumulation of water in the bilge Keep the bilge dry to eliminate this type problem Marine Growth Maximum performance is obtained only when your hull bottom is clean Marine growth on the bottom of the boat will increase ...

Page 28: ...psasthepropellerrotates Pitchisthetheoretical notaccounting for slippage forward distance the propeller would move in one revolution An example of a propeller dimension would be 14 X 17 for a propeller having a diameter of 14 35 6 cm and a pitch of 17 43 8 cm PropulsionSystem Outboard The engine manufacturer supplies all vital information concerning your engine s in the OperationandMaintenanceManu...

Page 29: ... be maintained within acceptable operating levels A low oil level will allow air to get into the steering system and result in unresponsive steering The oil level should always be at the base of the threads in the filler hole located on the front top portion of the helm pump Check the entire steering system regularly for oil leaks Unobserved leaks over a period of time will result in unresponsive ...

Page 30: ...that propellers are designed for maximum forward thrust so reverse thrust will not be as efficient All controls have a neutral safety mechanism This mechanism will not allow the engine to start whenthecontrolisingear Youmayusetheneutrallockoutfeatureonthecontrolhandletoincrease the flow of fuel to the engine while remaining in the neutral position Neutral Lock Out button for Mechanical Shifter is ...

Page 31: ...rse Also under certain conditions not allowing the RPMs to reduce before shifting to reverse may cause the engine s to shut down The throttle shift control system requires regular preventative maintenance for continued safe and reliable operation Refer to the engine manual for specific recommendation and maintenance requirements All inspections repairs and replacements to the throttle shift contro...

Page 32: ...4 6 Chapter 4 Performance ...

Page 33: ...ha display provides engine and boat information listed below The display of these functions and other graphics may be customized Please see the Yamaha owner s manual for detailed instructions on customizing Fuel Level This feature indicates the gas tank s fuel level Remember two things when reading this gauge The accuracy of your gauge varies with the attitude of your boat in the water trim or lis...

Page 34: ...n page 4 1 for adjustment recommendations Battery Voltage Indicator This feature indicates the battery charge when the engine is off and indicates the alternator output when the engine is running A reading of 12 or 13 volts is normal indicating a fully charged battery Readings of 11 or below indicate a weak battery which may not start the engine A reading of 13 to 15 volts when the engine is runni...

Page 35: ...primarily uses only idle RPM to do so Drift Point Drift Point allows the boater to drift the boat with the wind or the current it maintains a selected heading but not a position On the joystick are two control selector buttons The Joystick selector activates the joystick The remote control must be in the neutral center position for this selector to be activated The High Mode selector allows for in...

Page 36: ...dicate the system is unlocked Press the Ignition button then the Start Stop button to start the engines To engage the Y COP security system touch the key to the panel after the engines are turned off A single audible beep indicates the system is immobilized The Command Link Plus display allows the operator to adjust and customize settings though some settings must be adjusted by an authorized tech...

Page 37: ...ished color pigment called gel coat It is used for cosmetic purposes and makes routine maintenance relatively simple Although gel coat has a hard smooth surface it does contain microscopic pores that will allow surface discoloration if not kept clean Maintenance Normal exterior finish maintenance of your Grady White is similar to the care you would give your automobile Do not use caustic highly al...

Page 38: ...ation has been removed Repeat this process if necessary Buff using a polishing compound suitable for fiberglass an electrically or pneumatically operated buffer at low speed 1750 2250 RPM and an 8 inch 20 3 cm lamb s wool pad C AUTION Keep buffer moving Do not allow it to rest in one spot Heat build up will quickly distort the surface C AUTION Compounding too often or excessive compounding can wea...

Page 39: ...vent blistering use an epoxy barrier coat to be applied in conjunction with the anti fouling paint Canvas Grady White s canvas is made using the highest quality vinyl and latest sewing techniques The canvas will not be completely leak proof The seam holes in your canvas may stretch and tend to leak However you can correct this problem by applying Apseal or Uniseal to the seams Please understand th...

Page 40: ... the vinyl yellow This process should be repeated as necessary to maintain the protective wax coating Store and secure canvas before trailering Dry all canvas before storing to prevent mildew Roll vinyl panels to prevent them from cracking This is necessary to prevent them from cracking Never fold these pieces Upholstery Your exterior vinyl upholstery may be cleaned with a mild solution of househo...

Page 41: ...ect the caulking or gaskets for leaks Recaulk or replace the gaskets as necessary or have your dealer do the repair Hardware StainlessSteel Rails The hardware on your Grady White is made of laboratory grade 316 stainless steel and needs regular cleaning to maintain its less staining properties The key to maintaining your stainless steel is to keep it clean with a mild solution of soap and fresh wa...

Page 42: ...8405 800 853 7760 www aquatech marine com C AUTION Do not use abrasive cleaning products pads steel wool or steel brushes These products will damage the finish FuelSystem To determine whether a fuel flow problem is in your fuel system or your engine follow this simple method Connect a portable tank to the engine and operate the engine If the problem persists the likely cause is with the engine its...

Page 43: ...6 7 Chapter 6 Maintenance and Service ...

Page 44: ...6 8 Chapter 6 Maintenance and Service ...

Page 45: ...imidator 8A27M brand marine batteries If your boat is equipped with batteries not installed at the factory consult with the battery manufacturer for proper care and maintenance instructions and the engine manufacturer for appropriate battery specifications Replacements batteries should always be of the same brand model age and size Never mix different types of batteries The Intimidator 8A27M is an...

Page 46: ...econnecting battery cables the black cable must be connected to the negative terminal and the red cable must be connected to the positive terminal Reversing these connections will immediately damage your system Never disconnect the battery when the engine is running This can cause damage to the charging system When replacing your battery use the same brand and type as the factory installed battery...

Page 47: ...l Auto Float Switch Forward 16 ga Brown Red 5 0 Near Battery 6 0 In Battery Select Box Rule 1100 Integrated Float 255 257 275 16 ga Brown Blk Brown Red 6 0 Battery Select Box Accessory Panel Head Head Pump Marine Electric 10 ga Red Gray or Red 25 0 Fuse Block Head Control Panel Holding Tank Macerator Marine 10 ga Orange Red 20 0 Fuse Block In line Macerator Pump 10 ga Orange Gray 20 0 Accessory Pa...

Page 48: ...y 16 ga White 5 0 Accessory Panel Fuel Grounds 16 ga Green N A N A Fuel Tank Sender Auxiliary 16 ga Pink White N A N A Fuel Tank Sender Main 16 ga Pink N A N A Hardtop or T top Negative Main 10 ga Black Blue N A Negative Buss Hardtop or T top Power Lead Main 10 ga Red Blue N A Fuse Block Positive Block Horn 180 209 255 257 275 12 ga Orange White 5 0 Accessory Panel Horn 225 228 232 258 306 307 12 ...

Page 49: ...when lifting or moving the boat for storage While transporting a boat by a lift or fork lift the structure should remain as close to ground levelaspossible Ifslingsarenecessaryforliftingortransporting theyshouldbeinpropercondition and tied together to prevent any movement separating or slipping which could cause damage to the boat If fork lifts are used to move the boat the forks should be padded ...

Page 50: ...reservative like T 9 on metal surfaces to prevent salt water damage Check for loose silicone hinges and unseated gaskets Replace or tighten where necessary Heavy seas pounding and twisting the hull can cause leaks in your windows doors and hatches Check hinges for corrosion Lubricate hinges as necessary DrainingAndWaterSystem If the boat is stored out of water remove the garboard drain plug to kee...

Page 51: ... Tanks should be kept filled when the boat is not in use to reduce the accumulation of moisture and condensation Add stabilizer to fuel that won t be used in 60 90 days Use fuel stabilizer specifically designed for alcohol blended fuel if using E10 gasoline StorageChecklist In addition to winterization guidelines the following checklist can be used as a guide for storing your boat Additional detai...

Page 52: ...ion and for condition of hose Check operation of bilge pumps in manual and automatic modes Check shower sump pump if installed Check operation of all electrical circuits Check the hoses on the freshwater system and close all valves fill freshwater system and check for leaks Perform maintenance on engines according to the manufacturer s manuals prior to returning them to service Check all engine an...

Page 53: ... 236 255 307 DC Accy Wiring Color Fuse Breaker on page 6 11 for breaker amperage ratings for each circuit Not all boats are equipped with the same accessories Consult your dealer for specific information or questions on the accessories included on your boat Aft and Forward Bilge These two way switches serve as manual switches for each bilge pump These switches operate independently of each other C...

Page 54: ...windlass and the bottom of the switch to lower the windlass Wiper This switch powers the windshield wiper and windshield washer Accessory Switches and breakers labeled ACC are blank They may be used for non factory installed accessories Switch labels are available from your dealer for non factory installed options Other Switches Trim Tilt The trim tilt switch is located on the throttle control Tri...

Page 55: ...outlet provides an easily accessible power supply for accessories such as cell phones and spotlights NOTICE This outlet cannot be used with a cigarette lighter Aft RiggingCompartment The aft rigging compartment is located aft of the fuel tank compartment This area is functional for rigging ignition protected accessories and for better access to rigging components This compartment contains two flat...

Page 56: ...red by the larger battery bank C AUTION Never turn the battery select switch to the off position with the engine running as this could damage the charging system Bilge Pumps FloatSwitch Your boat is equipped with automatic float switches adjacent to the bilge pumps A float switch will enable the bilge pump to come on automatically if a significant amount of water accumulates in the bilge These swi...

Page 57: ...e boat is n motion Compass The compass is located at the helm station in direct view of the operator when navigating the boat Follow the compass instructions in your Owners Packet to make compensation adjustments Engine FlushingSystem Theonboardengineflushingsystemisusedtocleanthecoolingwaterpassagesofyourengines using a garden hose and tap water To operate this system do the following steps 1 Scr...

Page 58: ...e found at all freshwater and raw water outlets on your boat Contact your dealer for replacement labels FreshwaterWashdown To operate the freshwater washdown system place the freshwater switch on the helm switch panel in the on position This system will now be pressurized at the freshwater outlets A hose with a spray nozzle attached may be used intermittently without turning the switch off in the ...

Page 59: ...seacock arm NOTICE Overboard discharge seacock must be secured in the closed position in accordance with the laws in your boating area Livewell RawWater To operate the livewell open the seacock located in the aft bilge using the remote seacock arm labeledlivewell thelivewellpumpisscreweddirectlyintothisseacock Placethelivewellstandpipe in the drain at the bottom of the livewell Screw it down until...

Page 60: ...nses the motion of the hydraulic fluid from the helm and pumps fluid in the cylinders at the engine accordingly The power assist pump is installed on the starboard side of the lower rigging compartment inside the console Over currentprotectionisprovidedbya50Afuselocatedonthepositiveterminalofbattery bank 2 This system is compatible with multiple steering stations and the use of an autopilot Refer ...

Page 61: ...ect switches are on the pump will operate when needed The sump collects and discharges drainage from the console shower and sink The sump contains a filter which should always be installed when using the shower to prevent the sump pump from becoming clogged Similar to a bilge pump the sump pump is activated automatically by a float switch to discharge the collected water overboard via a thru hull ...

Page 62: ...positions for your boat under different load conditions Trim tabs are also useful in correcting a port or starboard running list If the boat is listing to the port side press the starboard trim tab switch toward bow down Press the port trim tab switch toward bow down to correct a starboard list This will tend to lower the bow by pulling the higher side to a level position If your bow is already in...

Page 63: ...ies for charging accessories such as cell phones and tablets WindshieldWasherSolenoid The wiper switch located on the helm switch panel controls your windshield washer Water may be sprayed on the windshield by pressing down on the wiper switch with the freshwater system pressurized To pressurize place the freshwater switch on the helm switch panel in the on position The wiper will operate and the ...

Page 64: ...as drinks and food items C AUTION Max load 20 pounds 9 2 kg Table collapse resulting in injury may occur if maxload is exceeded BowThruster The bow thruster aids in maneuvering your boat The engines can control the direction of the stern while the bow thruster moves the bow side to side Use the joystick control located at the helm to control the bow thruster by pushing the joystick in the directio...

Page 65: ...current to the battery charger located in the lower rigging compartment inside the console This is a dedicated system supplying power only to the battery charger It does not supply current to any other panels or devices on your boat The shore power is used by connecting the heavy duty cable supplied with the boat to an appropriate external power source This cable provides power to the boat s AC in...

Page 66: ...g on the shore power cable plug should be screwed on the threaded portion of the boat inlet to prevent the cable from working loose or becoming detached when in use If your shore power cable is missing this ring or showing signs of wear or burn marks around the terminals where it plugs into the inlet it should be replaced immediately A loose fitting plug will create electrical resistance that can ...

Page 67: ...under the aft starboard gunwale to the off position 2 Turn the circuit breaker at the dock outlet to the off position 3 Disconnect the shore power cable at the dock outlet first 4 Disconnect the shore power cable at the boat inlet NOTICE Keep inlet cover closed tightly when not in use ...

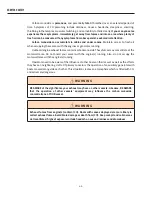
Page 68: ...a headache dizziness or drowsiness CO CO CO CO CO CO CO CO CO CO CO CO CO CO CO CO CO CO CO CO CO TO AVOID PERSONAL INJURY KEEP HANDS FREE OF WINDLASS AND ROPE WHEN OPERATEING CAUTION THIS MARINE HEAD SYSTEM WILL FLUSH MACERATE AND DISCHARGE WASTE AND MARINE RV TOILET TISSUE ONLY ANY OTHER MATERIALS CAN RESULT IN DAMAGE OR SYSTEM MALFUNCTION CAUTION WARNING Carbon monoxide CO can cause brain damag...

Page 69: ...ibility of the owner The owner will also be responsible to remove and reinstall at their own expense all outboard engines if directly related to damage in question as well as any and all personal effects and electronics equipment All repairs are subject to prior written authorization by Grady White Boats Incorporated The Five Year Structural Hull Warranty is transferable to the second and subseque...

Page 70: ...luding gel coat cracking crazing blistering discoloration chalking or fading chrome plated or painted metal aluminum and stainless steel finishes plastics or acrylic materials windshields glass breakage all vinyl upholstery and canvas instruments and gauges and leakage around windshields windows hatches and other apertures Failure of the owner to use maintain or store the boat as specified in the ...

Page 71: ...the boat who will affect the corrective action under this warranty upon prior written authorization from Grady White Boats Incorporated THESE WARRANTIES ARE EXPRESSLY MADE IN LIEU OF ALL OTHER WARRANTIES DURATION OF ANY IMPLIED WARRANTY OF MERCHANTABILITY OR FITNESS FOR A PARTICULAR PURPOSE OR OTHERWISE SHALL BE LIMITED TO AND COINCIDENT WITH THE DURATION OF THESE EXPRESSED WARRANTIES ...

Page 72: ...9 4 Chapter 9 Warranty ...

Page 73: ...p or Previous Owner _______________________________________ Date Purchased ________________ About Your Boat 1 What type of power is your boat equipped with o Single OB o Dual OB o Triple OB 2 What engine brand does your boat have o Yamaha o Other 3 Engine horsepower total if dual triple power ________ 4 Is your new Grady White the first boat you ve ever owned 5 o Yes Please skip to question 5a o N...

Page 74: ...torboating Sailing o Sportfishing o Boating World o Florida Sportsman o Power Motoryacht o Wall Street Journal o Boats U S o Offshore o Saltwater Sportsman o Other ____________________ 10 What is your age o Under 25 o 25 34 o 35 44 o 45 54 o 55 64 o 65 or older 11 Which of the following best describes your educational background o Some High School o Some College or Technical o Some Post Graduate W...

Reviews: