background image

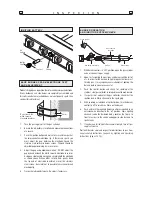
1.

Open barbecue hood before attempting to light
back burner.

2.

Set burner control knobs to 

‘OFF’

and open the

gas cylinder valve.

3.

Push and turn back burner control knob to 

‘ON’

.

4.

Then immediately press the continuous spark
igniter for 3 - 4 seconds to light the burner.

5.

If the burner does not light, turn the control knob
to 

‘OFF’

, wait 5 minutes, then retry.

6.

Once the burner is ignited, the back burner will
reach cooking temperature quickly.  The orange
/ red glow will even out in about 5 minutes.

7.

For best results, always rotisserie cook with the
hood down.  

NOTE: If extra heat is required, then any of
the main burners may be used on the ‘LOW’
setting only.  Do not exceed 250º with hood
closed.

NOTE: The location of the back burner makes it
more  susceptible to wind conditions that will
decrease the performance of your rotisserie cooking.
For this reason you should not operate the back
burner during windy weather conditions.

BACK BURNER IGNITION

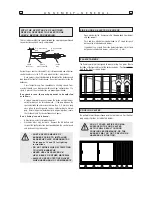
1.

Open barbecue hood before attempting to light burners.

2.

Set burner control knobs to 

‘OFF’

and open the

gas cylinder valve.  

NOTE: Upon first assembly the gas
lines and burners will be full of air.
In order for the burners to light
properly the lines must fill with gas.
It may require several attempts at
lighting the burners before you are
successful.

3.

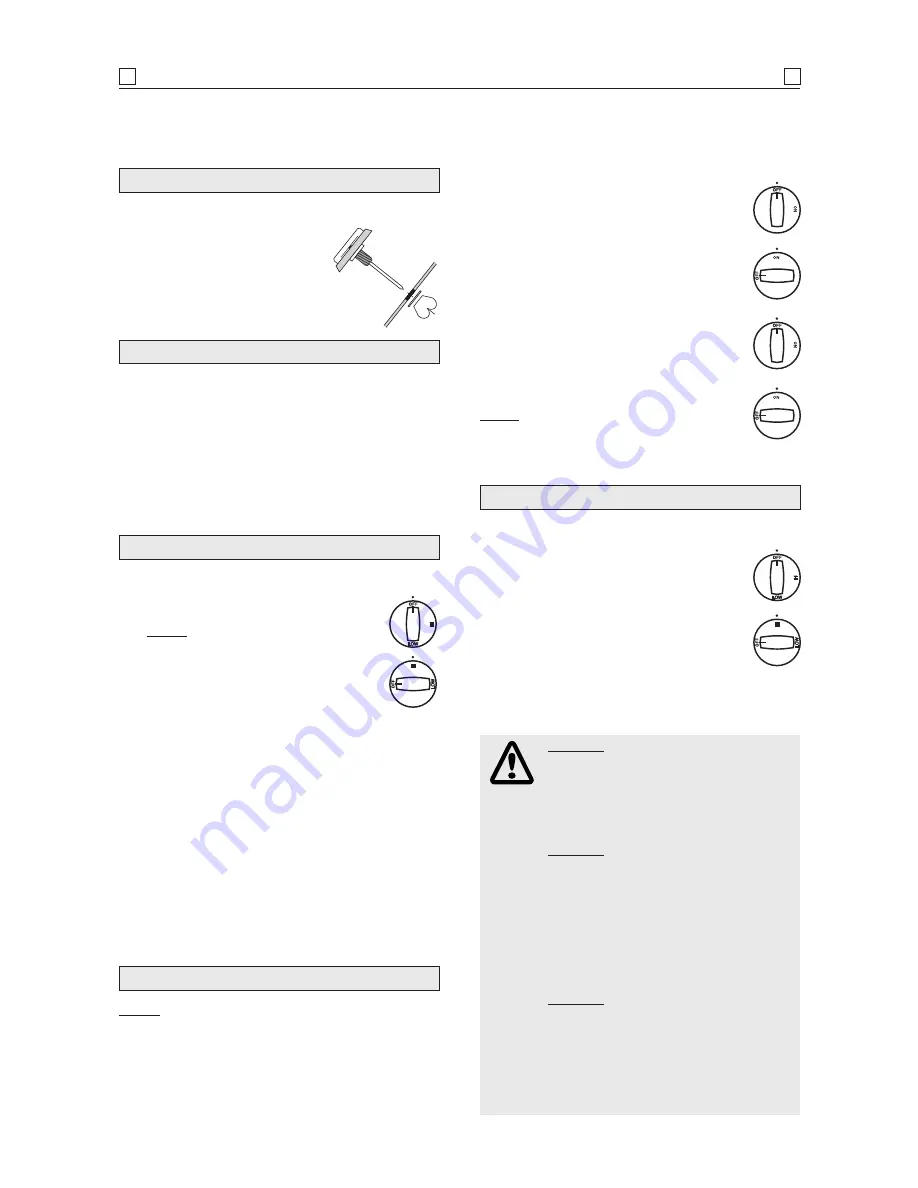
Push and turn the required burner control knob to 

‘HI’

4.

Immediately press the continuous spark igniter for up to 15
seconds to light the burner.

5.

If the burner does not light, turn the burner control knob to

‘OFF’

, wait 5 minutes for gas to clear, then retry.

6.

Once the burner is ignited, the adjacent burner can be lit by
simply turning its control knob to ‘

HI’

.

7.

Adjust burner control knobs to your desired cooking
temperature.

8.

If ignition cannot be achieved, perform ignition check
procedure.

Refer to pages 12 and 13.

MAIN BURNER IGNITION

1.

Open side burner lid before attempting to light side burner.

2.

Set burner control knobs to 

‘OFF’

and open the

gas cylinder valve.

3.

Push and turn the control knob anti-clock-
wise until a “click” is heard

.

4.

Immediately the piezo igniter will be triggered
to light the burner.

5.

If the burner does not light, turn the control
knob to 

‘OFF’

, wait 5 minutes, then retry.

6.

Adjust burner control knob to desired flame level.

SIDE BURNER IGNITION

O

P

E

R

A

T

I

O

N

14

14

Before first use and at the beginning of each barbecue season:

1.

Please read 

Safety, Lighting and Operating instructions

care-

fully.

2.

Check gas valve orifices, burner tubes and burner ports for
any obstructions. 

eg. spiders, webs, insects.

3.

Check and ensure the gas cylinder is full.

4.

Ensure all connections are securely tightened.
Check for gas leaks.  

See pages 3.

NOW YOUR BARBECUE IS READY TO USE

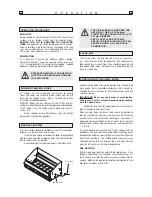
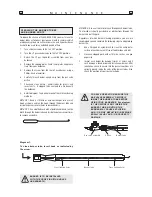
The temperature gauge is used as a guide to cooking temperatures
when cooking with the hood closed.
When an opening is provided in the
hood, this allows for the installation of
the temperature gauge.  

Install as shown in

the diagram, if not factory fitted. 

TEMPERATURE GAUGE

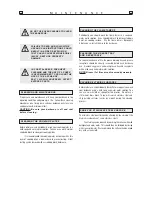
CAUTION: IF BURNERS GO OUT DURING
OPERATION, CLOSE GAS SUPPLY AT
SOURCE, AND TURN ALL BURNER 
CONTROLS OFF.  

OPEN HOOD AND WAIT 5 MINUTES
BEFORE RE-ATTEMPTING TO LIGHT
(ENSURE ACCUMULATED GAS FUMES
HAVE CLEARED).

CAUTION: SHOULD A GREASE FIRE
OCCUR, ATTEMPT TO CLOSE GAS SUPPLY
AT SOURCE, TURN OFF ALL BURNERS AND
REMOVE FOOD IF POSSIBLE.

KEEP THE VENTILATION OPENINGS OF
THE CYLINDER ENCLOSURE FREE AND
CLEAR FROM DEBRIS.

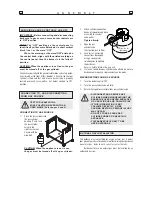
THE HOOD MUST BE IN THE OPEN 
POSITION FOR LIGHTING.

DO NOT SMOKE AT ALL TIMES WHEN
ATTEMPTING TO IGNITE BARBECUE.  

CAUTION: DO NOT MOVE TROLLEY WHILE
BARBECUE IS IN OPERATION.

THE SIDE BURNER IS DESIGNED FOR USE
WITH A WOK UP TO 360 mm DIAMETER, 
AND COOKING PAN OF UP TO 200 mm
DIAMETER. 

USE OF VERY LARGE POTS MAY RESULT
IN DISCOLOURATION OF THE SURFACE 
FINISH, OR CAUSE POOR COMBUSTION.

Summary of Contents for 5009XBHN

Page 1: ...petrol or other flammable vapours and liquids in the vicinity of this or any other appliance 2 A gas cylinder not connected for use must not be stored in the vicinity of this or any other appliance F...

Page 2: ...AL GAS INSTALLATION The regulator and hose assembly supplied with the barbecue is suitable for use with bottled gas POL connection A gas regulator adjusted to have an outlet pressure of 2 75 kPa is su...

Page 3: ...arbecue has cooled after you are finished Do not allow children to operate barbecue or to swing on handle PROTECT CHILDREN NEVER TEST FOR LEAKS WITH AN OPEN FLAME Prior to first use and at the beginni...

Page 4: ...FOLLOWING SHALL APPLY i AT LEAST 25 OF THE TOTAL WALL AREA IS COMPLETELY OPEN AND ii AT LEAST 30 OF THE REMAINING WALL AREA IS OPEN AND UNRESTRICTED IN THE CASE OF BALCONIES AT LEAST 20 OF THE TOTAL O...

Page 5: ...r pieces GENERAL Description Qty Trolley side panel right 1 Trolley side panel left 1 Bottom shelf 1 Castor seat 4 Castors 4 Trolley bracket front 1 Gas cylinder housing 1 Door hinge bracket top left...

Page 6: ...RR Phillips head screw 1 4 x 1 2 Qty 8 Countersunk flat head screw 3 16 x 3 8 Qty 8 Attach castor seats to side panels NOTE Castor seats are labelled for correct location 1 A A B B LF LR Phillips head...

Page 7: ...t Door hinge bracket top right Countersunk flat head screw 3 16 x 3 8 Qty 4 B A A B Wing bolt Qty 1 Attach top right and left door hinges Insert the bottom door hinge pin into the lower door hinge bra...

Page 8: ...16 Qty 4 Washer 1 4 Qty 4 Attach barbecue body to trolley NOTE Cut cable tie from underneath the barbecue head to release the gas regulator before assembling onto trolley NOTE Tool holder mounting ho...

Page 9: ...er neath the barbecue body Install the grease receptacle under the grease tray from the front of the barbecue 9 A S S E M B L Y 9 9 Grease tray Side shelf bracket B RF LR Side shelf bracket B RF LR Si...

Page 10: ...er frame Place the side shelf over the left side shelf brackets and side burner frame over the right side shelf brackets using four 4 1 4 x 1 2 Phillips head screws and four 4 1 4 flange nuts Tighten...

Page 11: ...ng your barbecue on natural gas Refer to back cover for contact details Barbecues for use on natural gas must be installed by an authorised person NATURAL GAS INSTALLATION IMPORTANT Before connecting...

Page 12: ...ramic electrode insulator 1 With burner controls in OFF position open the gas cylinder valve or connect to gas supply 2 Upon first assembly the gas lines and burners will be full of air In order for t...

Page 13: ...liers to gently squeeze the gas collector box to narrow gap Return the gas collector box to its original position secure the inside nut and try the electrode check again If no clicking sound is heard...

Page 14: ...rocedure Refer to pages 12 and 13 MAIN BURNER IGNITION 1 Open side burner lid before attempting to light side burner 2 Set burner control knobs to OFF and open the gas cylinder valve 3 Push and turn t...

Page 15: ...ARGE POTS MAY RESULT IN DISCOLOURATION OF THE SURFACE FINISH OR CAUSE POOR COMBUSTION The fats and juices that drip from the meat may cause flare ups Since flare ups impart the distinctive taste and c...

Page 16: ...nd other sauces to accompany the cooked meat Once the barbecue has been set up pre heat the barbecue according to the manufacturer instructions Close the hood when you start to cook For foods with lit...

Page 17: ...up and away from gas valve orifice Remove the orifice from gas valve and gently clear any obstruction with a fine wire Then reinstall all orifices burners cotter pins and cooking components If an obst...

Page 18: ...ase draining tray and grease receptacle should be visually inspected before each barbecue use Remove any grease and wash grease tray and receptacle with a mild soap and warm water solution NOTE Grease...

Page 19: ...each orifice for obstruction 8 Check each spark electrode adjusting as needed The space between the spark electrode tip and spark receiver should be approximately 4 5 mm 9 Replace the burners and adju...

Page 20: ...e any debris METHOD 3 Use an air hose to force air through each burner tube The forced air should pass debris or obstructions through the burner and out the ports Regardless of which burner cleaning p...

Page 21: ...THIS PAGE HAS BEEN LEFT INTENTIONALLY BLANK 21 21...

Page 22: ...ce Items included in your barbecue specification may differ from the parts list depending on region or specific dealer specification 1 3 4a 53 6 2b 4b 5 2a 4 7 9 16a 8 16b 10 59a 12 13 11 60 61 59b 15...

Page 23: ...Side shelf body P011020364 1 31 Side shelf pot support P00805010B 1 32 Side shelf trim plate P01108012S 1 33 Side burner P02002012A 1 34 Side shelf bracket LF RR P01204005B 2 35 Grease draining tray P...

Page 24: ...e applicable retailer Focus Lifestyle Products has a Privacy Policy available on request which encompasses compliance with the Privacy Act 1988 Cth Importantly individual consumers generally have a ri...

Reviews: