


1. Light tree one section at a time as described in assembly instructions, so you can easily identify any bulbs that may be dislodged.
Push any loose bulbs back into their sockets.
2. Separate the branch tips to form a “V” shape a
nd fl
uff the needles. Make sure each tip is spread out and no two branches are
touching each other. For best access to branches, shape each section prior to adding the next section as described in the initial
assembly instructions. You may want to wear cotton gloves whe
n fluffing
needles to avoid scratches and skin irritation.
3. Starting with the bottom row, position the branches parallel to th
e floo
r. Angle the tips slightly upward like they are growing
towards the sun. With each successive row, make the upward angle of the branches more pronounced. Position inner tips to hide
the center of the tree.
4. Arrange the uppermost section of the tree so that the tips are evenly spaced and pointing upward.
5. Step back and review the tree. Adjust branches and tips as neccessary to give the tree a fuller appearance (The tree may be shape
differently (upswept /downswept /etc.) pending on one’s preference.)
1. If entire tree lighting does not light, make sure power strip cords are securely inserted in a working wall outlet.
2. If an entire section of the tree does not light, please review following actions:
a. Check that all plugs within the tree are securely connected.
b. Check fuse in power strip to determine if it may need replacement. Caution: Note that a blown fuse indicates an electrical
overload or electrical short circuit. If the fuse is blown, unplug power strip from outlet. Also unplug any additional strings
or products may be attached to the power strip. Replace the fuse following manufacturer instructions with proper fuse
rating. If the replacement fuse blows, a short circuit may be present and the product should be discarded.
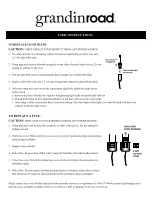
c. Check fuse in plug connection on end of each light string.(See section on replacing plug fuses in this document).
1. This is for decorative use only - do not immerse in water or exp
ose to heat. Keep away from fire.
2. Please use water only for cleaning purpose.
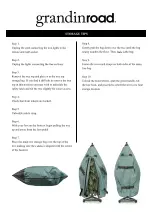
3. When not in use, store neatly in a cool, dry location protected from sun light.
4. When the remote control has malfunctioned, please remove the power strip from the receiver and plug the power strip directly into
the wall.
CARE & MAINTENANCE INSTRUCTION
THE FOLLOWING STEPS WILL HELP MAKE YOUR TREE LOOK MORE REALISTIC
TROUBLE SHOOTING TIPS
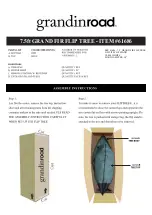
Summary of Contents for 61686
Page 1: ...7 5ft GRAND FIR FLIP TREE ITEM 61686...
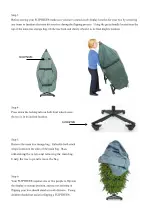
Page 3: ...unfastening the velcro and removing the main bag Unzip the tree top and remove the bag Then...
Page 4: ......
Page 5: ......
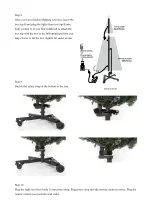
Page 6: ...velcro fasten...
Page 9: ......


