13
STEP ONE
1.5
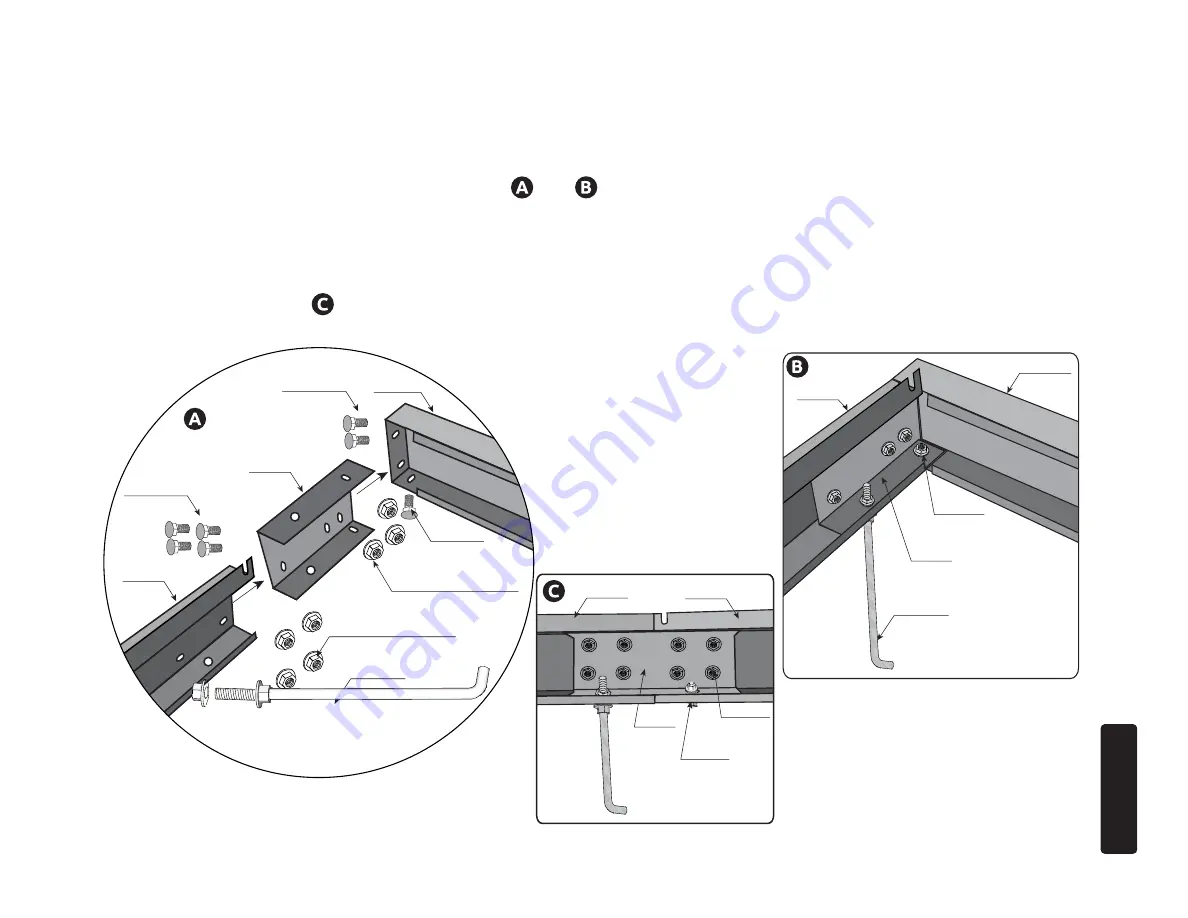
Slide the BA-C3 into the BA-S1, slide the BA-S2 into the BA-C3, align the holes and push together to an even and tight
position and use the BA-S03 Bolt and BA-M03 Collard Nut combo, tighten the collard nut on the inside of the base kit using the
10mm wrench. Repeat this process on all corners. See and .
Note: BA-S1 will be the front and back, while the BA-S2’ s will be the sides of your greenhouse base.
1.6
For Ground Installation only
Insert the BA-S03 and the BA-A1 into the holes at the bottom side of the corners of
the base, the nut will be tightened on the inside of base. You will install the BA-A1 and the BA-S10 in the middle where
the extensions meet see . If you are mounting your base kit to a flat mount surface like a deck or cement pad
discard the BA-S10 and BA-A1, you will need to purchase a fastener for your installation surface.
BASE KIT ASSEMBLY INSTRUCTIONS
BA-S1
BA-S2
FRONT
SIDE
BA-C3
BA-A1
BA-S03
ML01
BA-C3
BA-S1
BA-S2
BA-S03
BA-M03 Collared Nut
BA-S03
BA-M03 Collared Nut
BA-A1
BA-S03
BA-C4
BA-S3
BA-S2
BA-S03
BA-M03
BA-S10
Summary of Contents for GRANDIO ELITE 8x12 2015
Page 71: ...NOTES NOTES 70 NOTES...


