background image

3

8

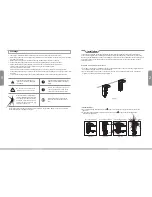
Up groove

Down groove

Figure 8

Figure 9

Figure  10

Figure  11

Figure 6

Figure 7

Drop Limit

Retraction Limit

Figure  12

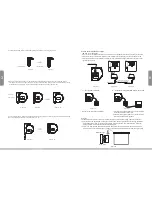
Wireless Synchro
Convertor Receiver 

ntelligent Synchro Power 
Supply Control Adapter.  

Figure 27

Figure 28

Figure 29

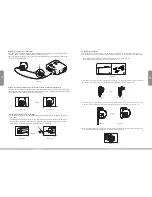
External Wall Switch 

Manual control for screen up/stop/down.   

Figure 30 

Figure 31 

Figure 32 

External Intelligent Wall Switch Connection

Locking screw

Locking piece

3.Loosen the locking screw to lower the locking piece down all the way (figure 6-7)

4.When mounting the screen onto the floating mounting brackets, ensure the grooves on the screen 
   casing match up with the upper and lower groves on the brackets. Simply slide in, and bracket's grooves 
   will hold the casing in place. Horizontal adjustments can still be made (figure 8-10). 

5.To lock the screen in place, close and tighten the locking screw on the mounting brackets. This will keep 
the screen casing locked firmly in place (figure 11-12).

Other Control Options Description

 1.FM to IR control description:

   When you insert the Wireless Synchro Converter Receiver into the EXTR slot of the control panel, you can use a 

   FM wireless remote control device. (figure 27). The Intelligent Synchro Power Supply Control Adaptor (for all 

   projectors) combined with the wireless 12V trigger (for all projectors with a trigger output) can control the screen 

   together. (figure 28-29)


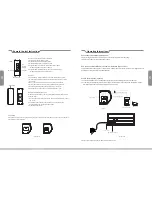
1.Control for screen up/stop/down when connected to the 

   control panel interface of the screen. 

2.Control for screen up/stop/down when connected to the 

   computer's RS232 or USB ingerface. 

Attention:
> Please make sure there is no dust or dirt on the fabric surface before rolling it back to the casing
> The recommened working time is less than 50 seconds. The motor will enter overheating protection 
    status and stop working for every continuous 4 minuters operation, user would need to wait for a 
    while until the motor cool down before operating again.
> There is no lube needed for the motor. Please be noticed that the appropriate setting is optimized 
    which requires no further adjustment, please consult the after sales team before adjusting the limits.

Summary of Contents for Cyber Series CB-MIxx?

Page 1: ...u Grandview Crystal Screen Co Ltd P O 511400 Federal Ind Zone No 363 Yushan West Road Shiqiao Panyu District Guangzhou Guangdong China Tel 8620 8489 9499 Fax 8620 8480 3343 Website www grandviewscreen com GRANDVIEW REPRODUCING GENUINE COLORS Model CB MIxxⅡ Thank you for purchasing a Grandview projection screen Before use please read instructions carefully After installation store instructions for ...

Page 2: ... to 120 Allen key 1pc Remote 1pc Controller External IR receiver 1 pc Description Accessories Trigger line 1pc Floating mounting bracket 2pcs 5 40mm Tapping screw cap 8sets M5x10 Screw 6pcs Ceiling hanger 2pcs Floating mounting bracket Aluminum casing Screen fabric Bottom Rod Top panel Upper groove Locking piece Lower groove Locking screw ...

Page 3: ...draw on the surface 3 Clean the screen with a soft cloth and lukewarm water Do not use any detergent or cleaning products Roll up the screen after every use Ensure that the screen is level when installing do not pull on the sides or fold the screen To prevent unnecessary damage the operating and maintenance of the screen should be done by adults Installation Figure 1 Wood wall installation Wood ce...

Page 4: ...tions Description 1 FM to IR control description When you insert the Wireless Synchro Converter Receiver into the EXTR slot of the control panel you can use a FM wireless remote control device figure 27 The Intelligent Synchro Power Supply Control Adaptor for all projectors combined with the wireless 12V trigger for all projectors with a trigger output can control the screen together figure 28 29 ...

Page 5: ...screws figure 16 17 Automatic Trigger Control Description 1 Insert one end of the trigger wire into the trigger jack located on the left side of the screen casing s end cap labeled TRIG figure 22 Insert the other end into the 12V output 2 When the projector is powered on the screen will lower automatically When th projector is powered off the screen will retract automatically External Controls Des...

Page 6: ...ontrol central control or RS232 USB Switch control follows this priority Down Stop Up Stop Down End cap lid Button Function and Operation Instruction 1 Press UP button to lift the screen 2 Press STOP button to stop the screen 3 Press DOWN button to lower the screen 4 Press MICRO UP button to retract the screen in small increments 150ms for each movement 5 Press MICRO DOWN button to lower the scree...

Reviews: