6
7
6 8mm
.
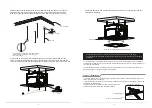
3.After checking that the tapping screw is fixed, install the screw rod
and fix it. (In order to
make the screw rod easier to pass through the lifter, we recommend that the end of the
screw rod be tapered, and the length between each two lead rods can differ by 10-20mm.
Concrete base
screw nut
Cushion
screw
rod
recommended to sharpen the end of the screw into
a taper that makes it easier to pass through the
screw hole of the lift
4
.
Lift the lifter to the height of the installation position by using the lifting equipment, and
pass the screw rod through the four holes of the lifter. Adjust the height of the lifter with the
screw nut so that it is flush with the height of the ceiling layer. Remove the
excess screw
rod
.
screw nut
5.Install the decorative frame so that the decorative frame fits on the ceiling layer and the
installation is completed.
make
the
decorative frame fits on the ceiling layer
Grille ceiling
For the convenience of installation, the side plates of the cage can be removed first. After the installation is
completed, the installer can stand in the cage and reinstall the side panels. At this time, the side panels must
be turned over and installed.
If it is necessary to adjust the limit height due to the installation environment or the limitations of the site, it
must be adjusted by a special technician or call after-sales.
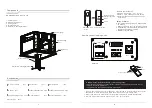
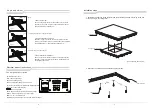
1. Lower the bamboo joint of the lift to the height suitable for the installer to install the projector, and remove
the mounting feet on the bamboo joint.
2. After the mounting feet are fixed on the projector, re-attach the projector and the mounting feet to the angle
adjuster and tighten the screws.
(Note: Be sure to confirm that the screws are securely locked, be
careful to prevent the projector from accidentally falling!)
Angle adjuster
Tighten the screws
projector
mounting Bracket
Projector installation
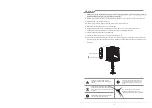
Please note that you must touch the upper limit switch to stop the projector lift from rising!
The level above the electric lift must be adjusted to the level, Tilting can cause the electric hanger to
malfunction.

