33
32
Grange Machinery Ltd.
Sproatley Grange
Hull
HU11 4PT
M: 07918 515385
T: 01482 815711
E: rjones@grangemachinery.co.uk
W: www.grangemachinery.co.uk
Grange Machinery Ltd.
Sproatley Grange
Hull
HU11 4PT
M: 07918 515385
T: 01482 815711
E: rjones@grangemachinery.co.uk
W: www.grangemachinery.co.uk
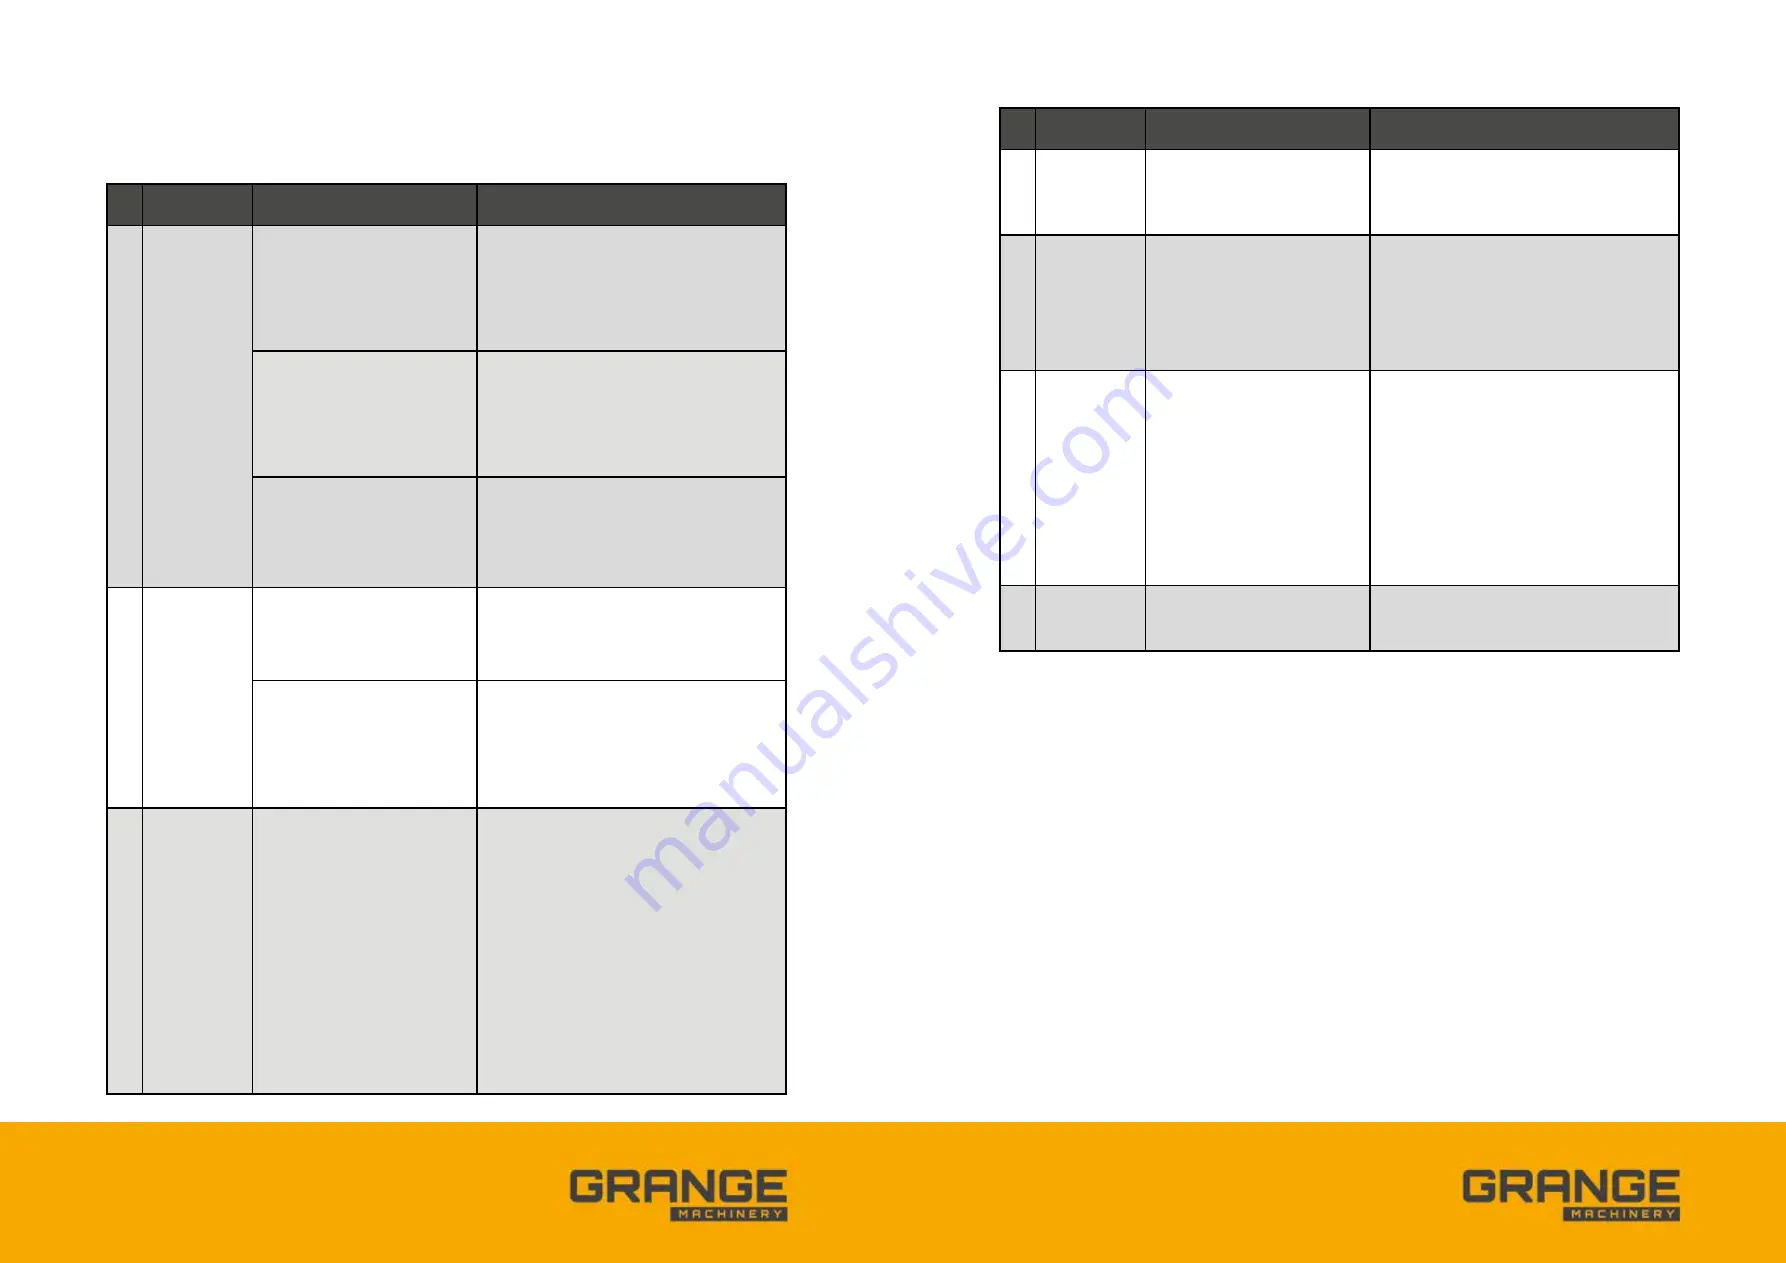
Example of
failure
Possible causes
Investigation to address root causes
of failure.
1.0 Inability to
achieve rapid
entry of soil
engaging legs.
Points are worn.
Replace points according to soil profile and
equipment usage. Contact Grange Machinery
Ltd personnel for sourcing replacements and
additional spares.
Incorrect linkage configuration.
Is the machine raising and lowering on the
linkage parallel to the rear of the tractor?
Review tractor linkage adjustments in
accordance with manufacturer’s guidance.
Tractor hydraulic pressure is
insufficient or flow rates / response
times require adjustment.
Review tractor hydraulic system and settings in
accordance with manufacturer’s guidance.
2.0 Hydraulic oil
leakage
Tighten up hydraulic fittings
General operation routines
Hydraulic ram seals need
replacing. Before removing rams
contact Grange Machinery Ltd
directly.
Check that the ram bores aren’t scored and
causing premature failure of the seals.
3.0 Inadequate
performance
of 2nd stage
soil engaging
equipment
which is
coupled up to
the Grange 3m
LDT.
Check hitch / linkage connection
position on rear of Grange 3m
LDT.
Check hydraulic connections and
flow settings through to auxiliary
equipment.
Set-up the tillage configuration in the field in
the working position, isolate the tractor engine,
secure the handbrake. Check all adjustment
variables and depth of soil penetration.
Check all equipment settings in accordance
with soil profile.
Check wearing parts and refer to operator’s
manual for connection 2nd stage cultivation/
seeding equipment.
Check tractor tyre pressures and front ballast.
If required refer to Grange Machinery Ltd
personnel for further advice.
This section provides the operator with a reference in the event of experiencing difficulty in operational
mode and in the event of component failure.
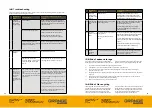
14.0 Troubleshooting
Example of
failure
Possible causes
Investigation to address root causes
of failure.
4.0 Discs stop
rotating when
engaged in the
ground.
Bearing failure.
Bearings are sealed although do have a
finite life. Remove disc section and contact
Grange Machinery Ltd personnel for sourcing
replacements and additional spares.
5.0 Trash building
up around the
legs.
Discs have lost their cutting edge
and need replacing.
Replace discs. Check all discs for wear and plan
to replace in sections to maintain a constant
profile across the machine.
Contact Grange Machinery Ltd personnel
for sourcing replacement disc sections and
additional spares.
6.0
Repeated
failure of shear
bolts.
Incorrect shear bolt specification
and tightness.
Main leg assembly bolts are
loose.
Check the leg points for wear. Using the points
beyond their useful wear life will put excessive
stress on the shear bolts. Replace points.
Contact Grange Machinery Ltd personnel for
sourcing replacement shear bolts and additional
spares.
Check the shear bolt locating section for any
signs of elongated holes or loose fitting.
Tighten main leg assembly bolts.
7.0 Uneven
cultivation
depth
Incorrect lower link arm settings
Check lower link arm settings on the tractor
and adjust in accordance with tractor
manufacturer’s guidance.
15.0 End of season storage
At the end of the working season, undertake the
following maintenance procedures. Ensure that the
machine is lowered to the ground, the hand brake
applied, tractor engine stopped and key removed.
i)
Dry brush and remove extraneous soil and vegetation matter.
ii)
If the points or discs need replacing follow the procedure in Section 13.0.
iii)
Check shear bolts for signs of excessive shear loadings and replace if necessary following the
procedure in Section 13.0.
iv)
Check hydraulic hoses, couplings and ram seals for evidence of leaks and excessive wear. Replace as
required.
v)
Apply anti-corrosion oils or grease to all wearing parts and exposed hydraulic cylinder rods and
linkage connections. Grease all pivot points liberally.
vi)
Park on hard standing in a dry covered storage area.
16.0 End of life recycling
The Grange 3m LDT is manufactured from
predominantly steel components with hydraulic
pipes and activating rams. Once the Grange 3m
LDT has completed its working life, the steel
can be recycled via an authorised outlet. Where
components have been in contact with hydraulic oil
they will need to be disposed of via an appropriate
hazardous waste recycling outlet. If you are unsure
of the correct disposal method please contact
Grange Machinery Ltd for further advice.


