36
Installation of
Solar Collectors
7.1 Installation Sequence of
Solar Collectors
In accordance with solar collector
connection and installation type, there
are small differences in the installation
sequence of solar collectors.
•
If the installation kit contains
straight
compression fittings, these
must
be installed
during
solar
collector installation. Refer to
section 8.1
•
If the installation kit contains
angled
compression fittings, these
must
be
installed
after
solar collector
installation. Refer to section 8.2
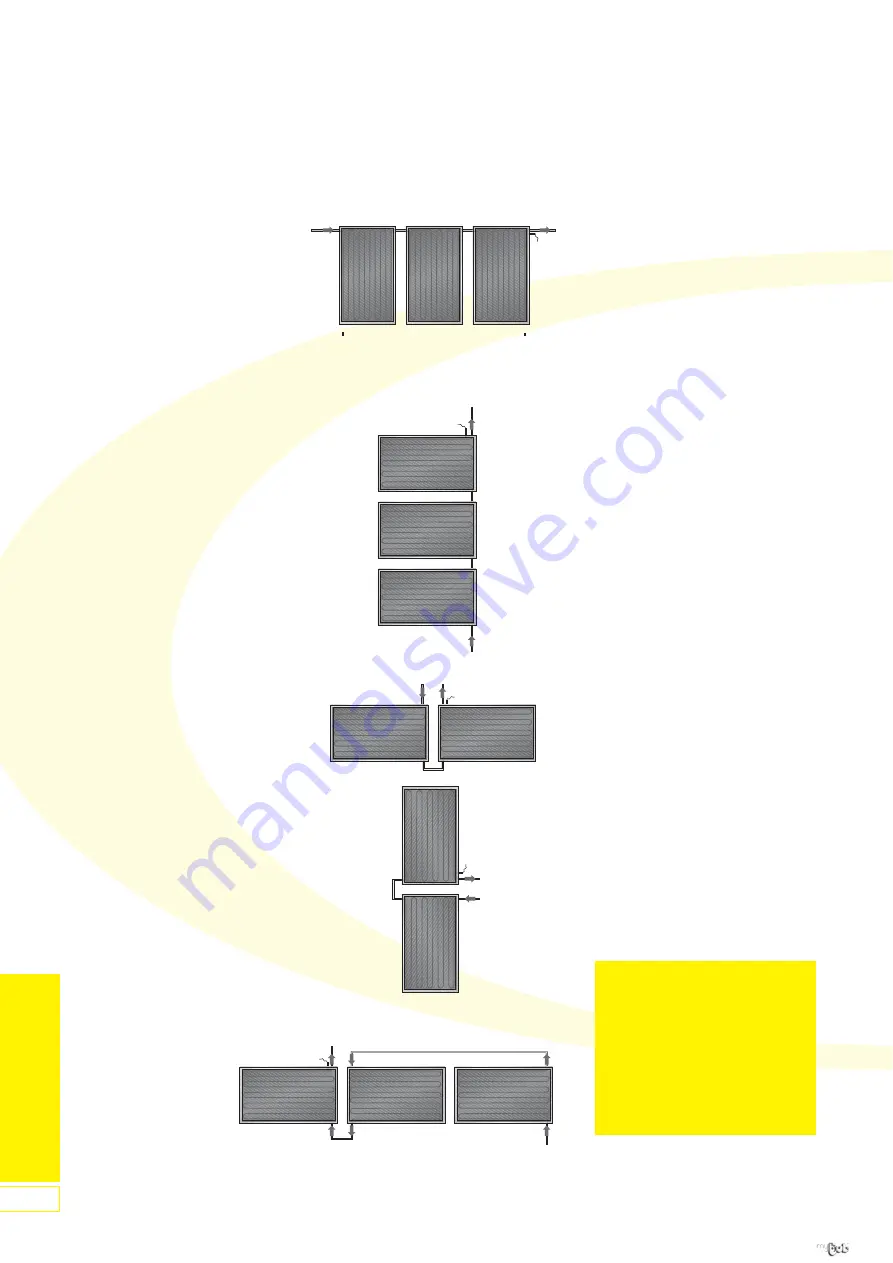
The choice of Outlet (flow)
connection ‘A’ and inlet (return)
connection ‘B’ for the collector
array is up to the installer - to suit
the installation.
Caution:
Locate the temperature sensor of
the solar controller in the sensor
pocket next to the outlet (flow)
connection of the collector array
Figure 76:
Connections for Portrait
Format Collectors Mounted Side
by Side
Figure 77:
Connections for Landscape
Format Collectors Mounted one Above
the Other
Figure 78:
Connections for Two
Landscape Format Collectors Mounted
Side by Side
B
A
A
19
B
B
A
19
A
B
19
Figure 80:
Connections
for Three Landscape
Format Collectors Mounted
Side by Side
Figure 79:
Connections for Two Portrait
Format Collectors Mounted one Above
the Other
A
19
19
7
Installation of Solar Collectors
Now go to Section 7.
B
Important:
All system pipe connections must
use compression fittings with
brass olives. Soft soldered joints
must NOT be used on the solar
primary circuit.
Plastic pipe must NOT be used
for any part of the solar primary
circuit.
For latest prices and delivery to your door visit MyTub Ltd - www.mytub.co.uk - info@mytub.co.uk 0844 556 1818


