4-18
Function Settings and Operations
4.14 Setting the Cutting/Plotting Area
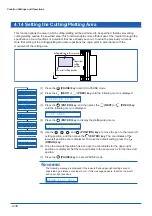
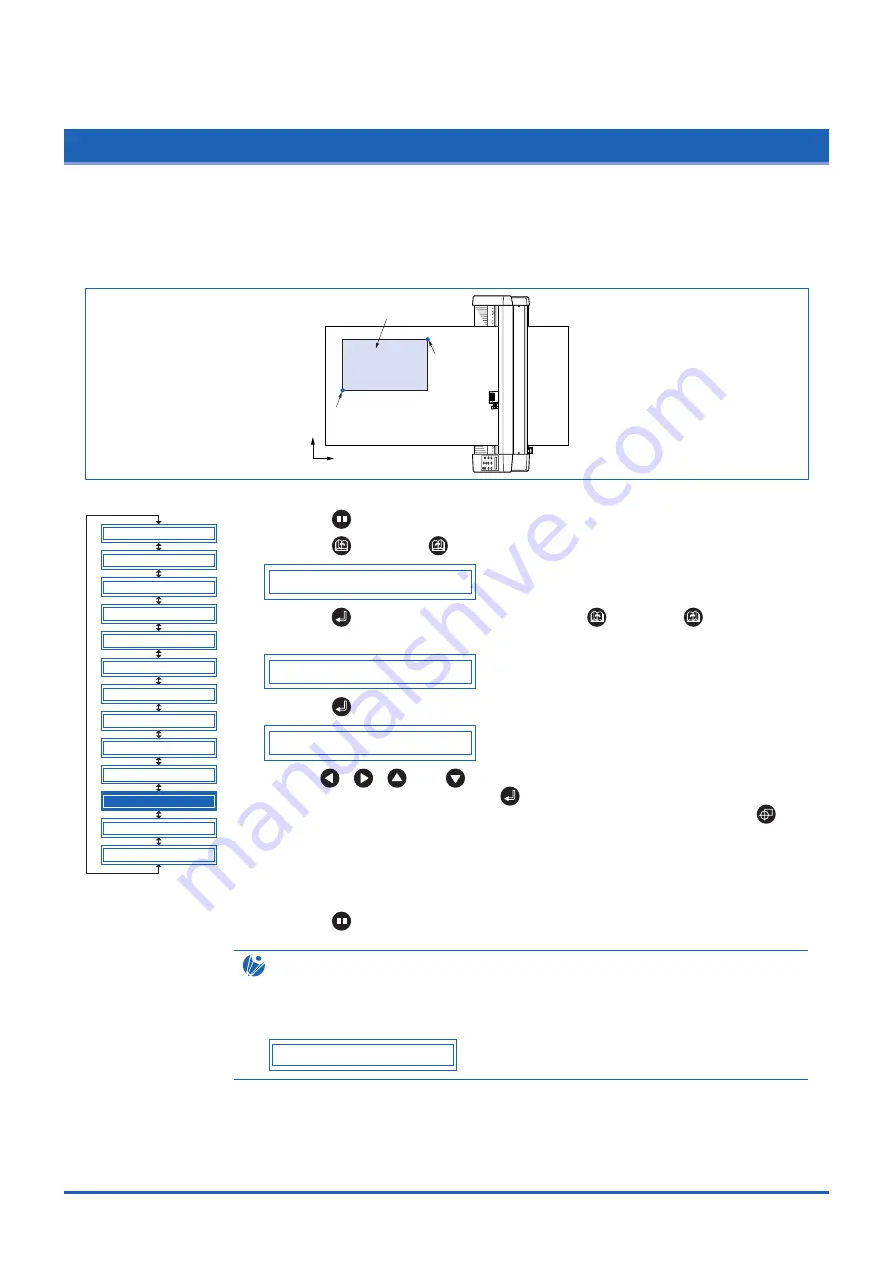
This function allows the area in which cutting/plotting will be performed to be specified, thereby preventing
cutting/plotting outside the specified area. This function enables more efficient use of the medium through the
specification of uncut portions of a medium that have already been cut, to avoid the previously cut areas.
Note that setting of the cutting/plotting area also repositions the origin point in accordance with the
movement of the cutting area.
Lower-left setting position
Upper-right
setting
position
Cutting/plotting in this area only
Y
X
(1) Press the
(PAUSE) key to switch to PAUSE mode.
(2) Press the
(NEXT) or
(PREV.) key until the following menu is displayed.
A D V A N C E D F U N C .
(3) Press the
(ENTER) key, and then press the
(NEXT) or
(PREV.) key
until the following menu is displayed.
P L O T A R E A
(4) Press the
(ENTER) key to display the plotting-area menu.
L L 0 , 0
(5) Use the
,
,
, and
(POSITION) keys to move the pen to the lower-left
setting position, and then press the
(ENTER) key. The coordinates of the
lower-left position set are displayed. To make the default setting, press the
(ORIGIN) key.
(6) Once the lower-left position has been set, the coordinates for the upper-right
position are displayed. Set these coordinates in the same way as for the lower-left
position.
(7) Press the
(PAUSE) key to cancel PAUSE mode.
CHECKPOINT
The following message is displayed if the lower-left and upper-right settings are not
separated by a distance of at least 5 mm. If this message appears, reset the lower-left
and upper-right positions.
W R O N G P L O T A R E A
B L A D E W A R E S E T U P
C U T L I N E P A T .
T A N G E N T I A L
I N I T . B
P E N U P S P E E D
I N I T I A L F E E D
A U T O P R E F E E D
S E T U P M E N U
T E S T
F E E D & C U T
P E N U P / D O W N
A D V A N C E D F U N C .
C L E A R B U F F E R


